¶ WiFi Cambium cnMaestro Controller
¶ Secured wireless network configuration WPA3-Enterprise/WPA2-Enterprise (802.1x)
After you have got logged in to the management panel, select the tab Wi-Fi Profiles, WLANs and click the New option on the right of the wireless networks list.
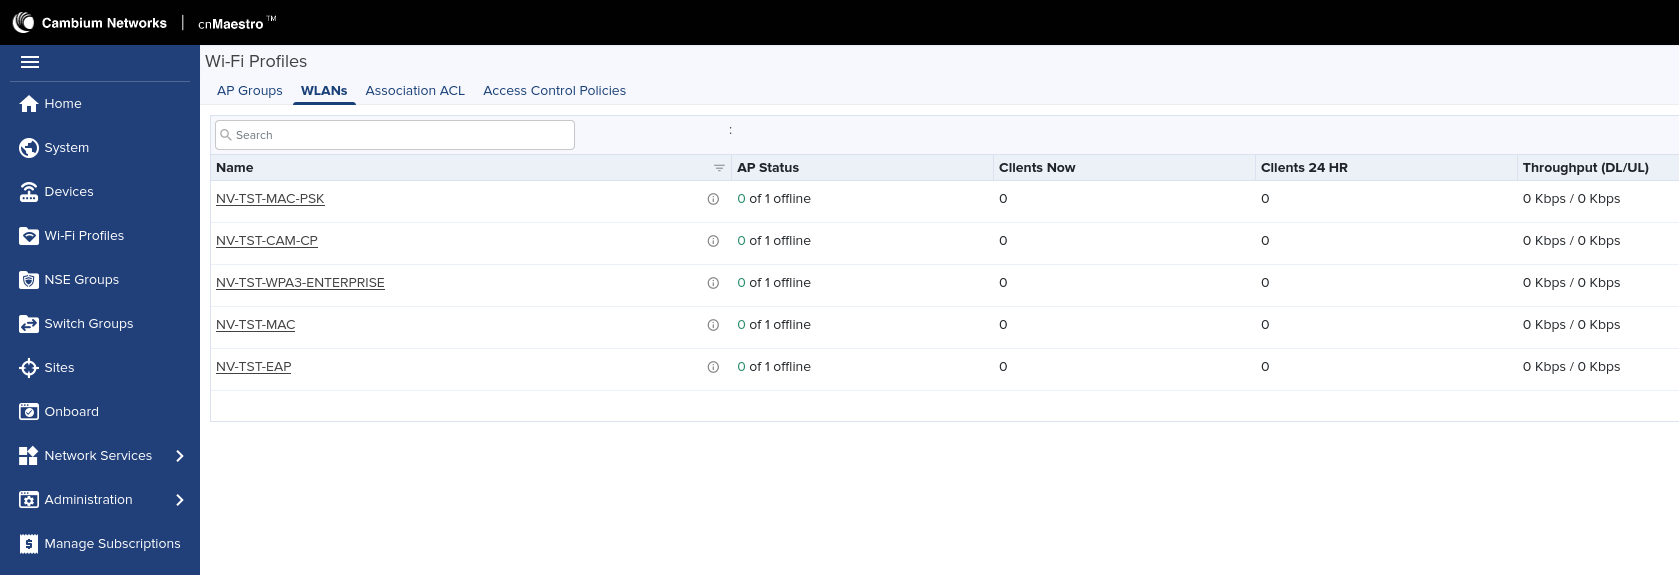
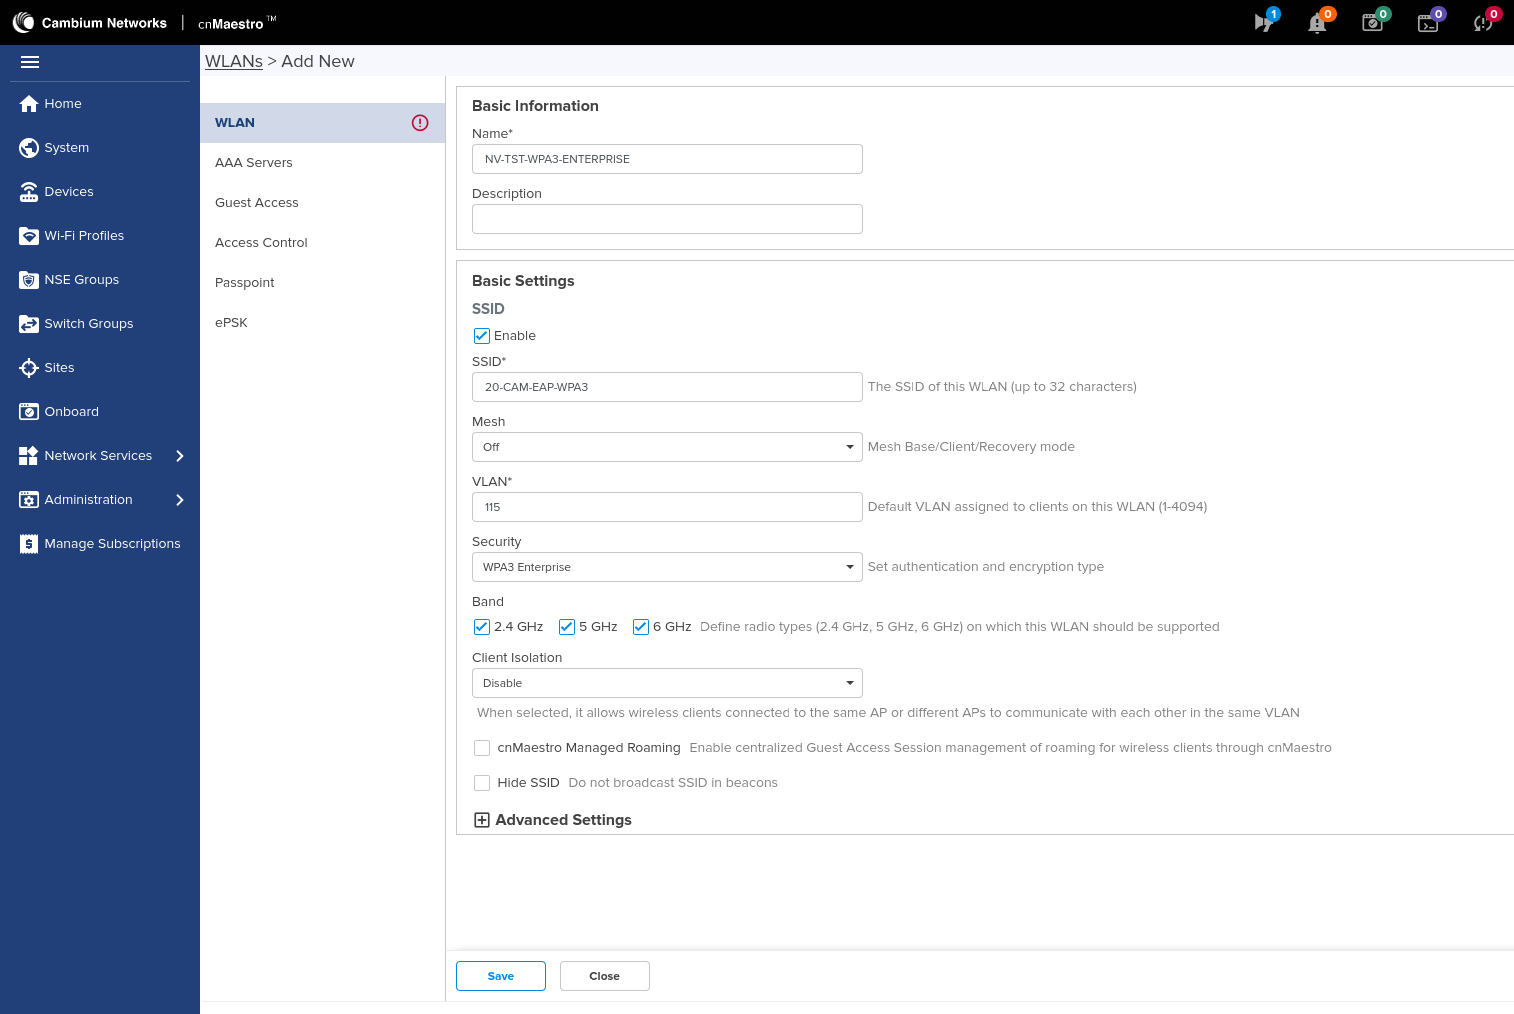
Now we can complete the network data, such as: name, description, SSID, band or default VLAN (it is recommended to set a default VLAN that does not allow access to any part of the network).
Next we choose WPA3-Enterprise option, or else: WPA2-Enterprise(802.1x) in the Security section.
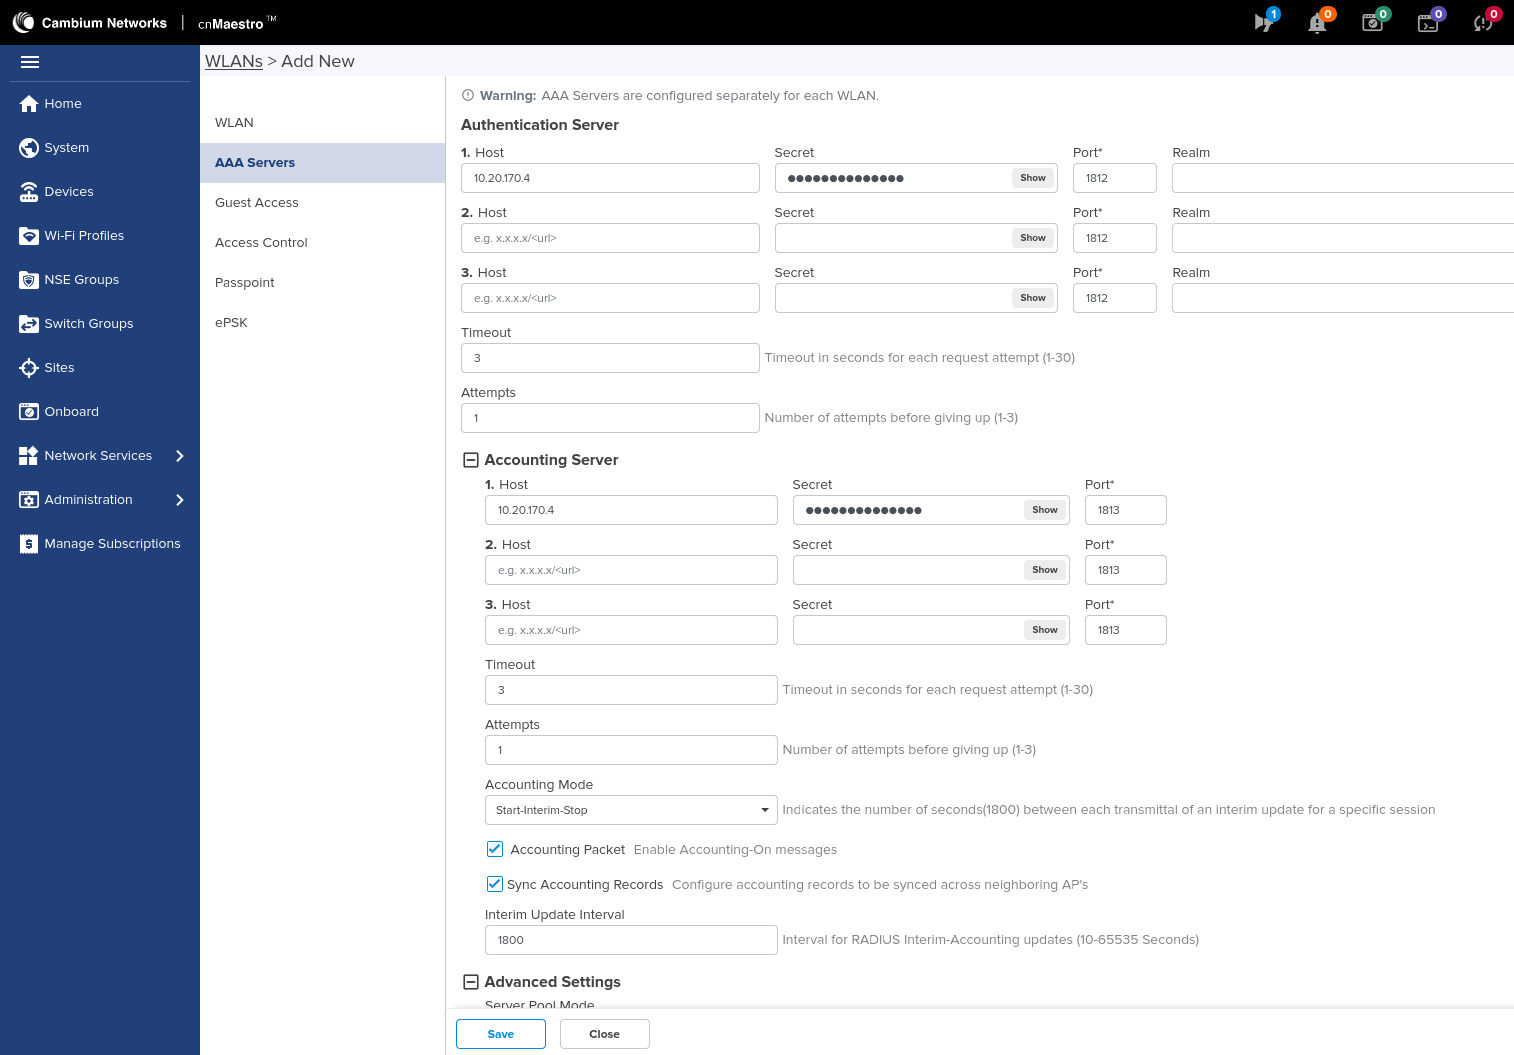
Now go to the AAA bookmark. We fill in the items in the Authentication section and also: Accounting with connection data. Now we need to mark both: Accounting Packet and Sync Accounting Records. In the Interim Update Interval field, we need to specify the time (in seconds) between updating the session data. The recommended value is 15-30 minutes, depending on the nature of traffic. We now need to get to the Advanced Settings tab.
Now, in the NAS-Identifier field, we need to choose AP-HOSTNAME. We check both: Dynamic Authorization and Dynamic VLAN. In the Called Station ID field select: AP-MAC:SSID
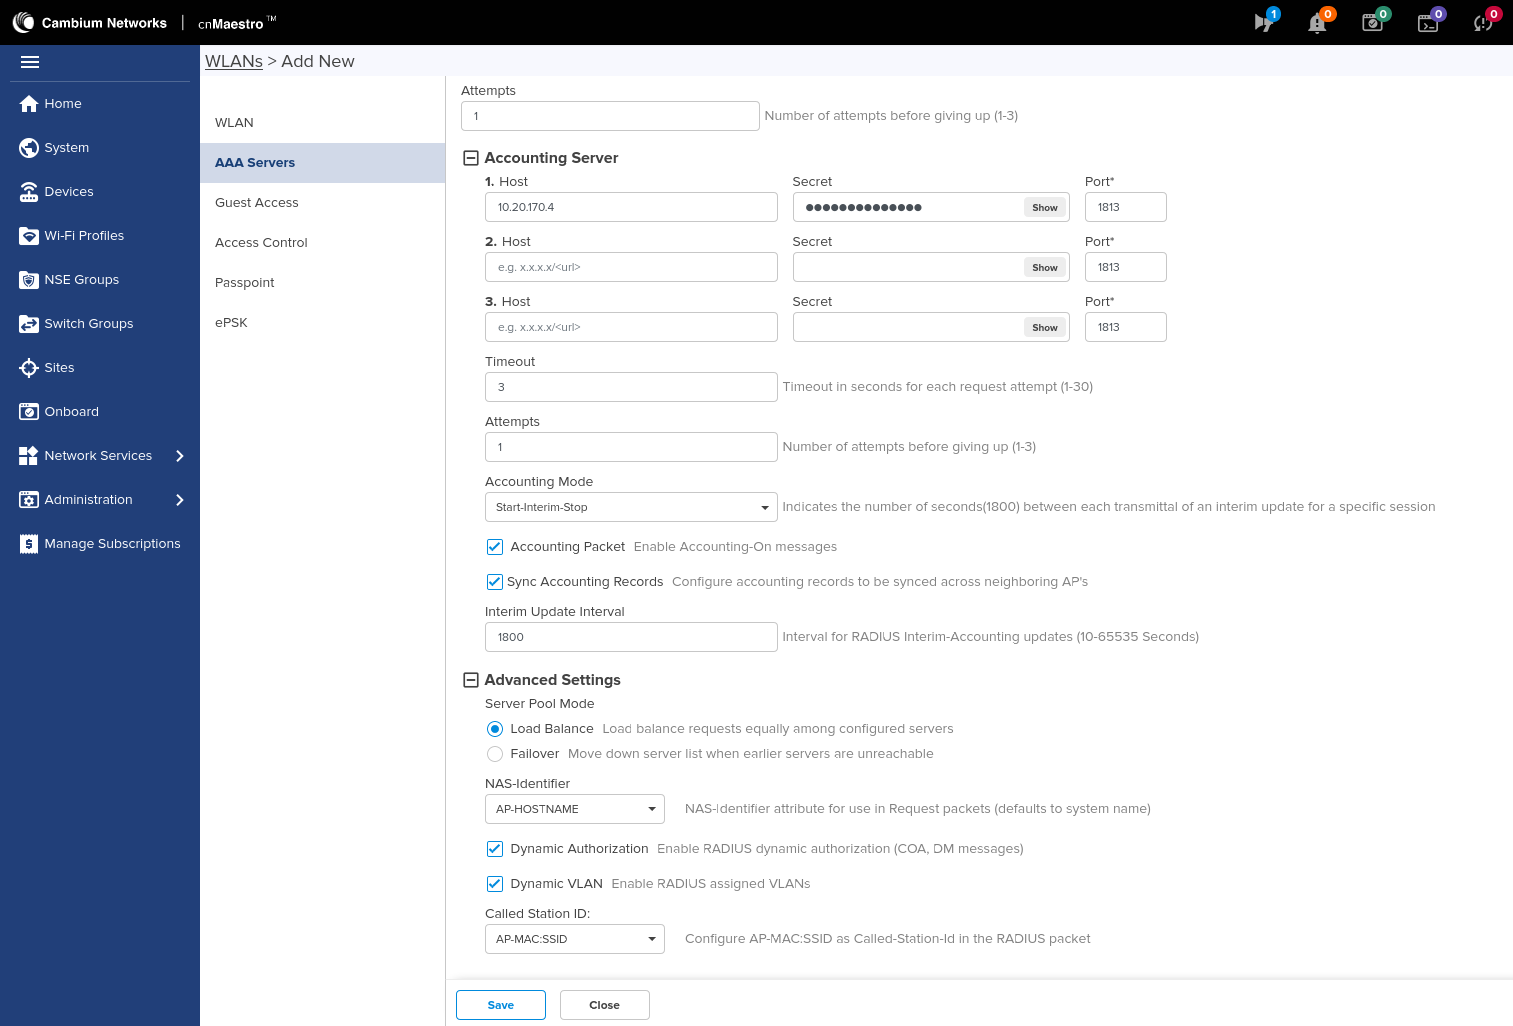
The rest of the wireless network settings are not important from the point of view of NACVIEW.
¶ Configuration of wireless network secured with MAC address authorization
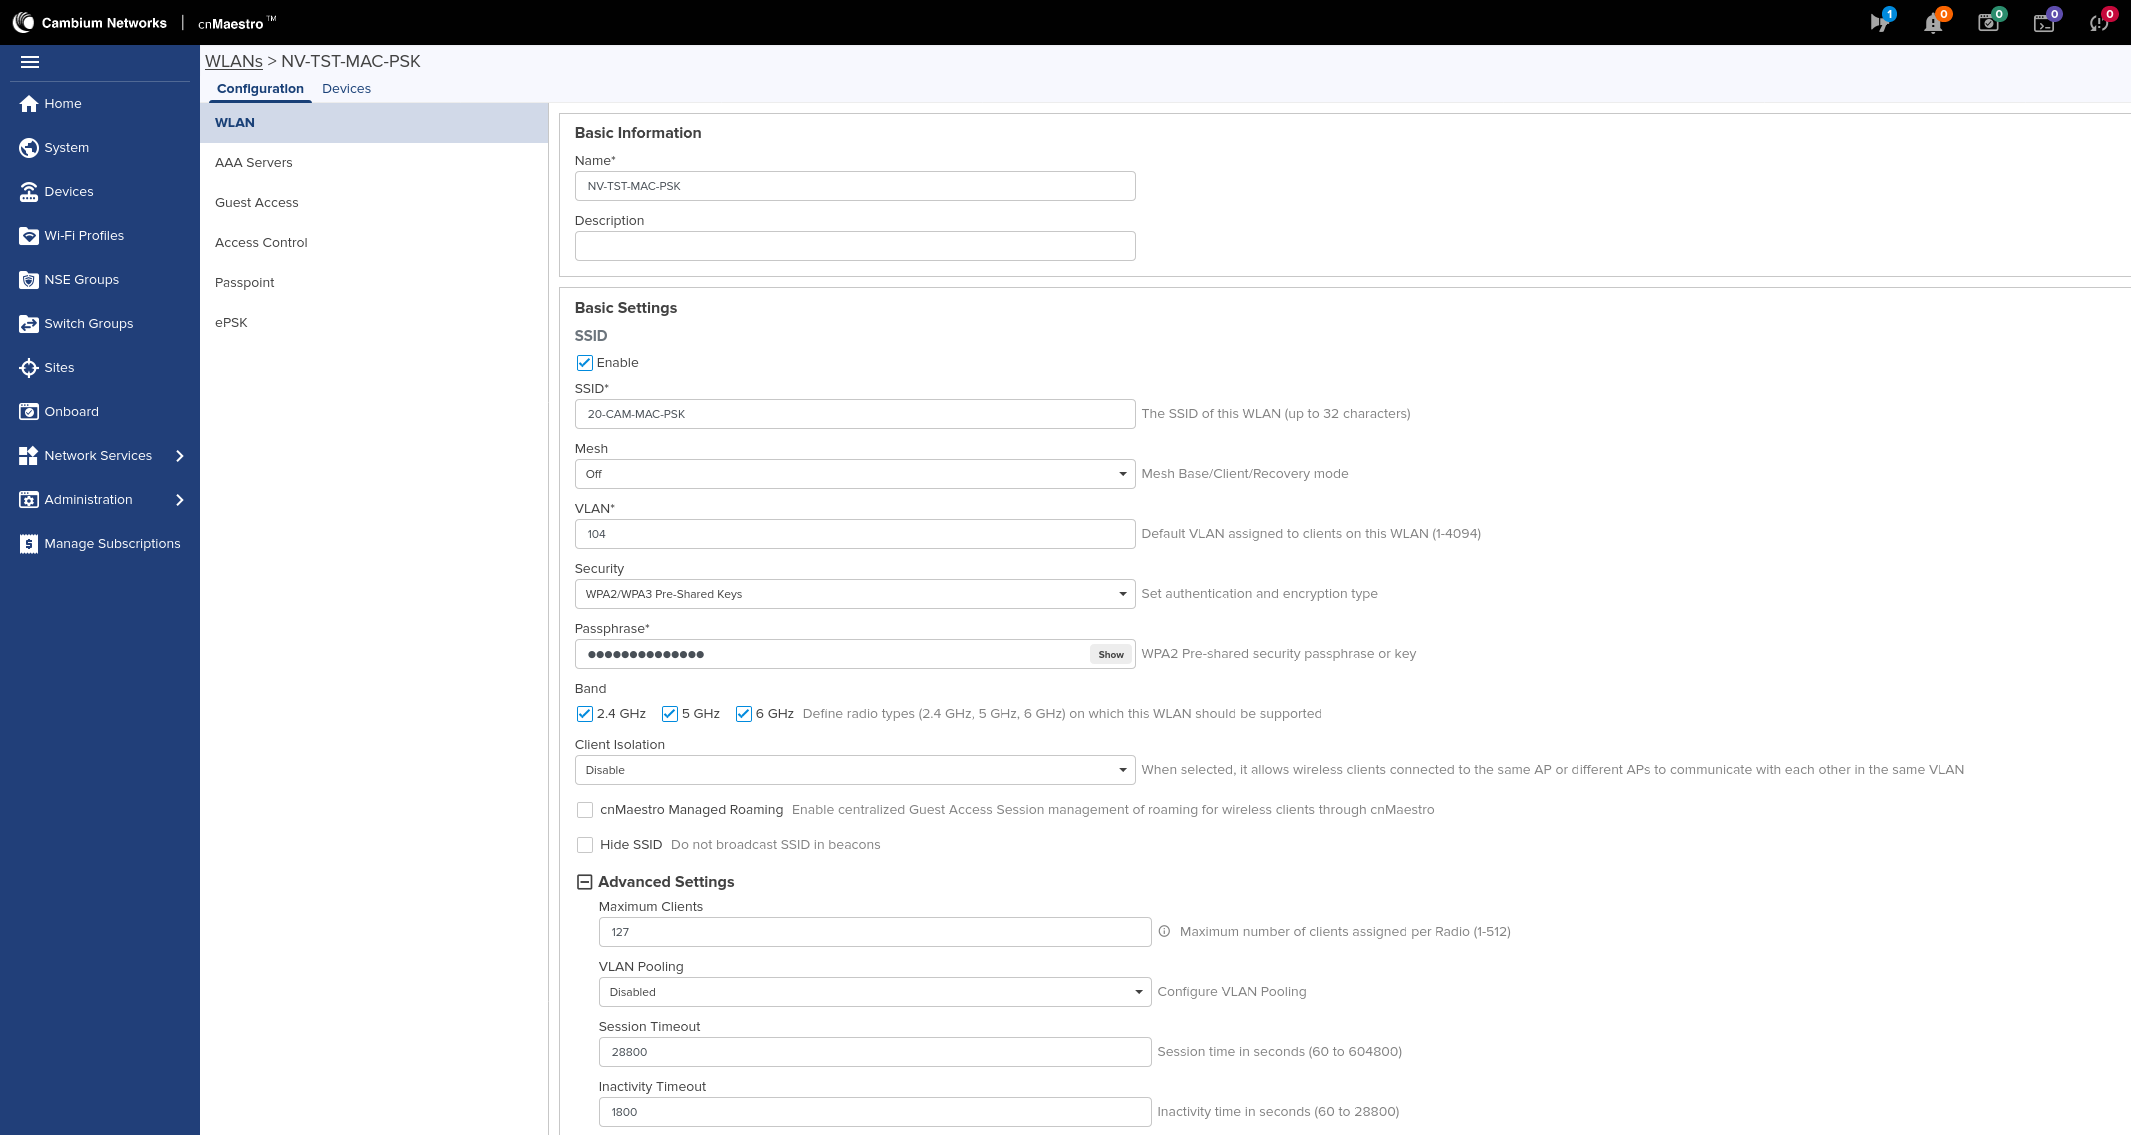
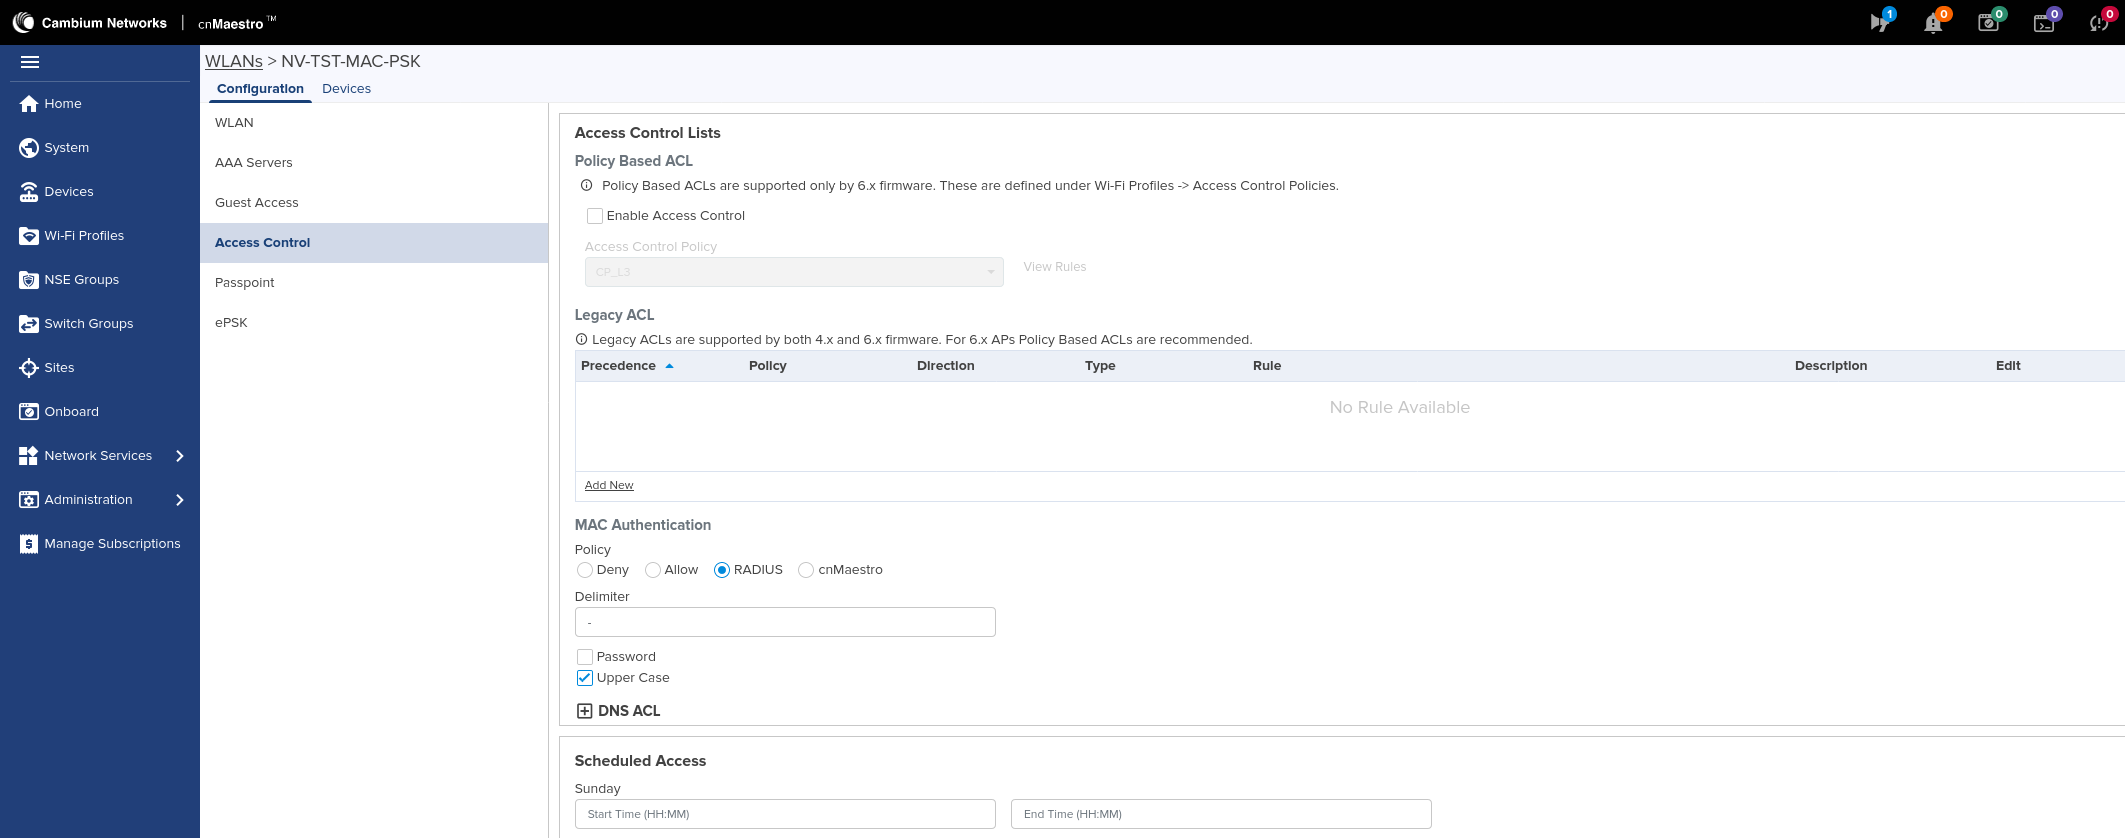
Configuration is the same as for WPA2/3-Enterprise networks, with the following changes:
- in the WLAN tab choose Open or any of the avaliable options: Pre-Shared Keys(in this case, you must also specify the WPA key in thePassphrase field.
- in the Access Controll field, in the MAC Authentication section, we need to check the RADIUS field. You can set a semicolon as Delimiter and select Upper Case.
Other settings remain unchanged.
¶ Captive Portal L3 Network Configuration (Cambium)
It goes the same way as network configuration with MAC address authorization, but also apply the following:
- in the WLAN tab: set the authorization target VLAN as the default VLAN
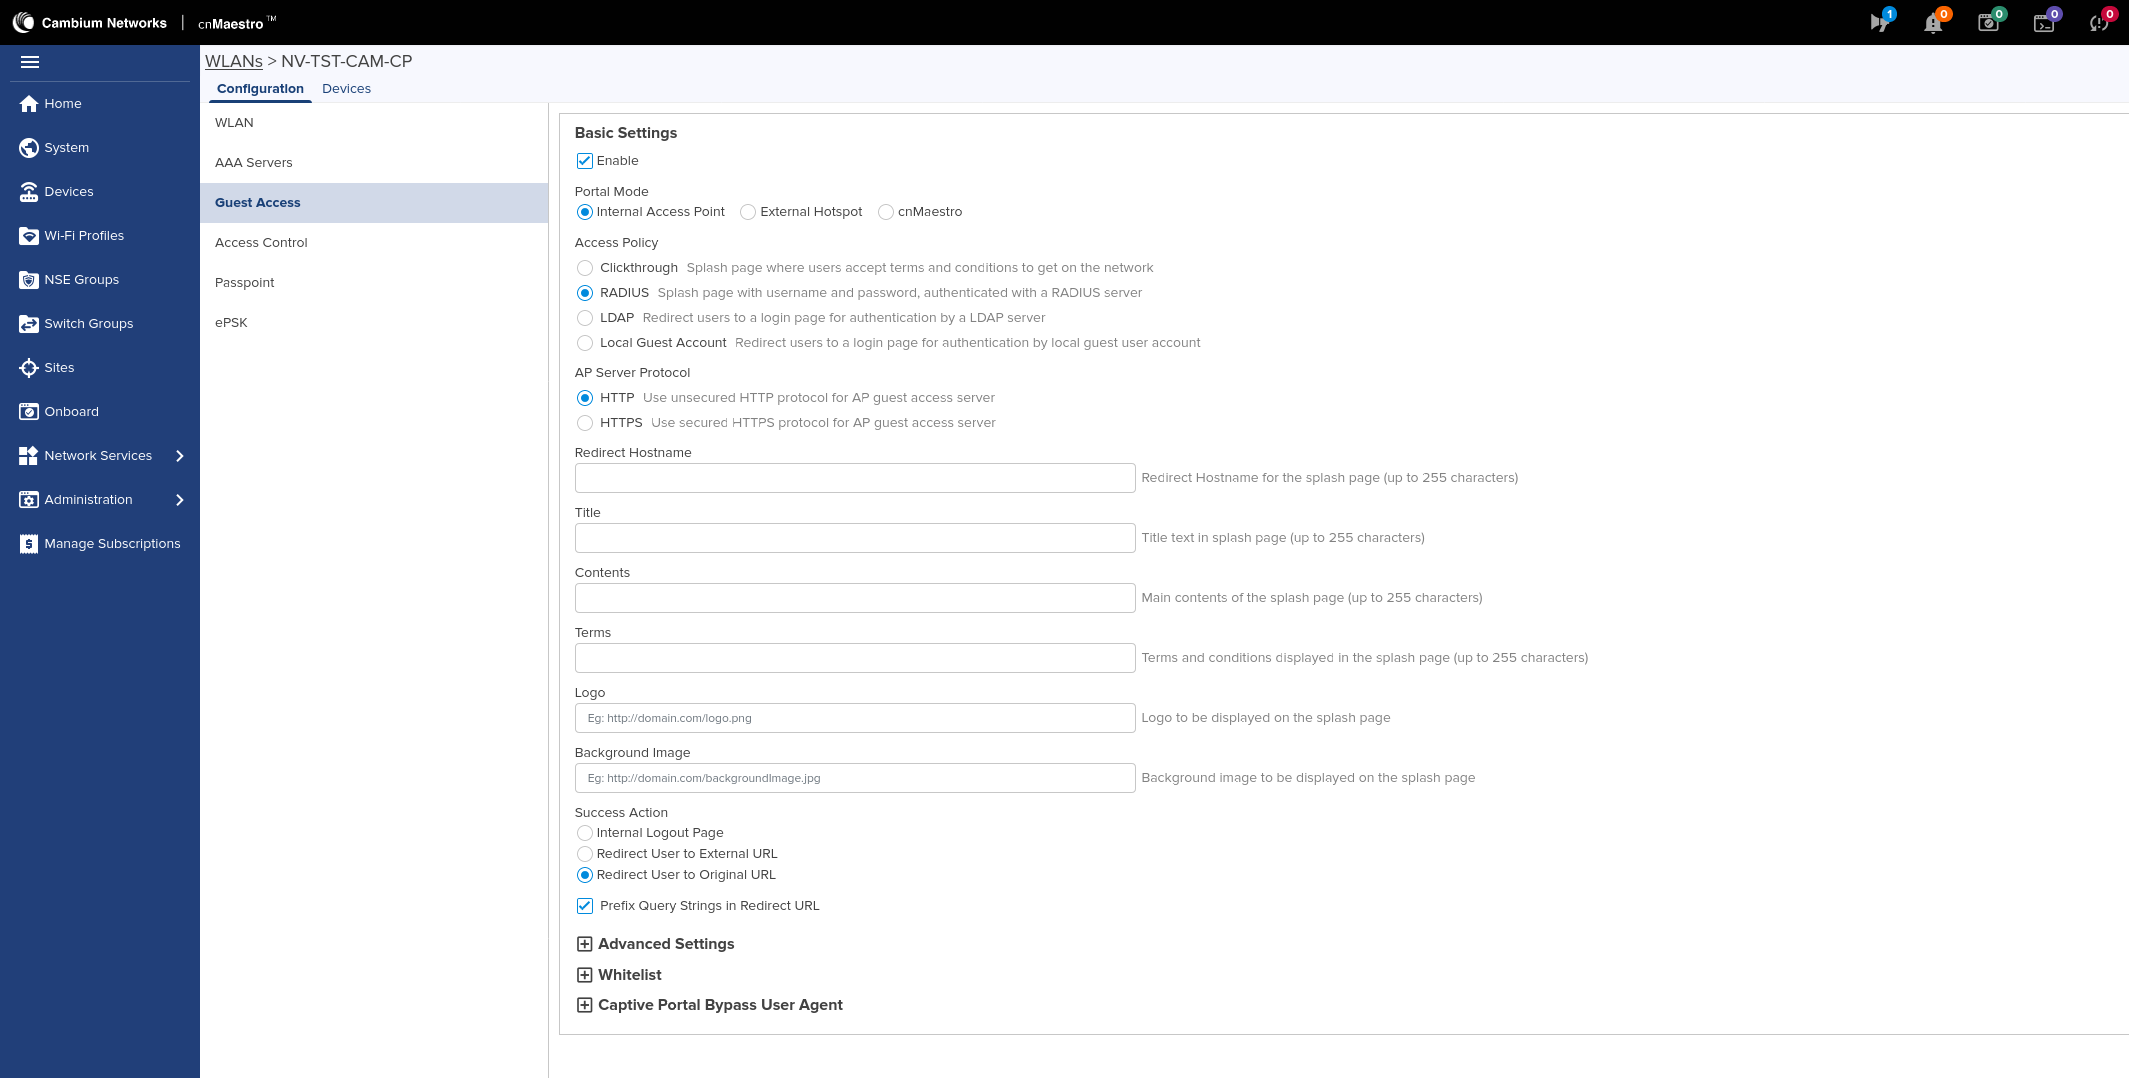
- in the Access Controll tab: in the MAC Authentication section we DO NOT check the RADIUS field
- in the Guest Access tab: check Enable, Internal Access Point and also RADIUS. As the Success Action set Redirect User to Original URL
In NACVIEW, we need to create an access policy for Captive Portal without sending VLAN back.

¶ Captive Portal L2 Network Configuration (NACVIEW)
It goes the same way as network configuration with MAC address authorization, but here also the VLAN Captive Portal needs to be set as the default VLAN (same as set in NACVIEW). In addition, configure also the access policy in accordance with the instruction:
Captive Portal NACVIEW.
¶ Reauthentication (CoA) setting
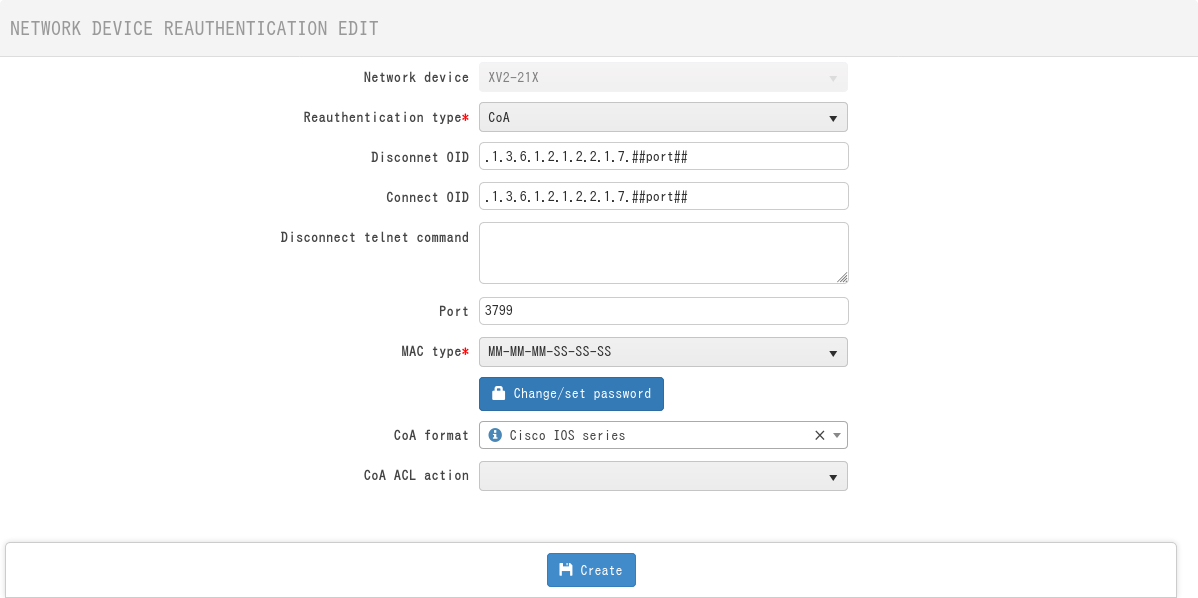
In NACVIEW, set the following reauthentication settings:
- port 3799
- format adresu MAC: MM-MM-MM-SS-SS-SS
- same password as of the RADIUS server
- CoA format: Cisco IOS Series
¶ SNMP, syslog, administrative access and NTP settings
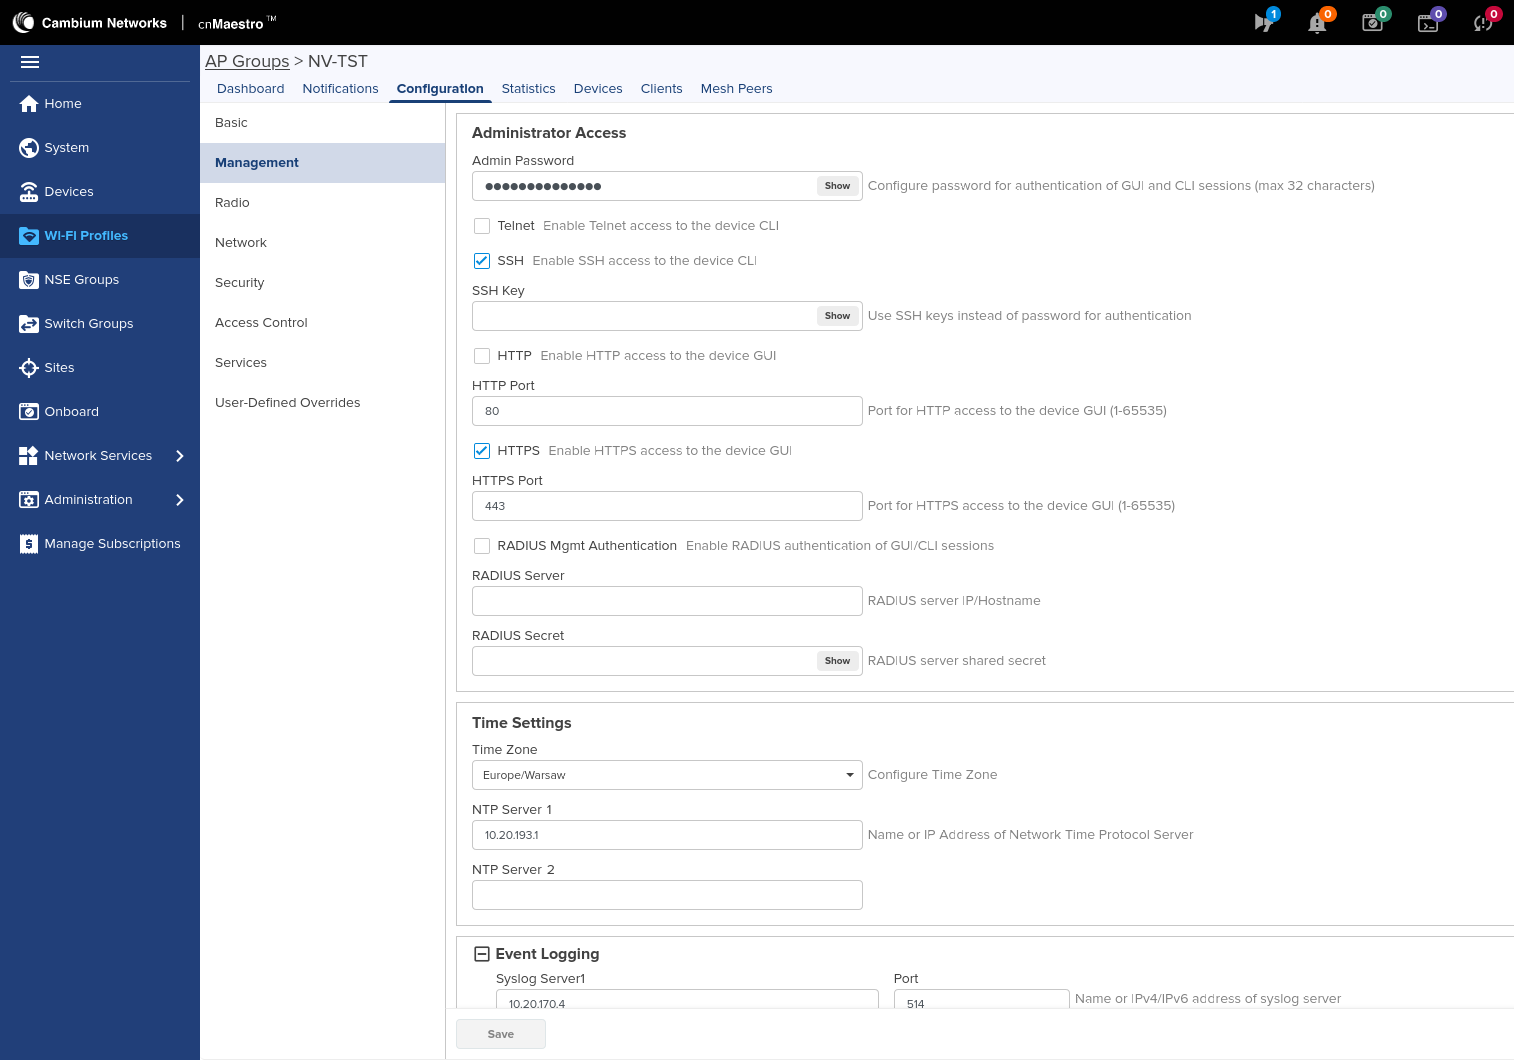
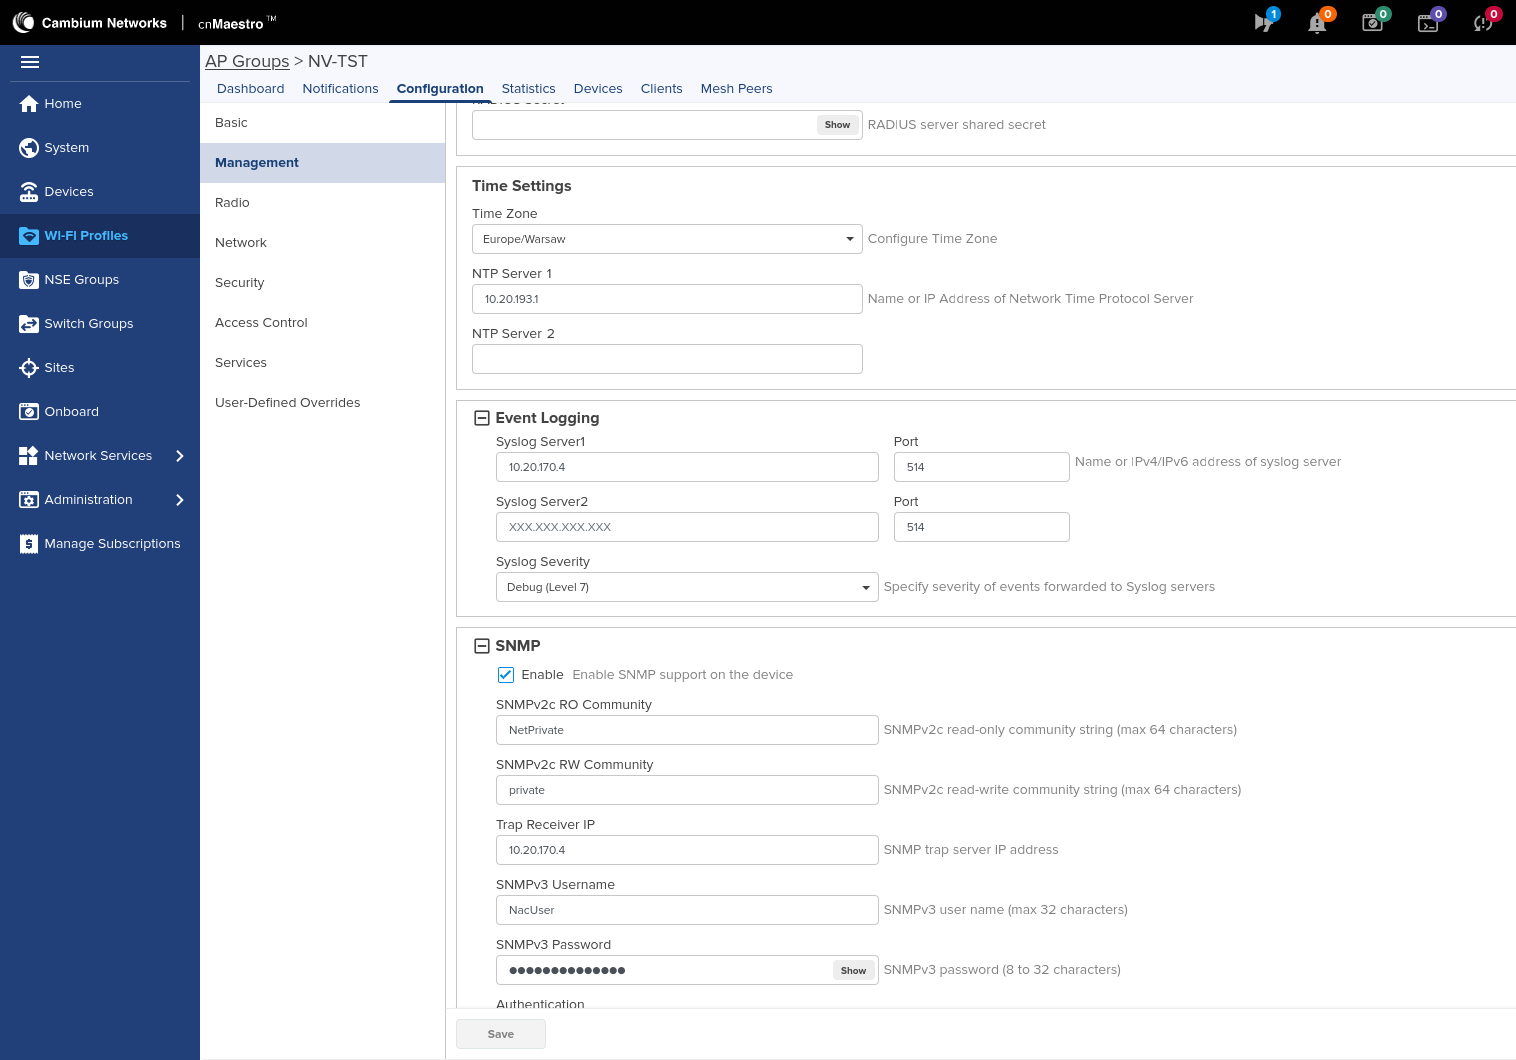
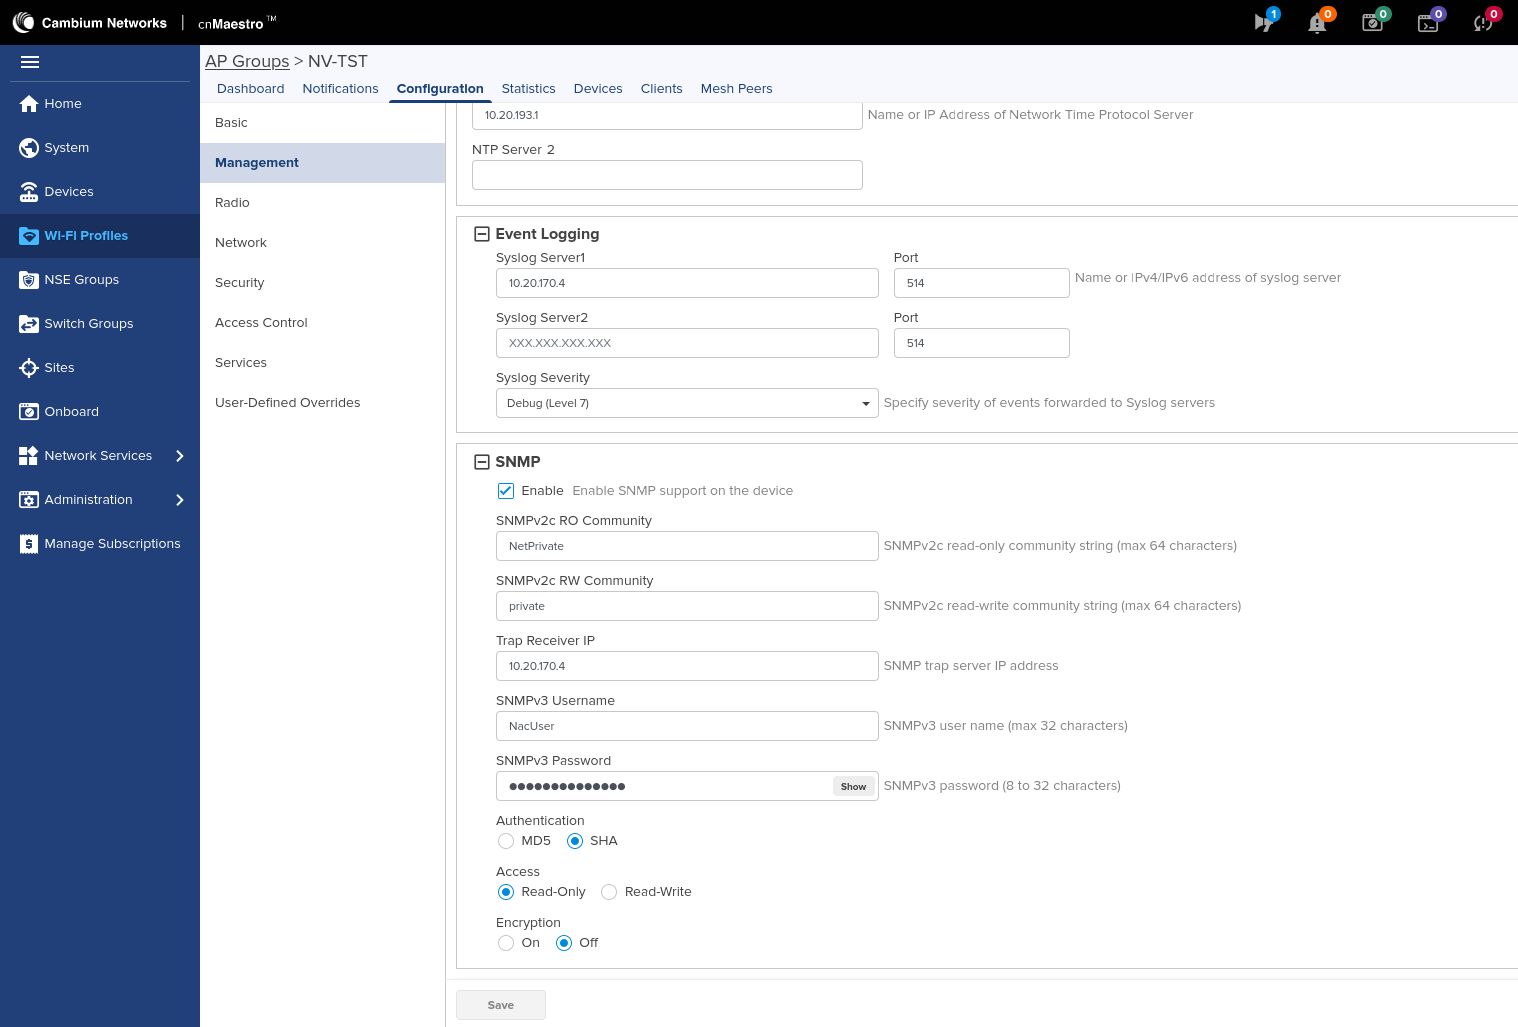
These settings are defined in an access point group, to which specific WLANs and access points must then be assigned.
Adding a network to the existing group:

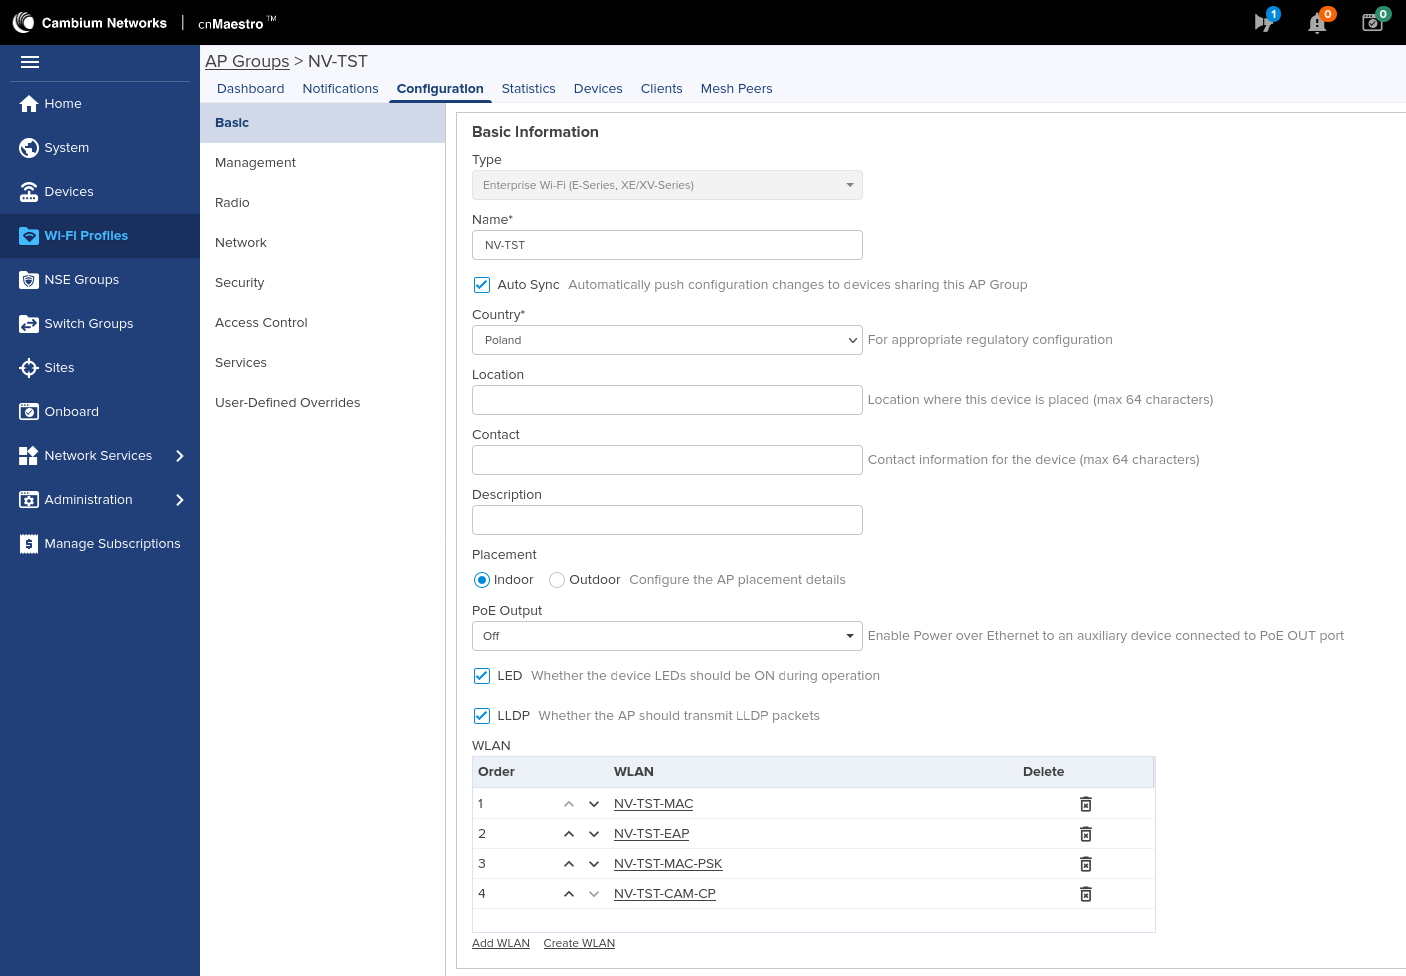
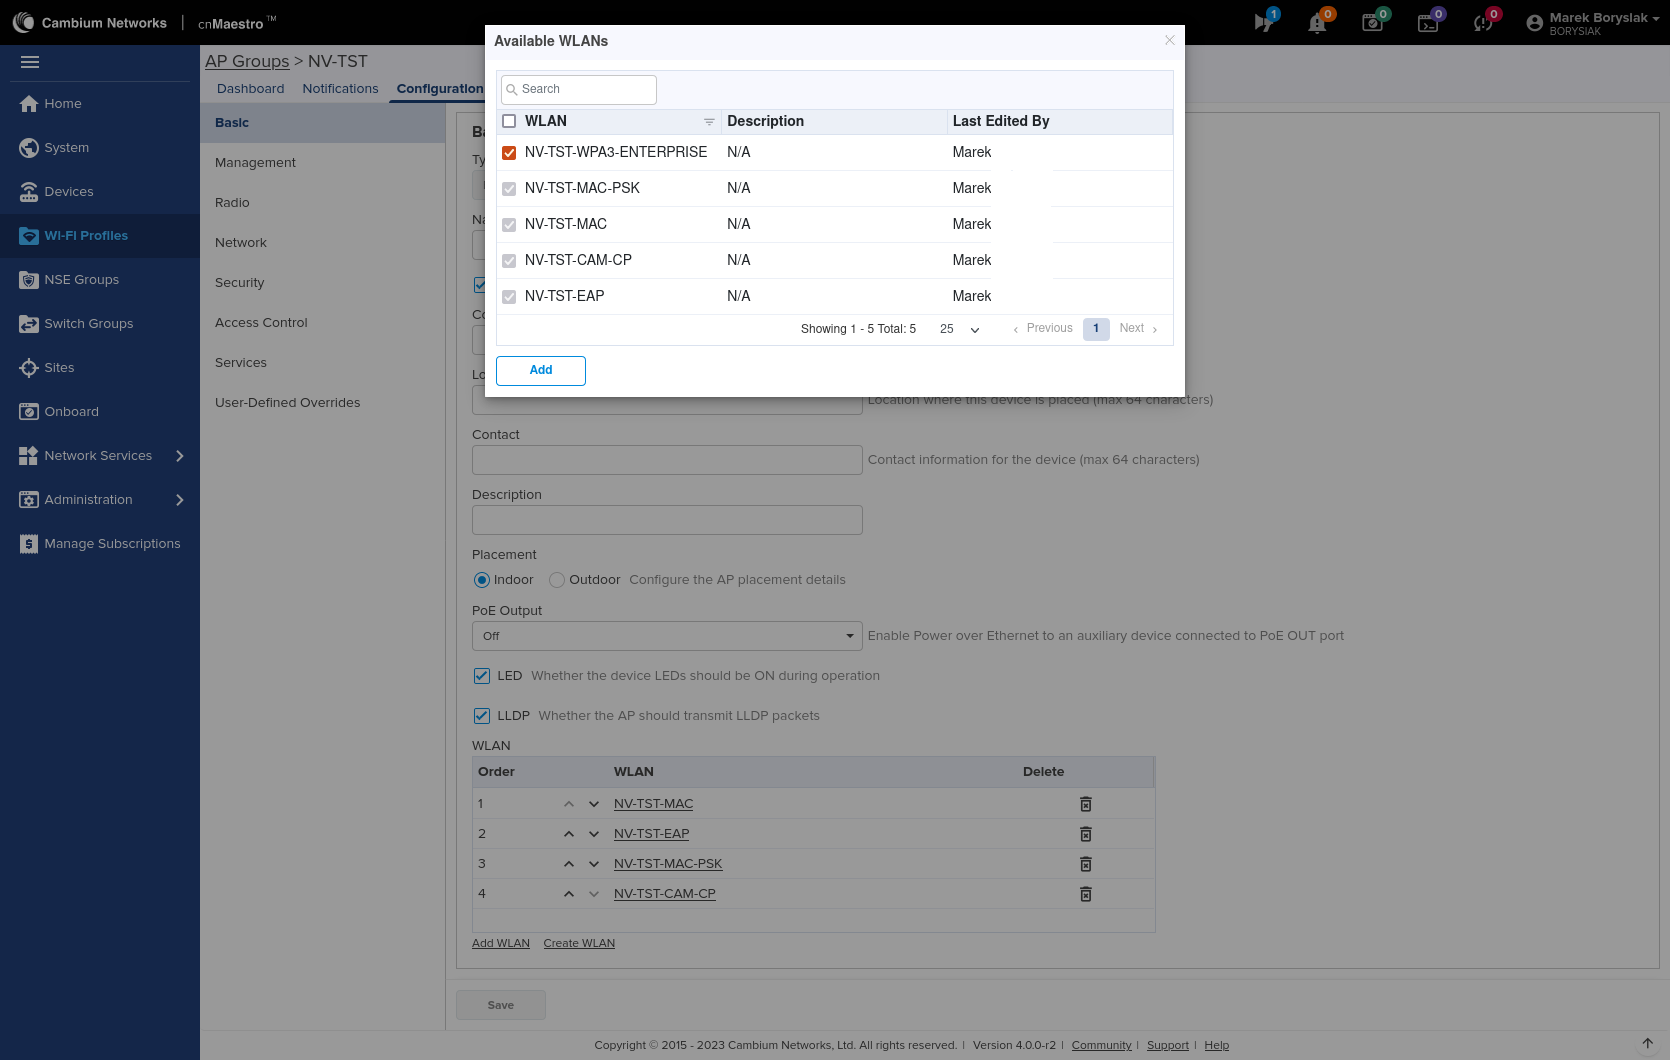
SNMP, NTP, syslog and administrative access settings:
