¶ VPN PaloAlto OTP (Active Directory)
¶ OTP
One time password (OTP) authentication is one of the forms of the user's identity verification, based on providing a one-time password or code by the user logging into the network. OTP can function as a stand-alone form of verification, as well as in addition to the traditional forms.
OTP configuration for PaloAlto allows for an extremely well-secured connection to the network via VPN. The first stage of verification is to check the user's credentials in the local NACVIEW database or in an external database (e.g. Active Directory). After you have passed this stage, the next one takes place, based on sending a message with a verification code to the user. To connect to the network, the user enters the received code into the GlobalProtect application.
This instruction is an extension to the already existing instruction, called PaloAlto OTP. The difference is that the configuration in the extended version results in additional verification of the logging-in user, in terms of belonging to the selected LDAP groups.
For the purposes of this manual, Windows Server Directory Services have been used, however this type of integration can be performed with any LDAP server.
¶ How to configure OTP support for PaloAlto with LDAP integration option?
It can be easily done in the following steps:
¶ 1. Synchronization with LDAP
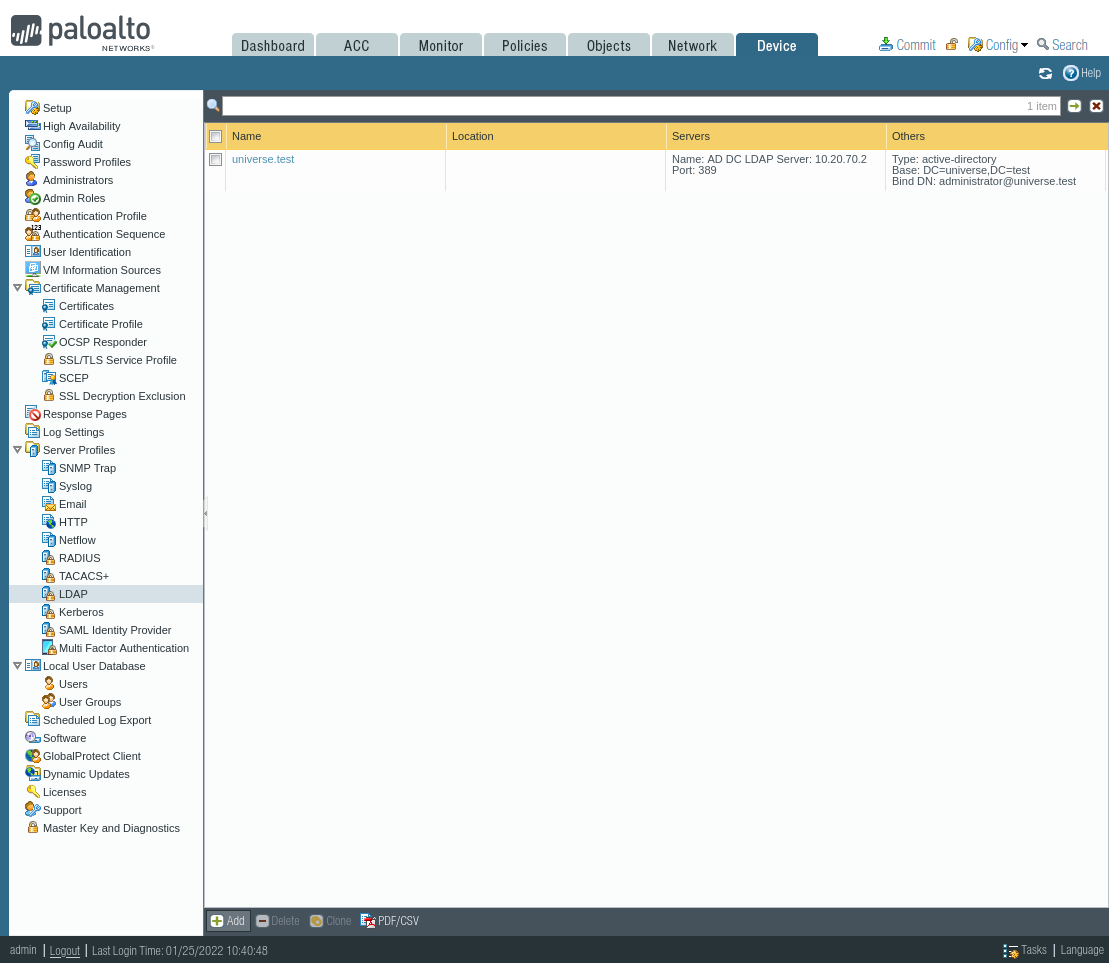
1.1. In the PaloAlto system open Device > Server Profiles > LDAP and click the Add button at the bottom of the page.
1.2. Complete the displayed fields with the connection parameters for the LDAP server. First enter the name of the connection profile in the Profile Name field. Then complete the list of LDAP servers by clicking the Add button in the Server List section. Finally, complete the form in the Server Settings section with the connection type, top-level DN, username (Bind DN), password, connection timeout, and search timeout.
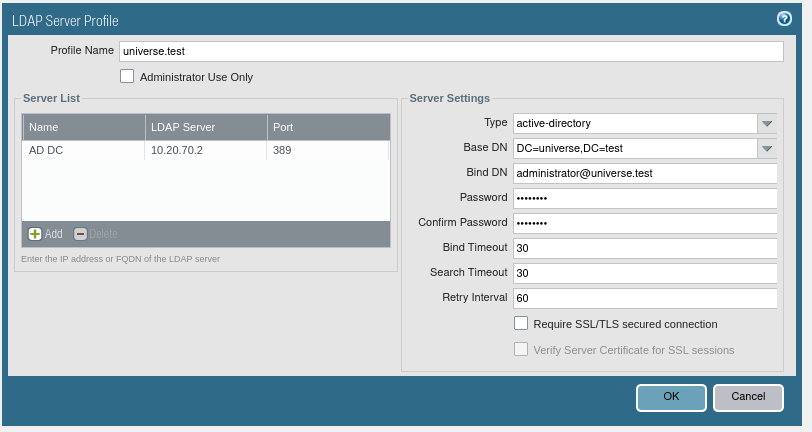
1.3. Save your changes with the OK button, then confirm by clicking Commit (upper right corner).
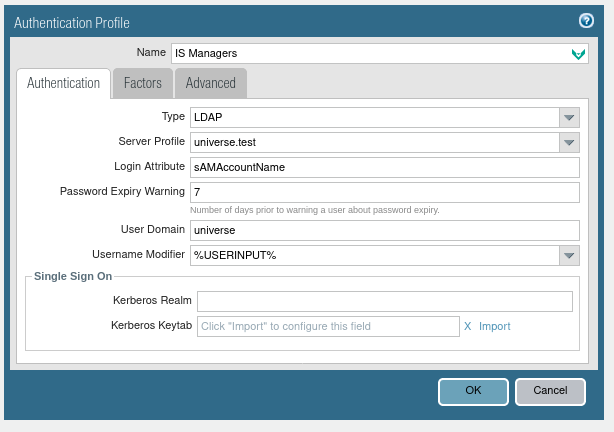
1.4. Go to: Device > Authentication Profile and click: Add. Then configure the settings with the type (LDAP), server profile (configured in the previous step), login attribute (sAMAccountName), number of days before warning the user about the password expiration, and the domain where the user is located.
1.5. Go to the Advanced tab and select a group or groups corresponding to this authentication profile. In this example, all AD users have been selected, and the group selection will take place in the next steps.
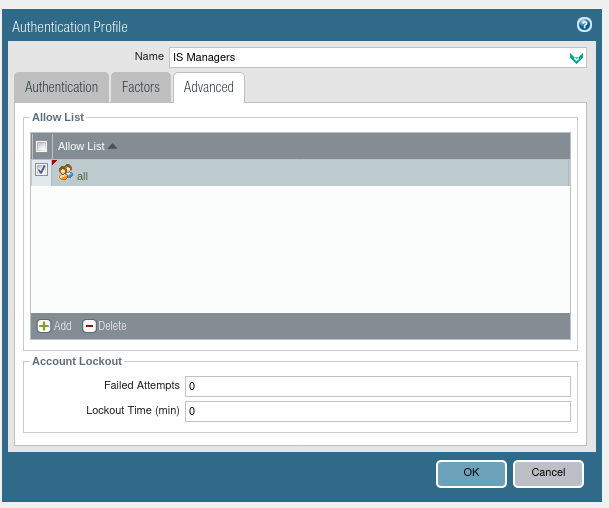
1.6. Save your changes with the OK button, then confirm by clicking Commit (upper right corner).
¶ 2. 2FA configuration with NACVIEW
2.1. Staying on the Devices tab, select Server Profiles > RADIUS from the menu on the left, then click the Add button at the bottom of the page.
2.2. Complete the form in the Server Settings section, specifying: timeout in seconds, number of connection attempts and type of authentication protocol.
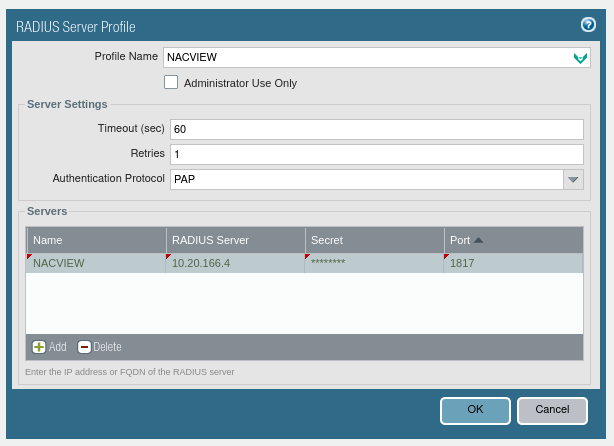
2.3. Add the NACVIEW server by clicking the Add button in the Servers section. Enter the name, IP address or FQDN, and the Radius password and port (1817, RADIUS-OTP).
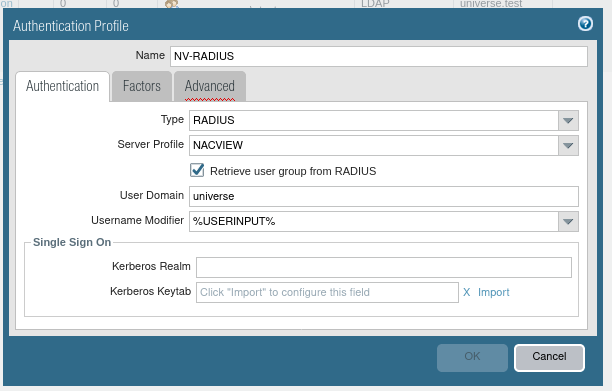
2.4. Go back to Authentication Profile and again add a new profile - for the Radius server this time . Configure the settings with the type (RADIUS), the server profile (configured in the previous step), and the domain where the user is located. Check Retrieve user group from RADIUS.
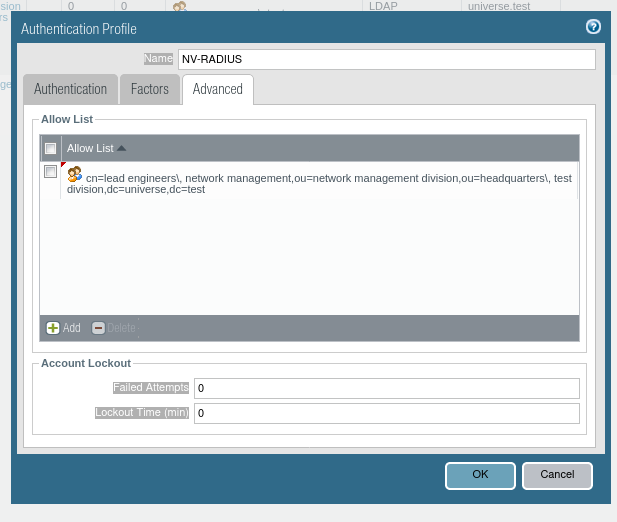
2.5. Now go to the Advanced tab and click Add. From the drop-down list select the appropriate group of users to whom you want to grant access.
2.6.Save all your changes with OK, and then approve all by clicking Commit (upper right corner).
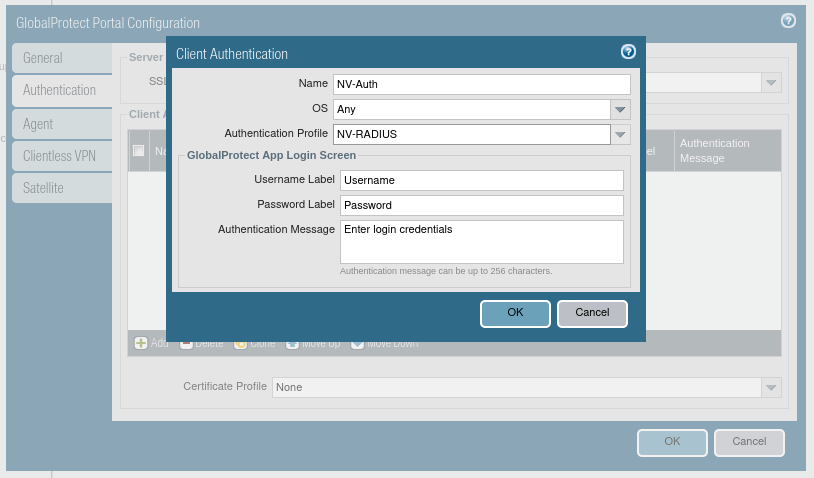
2.7. Go to the Network tab, then to GlobalProtect and Portals. Click Add at the bottom of the page and complete the form with configuration data.
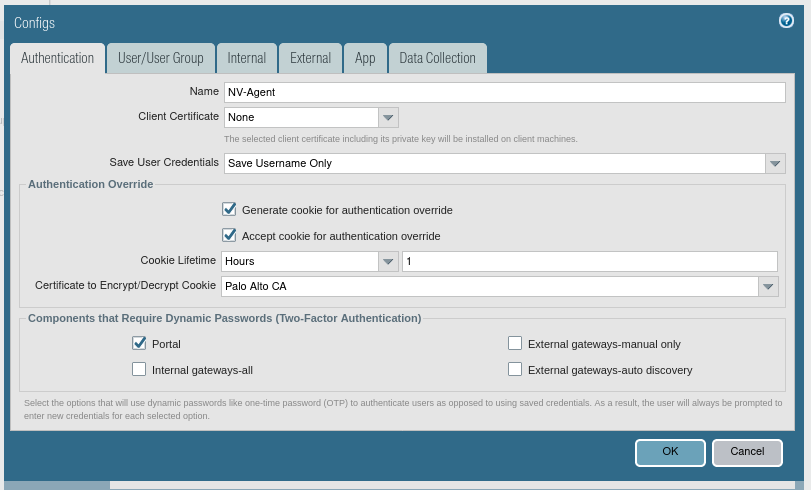
2.8. Go to the Authentication tab, and then complete the form by providing customer authentication data.
2.9. Confirm with OK and go to the Agent tab.
2.10. Click Add and complete the form with the agent's details.
2.11. Staying in the Configs modal window, change the tab to User/User Group.
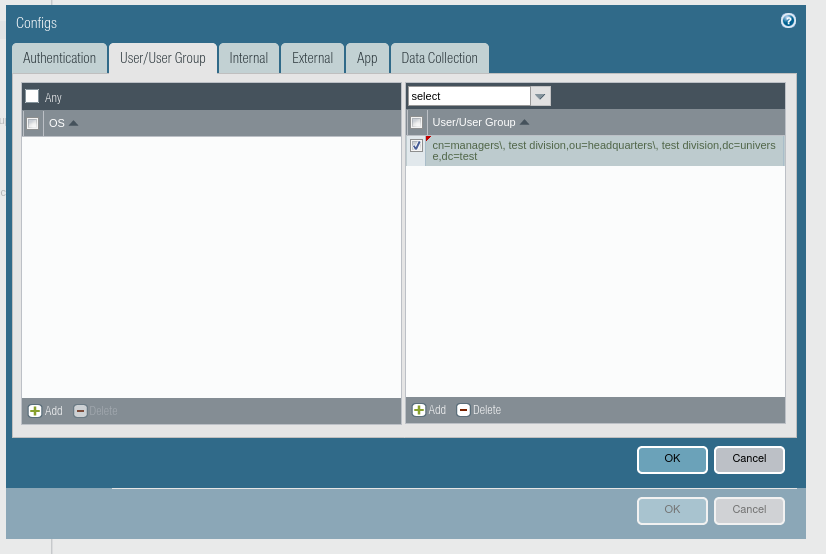
2.12. In the right part of the window, click Add, then select the group you want to allow access to.
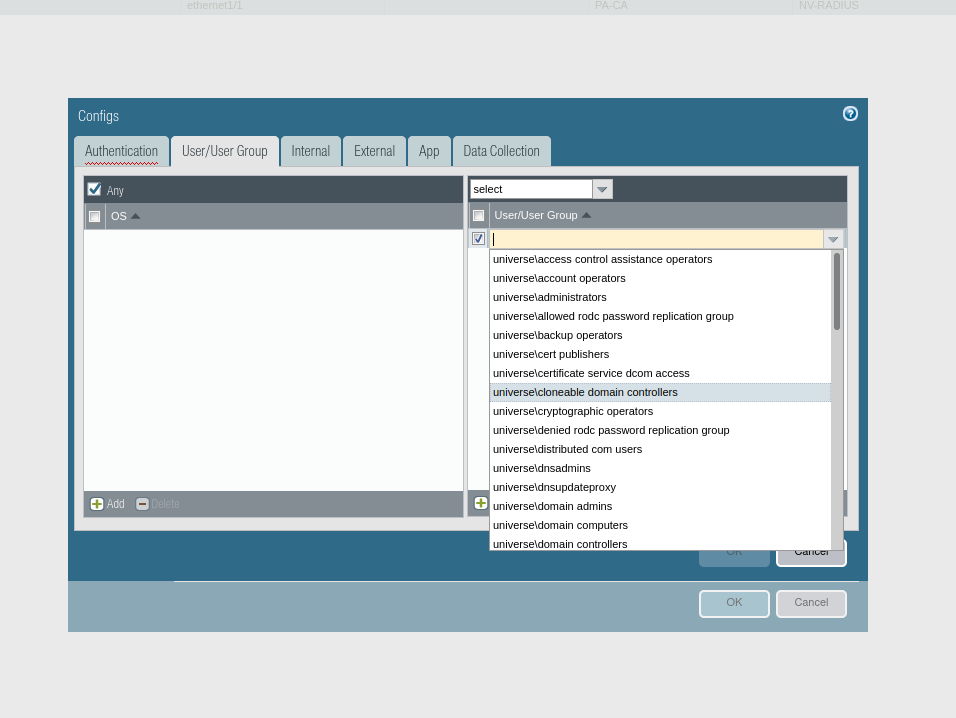
2.13. Confirm all with OK.
¶ 3. Security configuration
3.1. Go to the Network tab, and next to: GlobalProtect > Gateways.
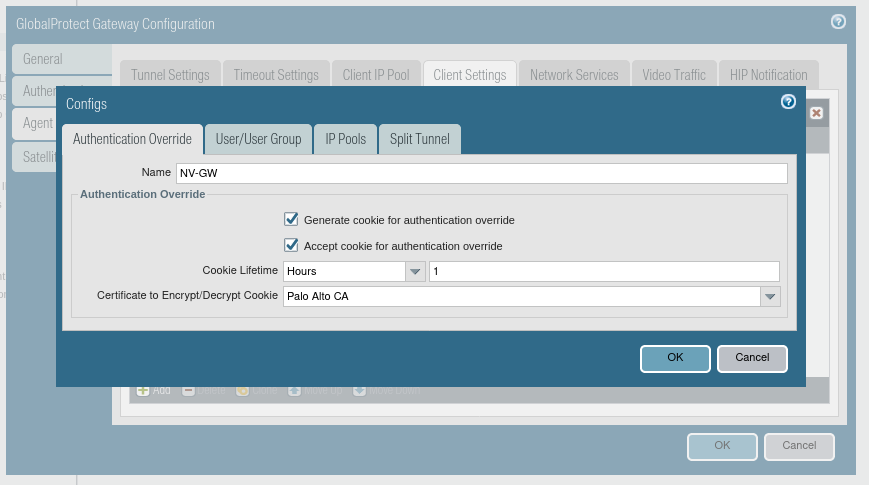
3.2. Click Add, located at the bottom of the page and complete the form with configuration data. Then confirm with OK.
3.3. Staying in the GlobalProtect Gateway Configuration window, go to the Authentication tab. Click Add again and fill in the form fields with the appropriate data.

3.4. Confirm with the OK button and then go to the Agent/Client Settings tab this time. Again, using the Add button, go to the form and complete it with configuration data. przejdź tym razem do zakładki Agent/Client Settings. Again, applying the Add button, go to the form and complete all with the configuration data.
3.5. This time go to the User/User Group tab and, on the tab responsible for selecting a user or group (in the example below - on the left side of the window), click Add, and then add the group that you want to grant access to.
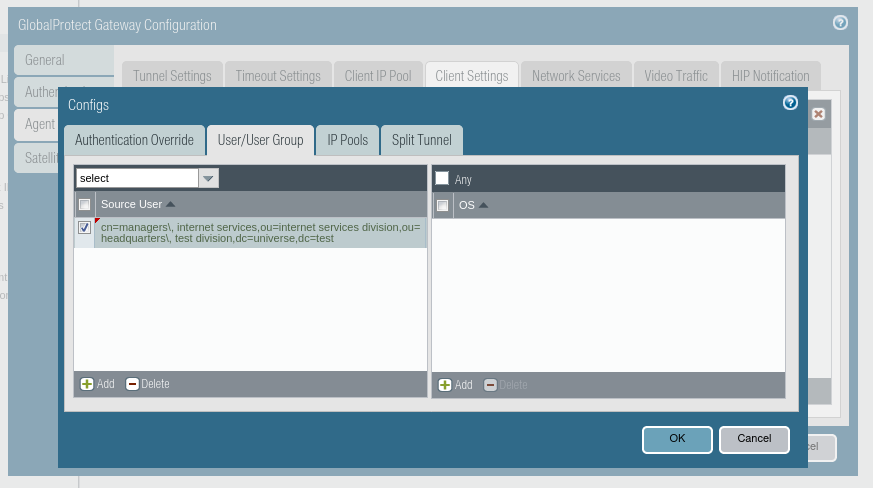
3.6. Confirm all with OK.
¶ 4. NACVIEW configuration
4.1. Go to the NACVIEW system. Open the menu and select: Network Devices.
4.2. Click: Add new Item.
4.3. Complete the form fields: IP address, Radius communication Key (available after clicking the Change/set password button), OTP options (drop-down list at the end of the form), entering data for the PaloAlto system.
4.4. Save your set values.
For the OTP service to work properly, you also need to configure the SMS Gateway in NACVIEW. To do this, use the SMS Gateway tutorial in the Instructions section of our website.
More detailed information about the sections and elements of the NACVIEW system can be found in the Administration Guide document.