¶ UniFi Network Server
Ubiquiti US-8-150W UniFi
¶ Connection to the radius server
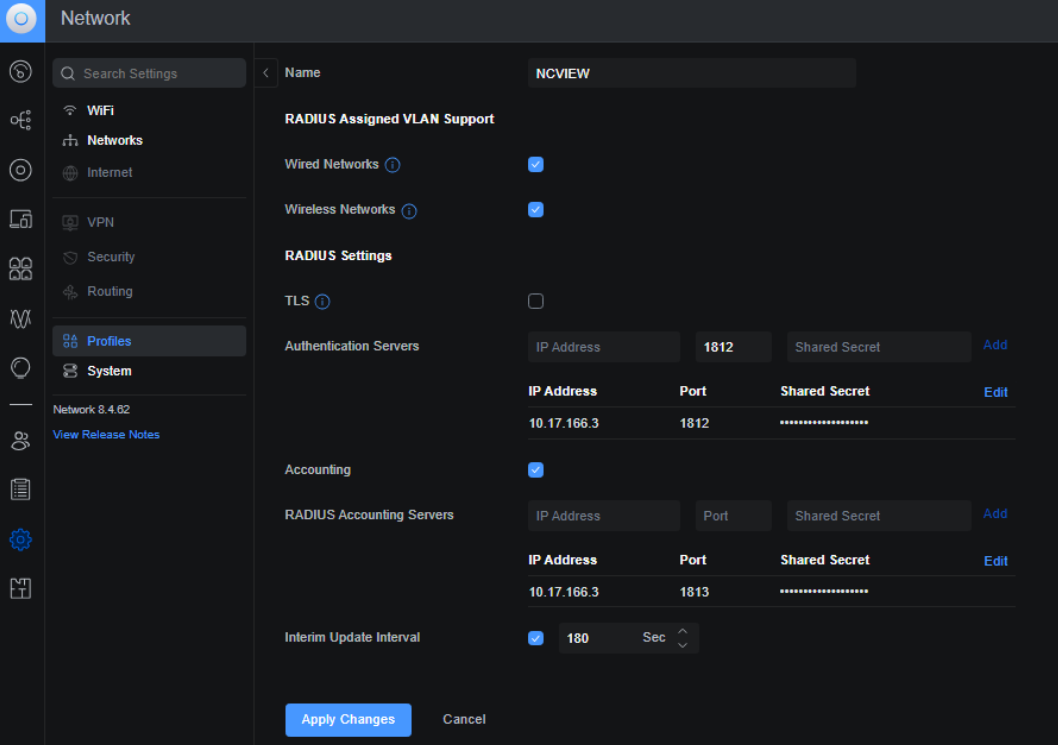
- After logging into the management panel, select the Settings, Profiles and then RADIUS tab. Click Create New. Check the boxes for Wired and Wireless Network. Enable the Accounting and Interim Update Interval options. Enter the NACVIEW server parameters in the Authentication Servers and Accounting fields (IP address and RADIUS server key), then confirm by clicking Add. Finally, click the Apply Changes button.
- In the Settings menu select Networks. In the Global Switch Settings section, check the 802.1X Control box and select the created RADIUS Profile. Click the Apply Changes button.
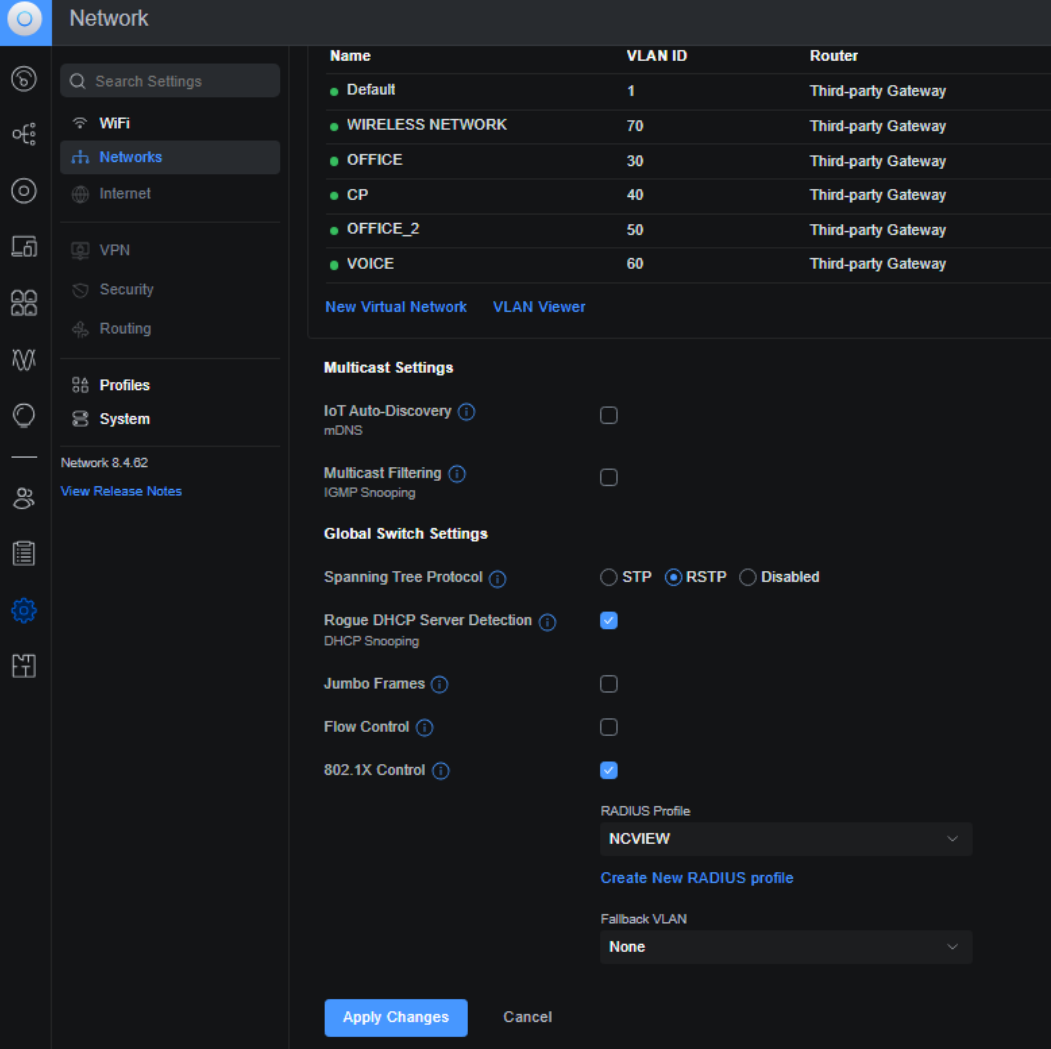
It's recomended to leave Fallback VLAN set as None. All rules should be configured in NACVIEW.
¶ Configuration of authorization
The UniFi Network Server allows you to create Ethernet Port Profiles. You can create standard profiles for 802.1X, MAB, and MAB/802.1X. This enables you to assign a range of ports to a specific profile.
From the management panel, navigate to Settings, then select Profiles, and go to the Ethernet Ports tab. Click Create New.

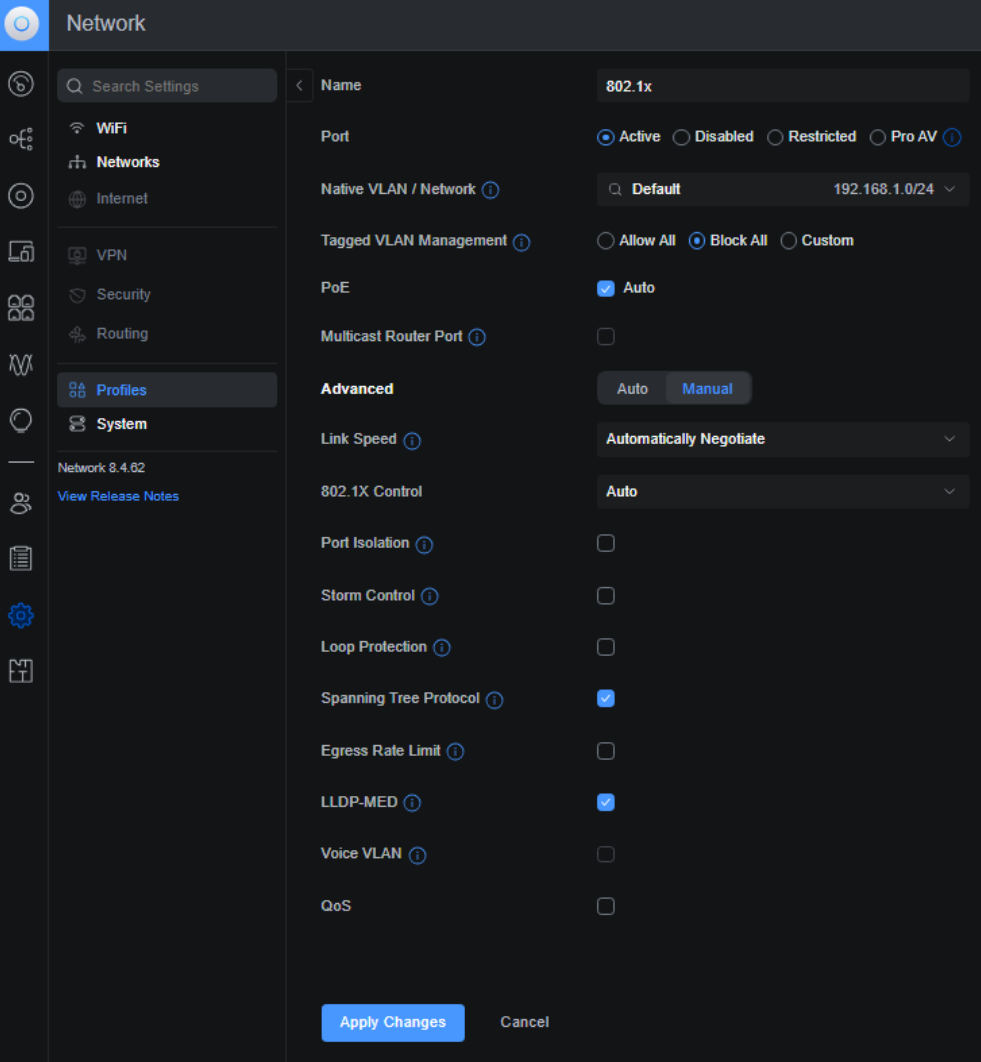
¶ 802.1x Protocol
- Name the profile. Set the Native VLAN to Default and block All Tagged VLANs.
- In the Advanced section, switch to the Manual tab. From the dropdown menu next to 802.1X Control, select Auto.
- Click Apply Changes to save configuration.
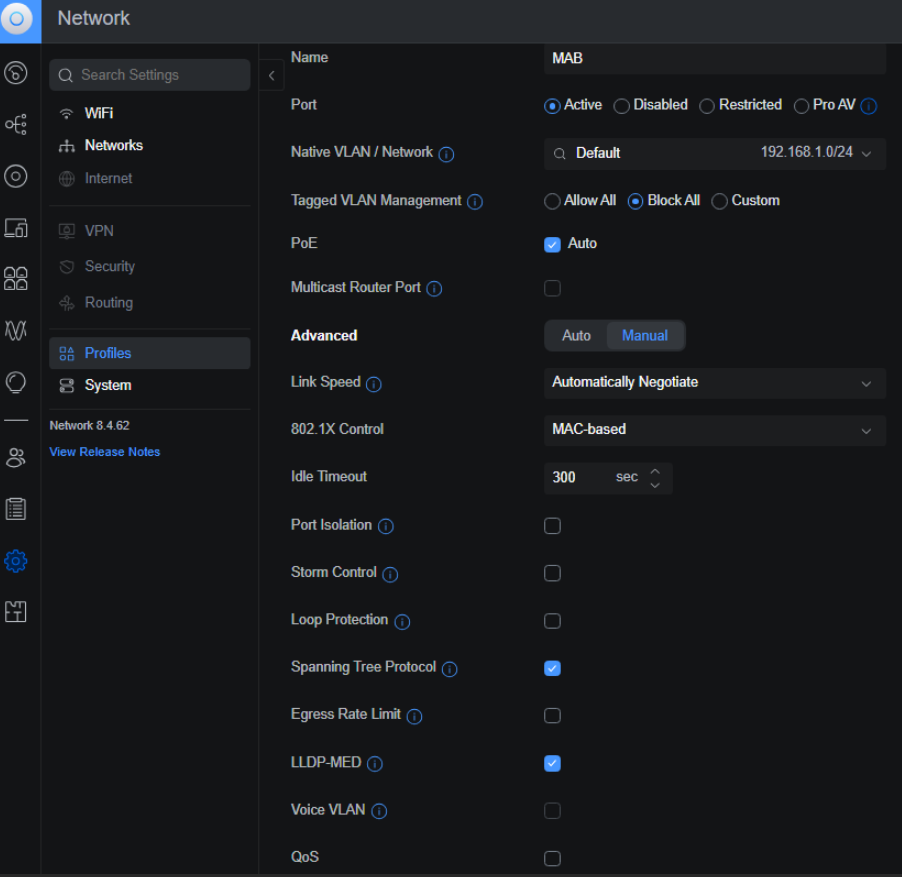
¶ MAB
- Name the profile. Set the Native VLAN to Default and block All Tagged VLANs.
- In the Advanced section, switch to the Manual tab. From the dropdown menu next to 802.1X Control, select MAC-based.
- Click Apply Changes to save configuration.
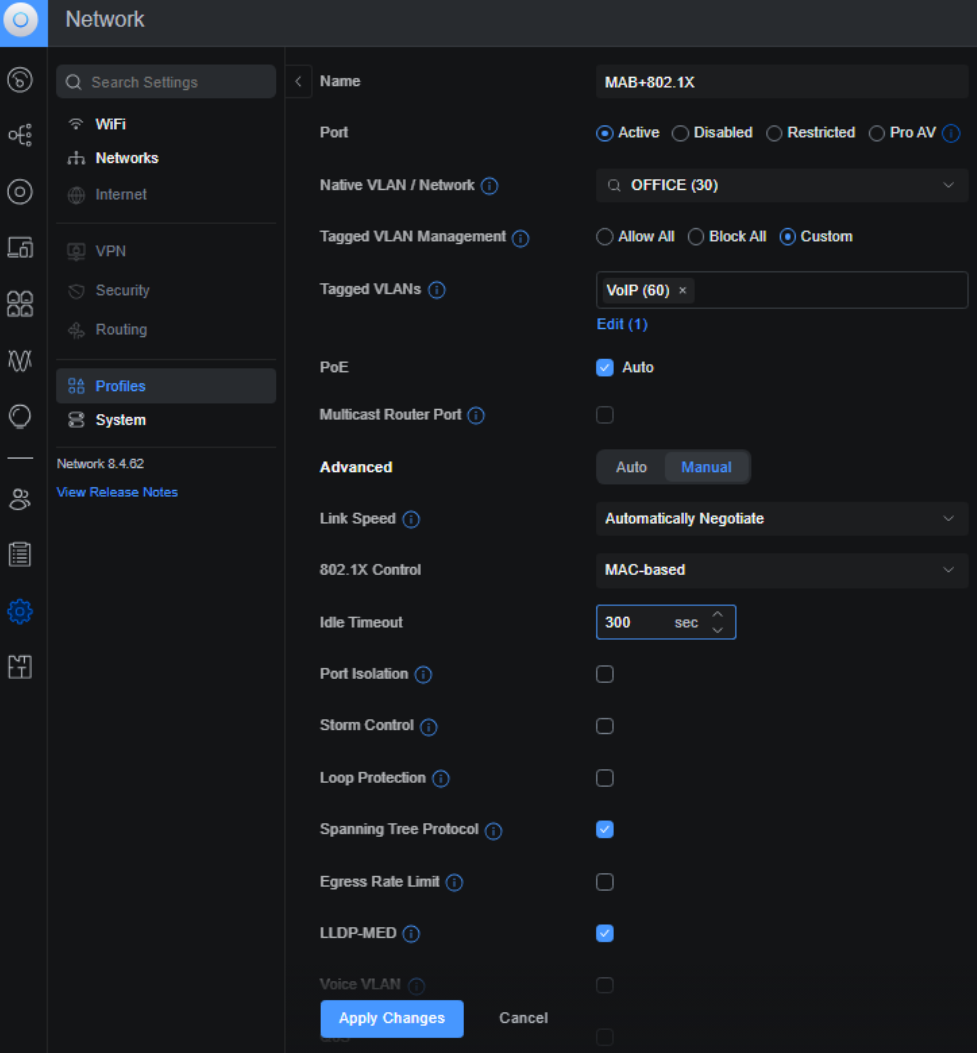
¶ MAB/MAB + 802.1X
- Name the profile. Set the Native VLAN to your data VLAN (PC) and set the Tagged VLAN Management to Custom. Add the VLAN for your VoIP phones.
- In the Advanced section, switch to the Manual tab. From the dropdown menu next to 802.1X Control, select MAC-based.
- Click Apply Changes to save configuration.
¶ Enable authorization on ports
- From the management panel, select Ports and mark the port(s) you want to configure.
- In Advanced section switch to the Manual tab.
- Find the Ethernet Port Profile option and check the box. From the dropdown menu, select the desired profile.
- Click Apply Changes to save.
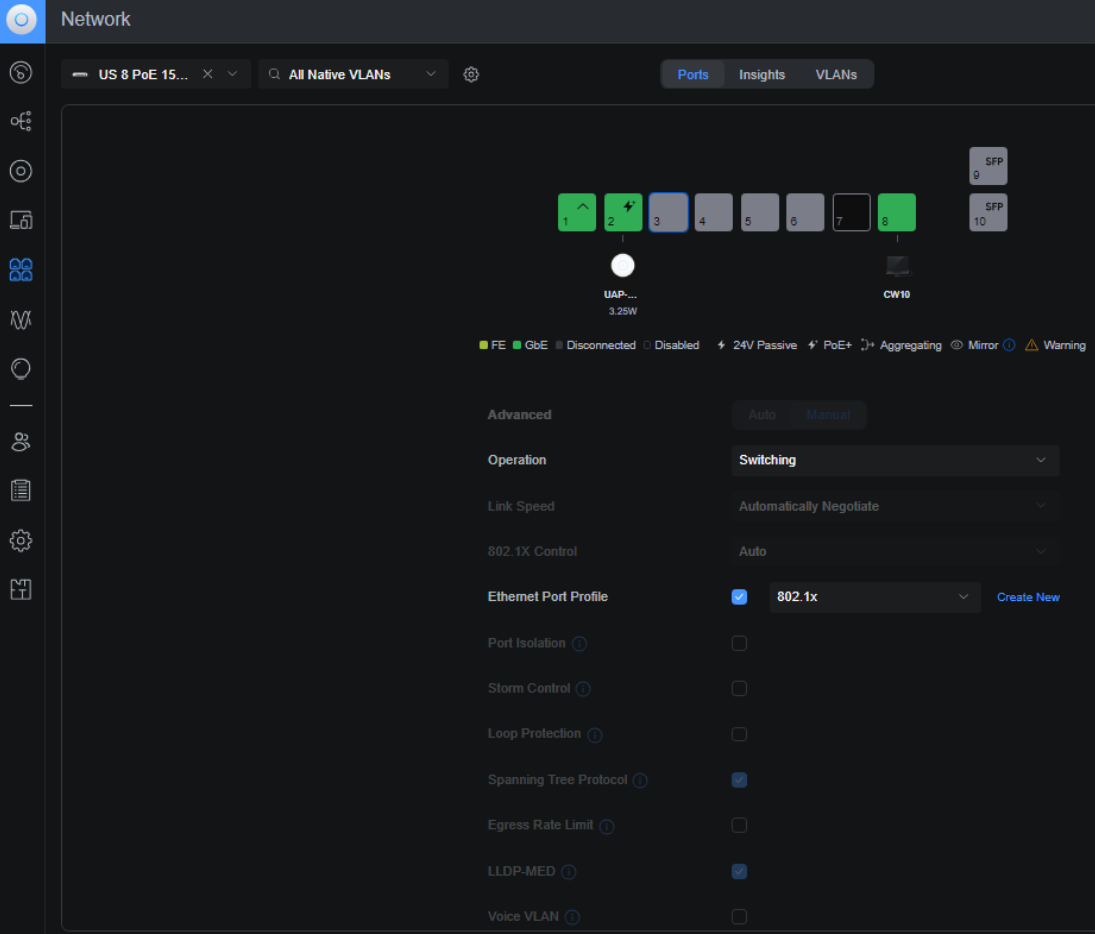
If you use Voice VLAN in your network you can mark this option and choose correct VLAN. In combination with LLDP-MED VoIP phone will be placed in specified VLAN. Device connected to the phone will be placed in Native VLAN.
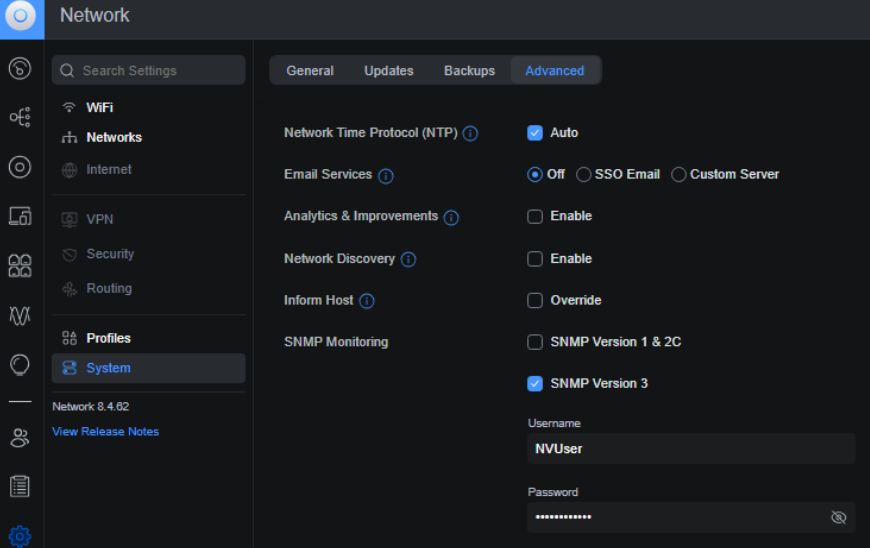
¶ SNMP
- From the management panel, select Settings, then System, and go to the Advanced tab.
- Find SNMP Monitoring option and mark NMP Version 3 checkbox. Enter the username and password that you previously set in NACVIEW.
- Click Apply Changes to save.
¶ Syslog
- From the management panel, select Settings, then System, and go to the Advanced tab.
- Find Logging levels option and make sure Auto is enabled.
- For the remote logging location, select Remote Server. Ensure that the Syslog checkbox is marked and enter the IP address of your NACVIEW server.
- Click Apply Changes to save.
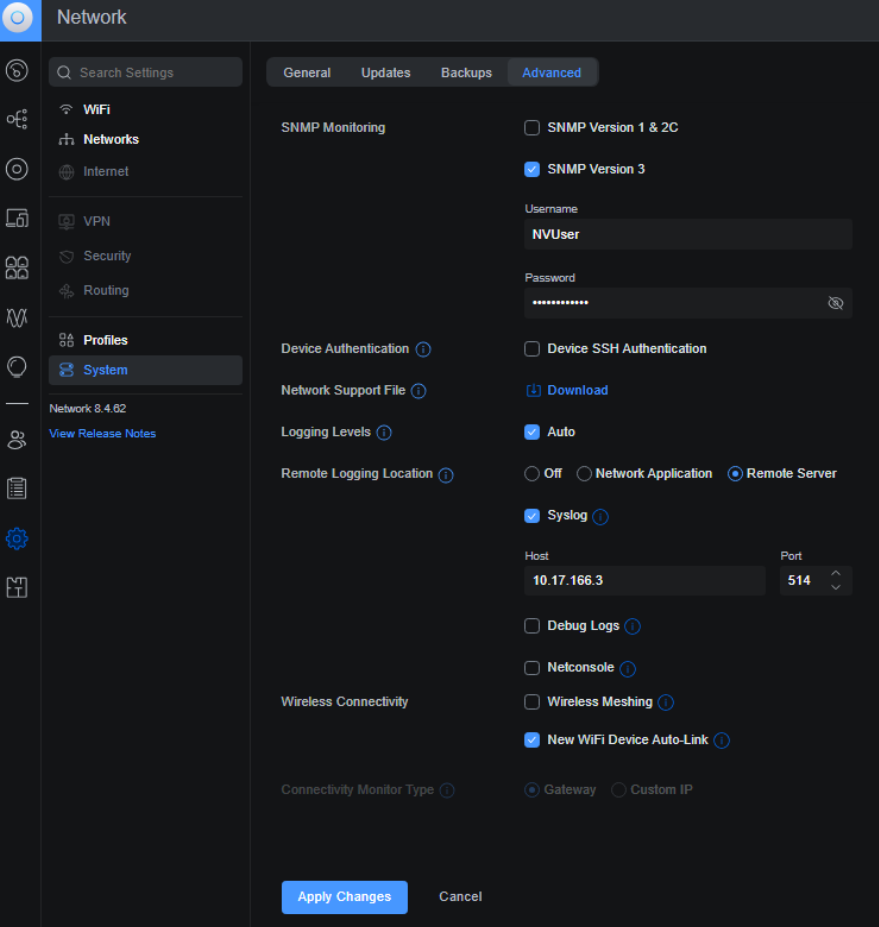
You can set your logging levels by unchecking the Auto checkbox. This can be helpful for troubleshooting.
¶ Additional information
¶ USW Enterprise 8 PoE
If you are using this model:
- For certificate-based network authentication - enable Jumbo Frames.
- For dynamic VLAN assignment - configure a fallback VLAN.
¶ UniFi WiFi
¶ WiFi network RADIUS configuration
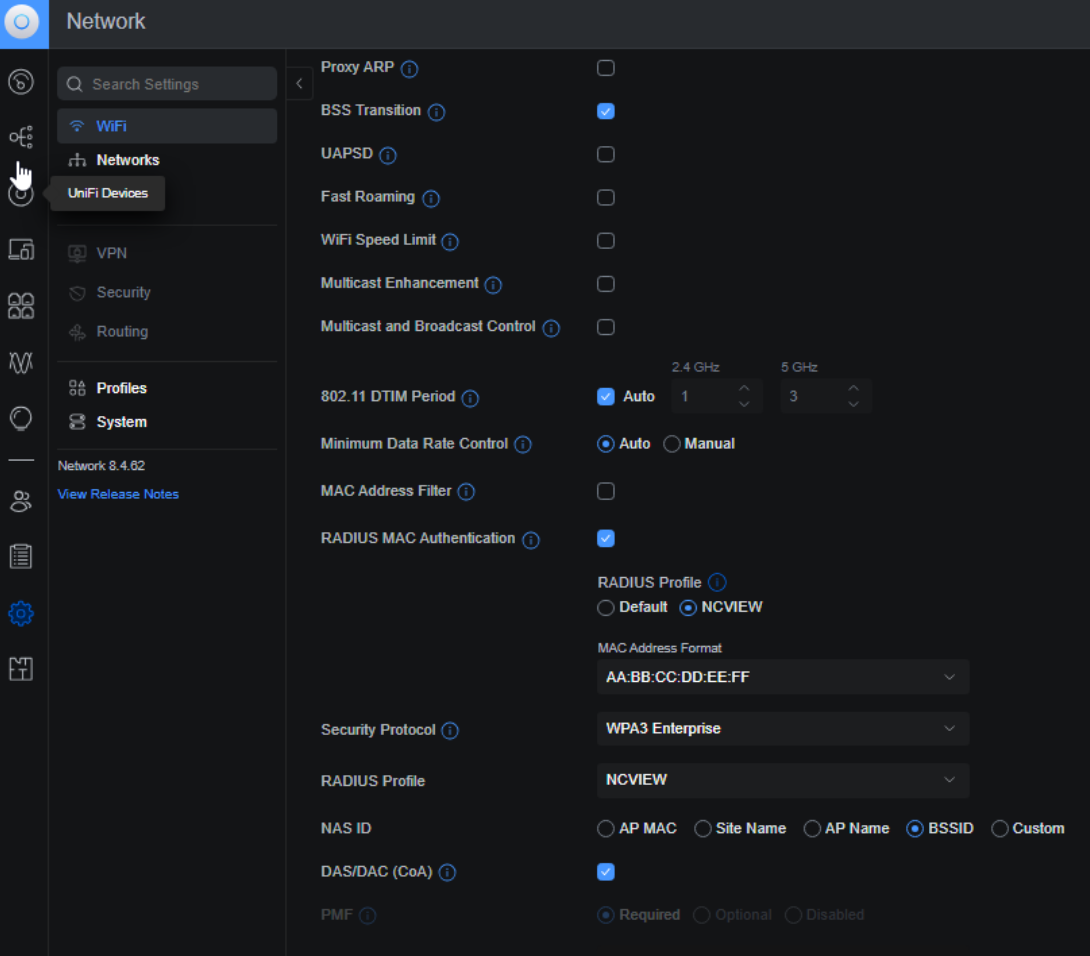
- From the management panel, select Settings, then WiFi.
- Click the Wi-Fi network you want to configure.
- If you want authenticate client devices using their MAC addresses enable RADIUS MAC Authentication option and select the RADIUS profile. Change the MAC address format to AA:BB:CC:DD:EE:FF
- If you want authenticate client devices using 802.1x set the security protocol to WPA3 Enterprise and choose RADIUS profile.
- Check the box next to DAS/DAC (CoA).
- Click Apply Changes to save.
If devices in your network do not support the WPA3 Enterprise security protocol, you can choose WPA2 Enterprise instead.
¶ Additional information
If you notice that a device connected shortly after disconnecting does not trigger the authentication process (no information in Nacview), it is likely caused by the PMKSA cache option.
PMKSA (Pairwise Master Key Security Association) cache is a security mechanism defined in IEEE 802.11-2007 that enables fast and secure roaming in wireless networks by storing authentication information between access points and client stations for a specified period of time. When a client roams between access points, PMKSA caching allows both parties to skip the time-consuming full 802.1X/EAP authentication process and proceed directly to the 4-Way Handshake. This significantly reduces reconnection times for time-sensitive applications like voice over WiFi.
¶ Behavior with Different PMKSA and Fast Roaming Settings
| Fast Roaming | PMKSA Cache | Behavior |
|---|---|---|
| ON | ON | Devices connected shortly after disconnect are authenticated from cache. |
| ON | OFF | Devices connected shortly after disconnect go through the full authentication process; devices roaming between APs are authenticated from cache. |
| OFF | OFF | Devices connected shortly after disconnect and devices roaming between APs go through the full authentication process. |