¶ Mikrotik v6 - Winbox
Model: CHR
Software: RouterOS v6.48.6
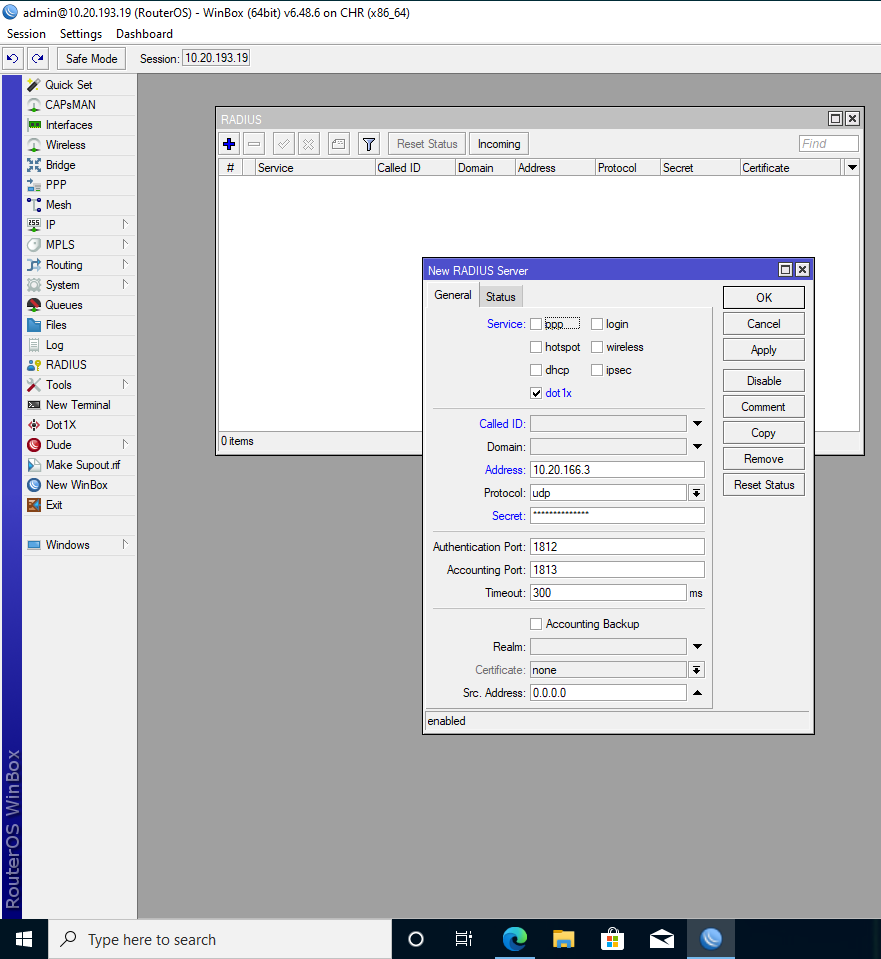
¶ Connection configuration with the RADIUS Server
After logging in via Winbox to the Mikrotik switch, open the RADIUS tab from the menu on the left,and then configure a new RADIUS server with + button. Complete the fields as follows:
Service: dot1xAddress: NACVIEW server VRRP addressSecret: RADIUS password from the NACVIEW panelAuthentication Port: 1812 (default value)Auccounting Port: 1813 (default value)Protocol: udp (default value)
Additionally, as Src. Address, you can specify the management address of the switch - it should be the same as the address given in NACVIEW. Confirm with Apply.
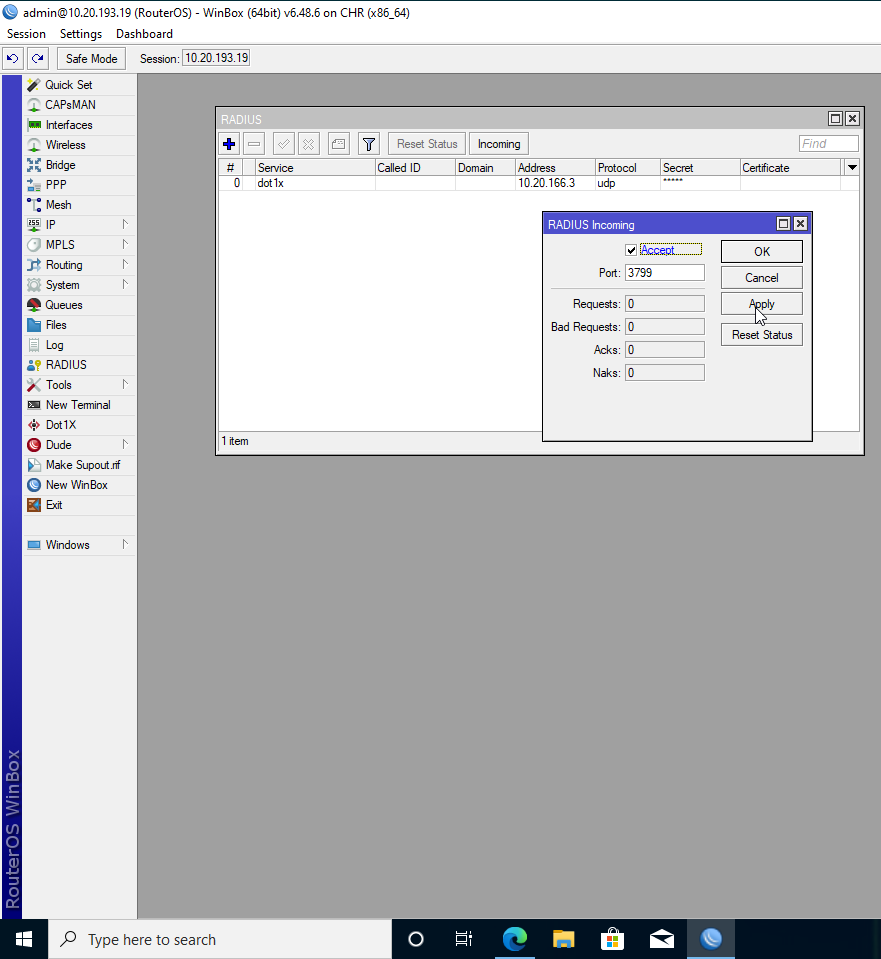
¶ Change of Authority
With the RADIUS tab active (opened), open the Incoming tab. Select the Accept option and specify the port (3799 by default). Confirm with Apply.
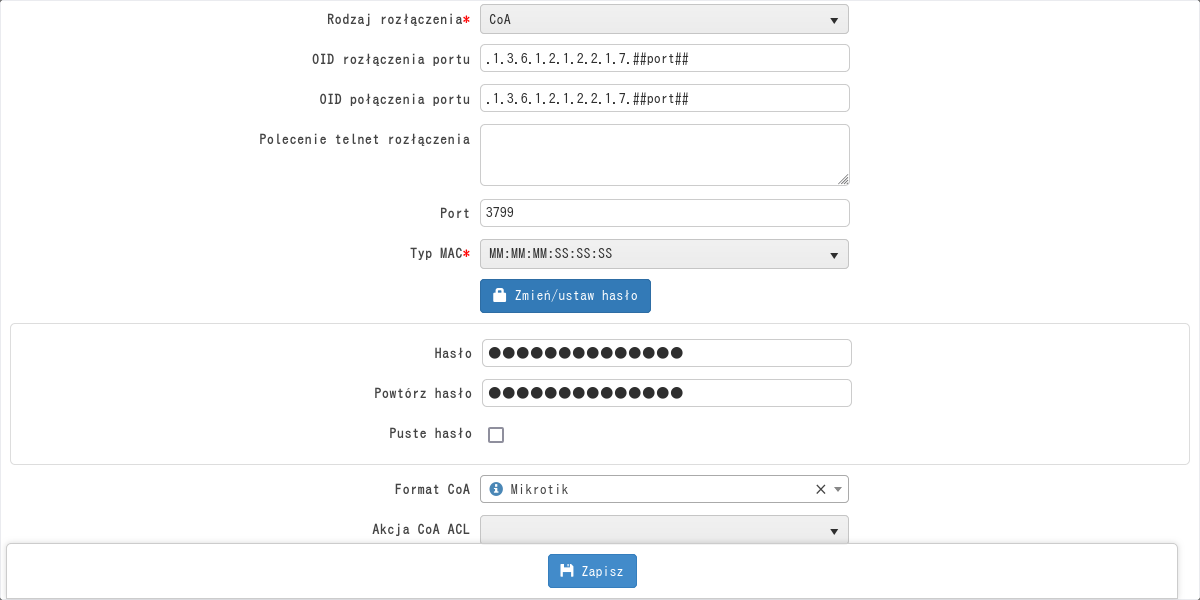
In NACVIEW, select the CoA format Mikrotik, set Port to the port specified in the switch (default 3799) and select set the password, such as the RADIUS password on the switch:
¶ Configuration of authorization
¶ 802.1x Protocol
Open the Dot1X tab and select the Server tab. Using the + button, add a new configuration of the 802.1x authenticator (Dot1x server in Mikrotik terminology. Complete the fields as follows:
Interface: interface nameAuth. Types:dot1xInterim Update: amount of time between theAccounting(hh:mm:ss) packetsAuth. Timeout: 60.00 (default value)Reatrans. Timeout: 30.00 (default value)
Now confirm all with OK to immediately apply configuration and enable authorization.
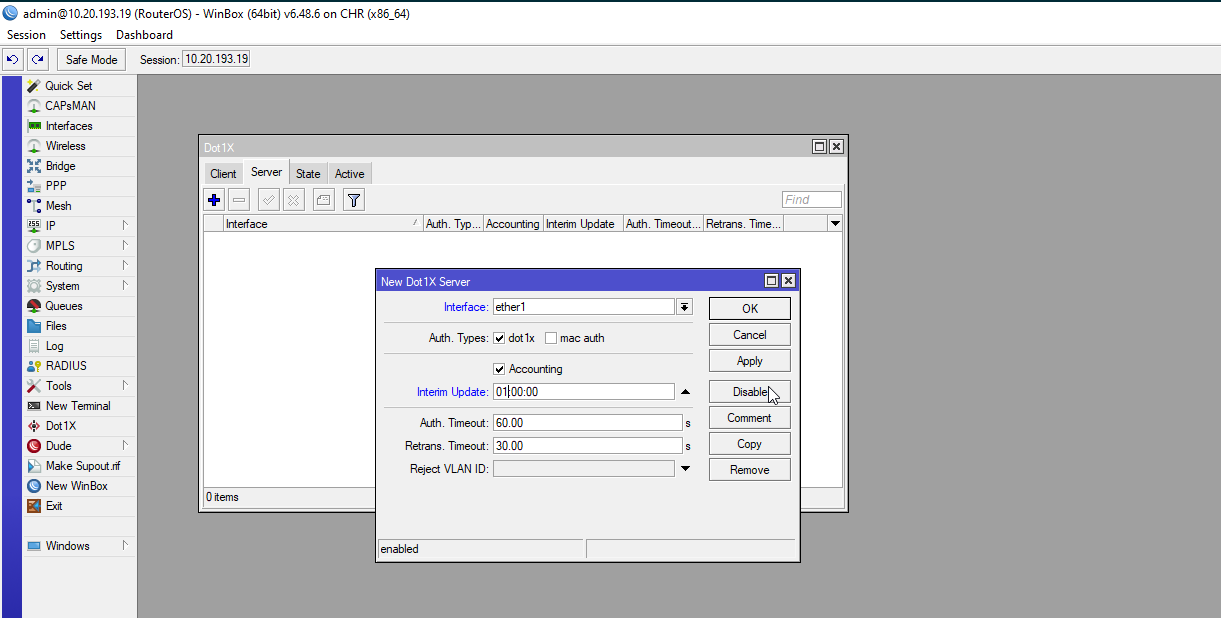
In order to set the configuration, but without enabling port authorization, confirm the settings with the Disable button, then confirm with Yes and OK.

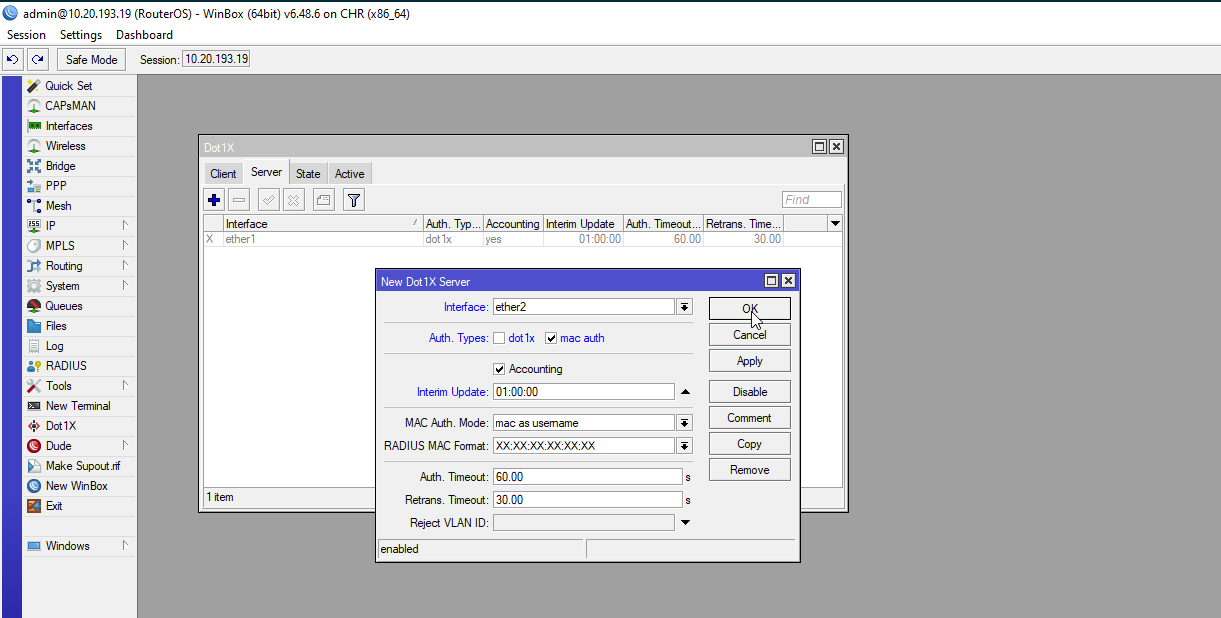
¶ MAC
Open the Dot1X tab and select the Server tab. Using the + button, add a new configuration of the 802.1x authenticator (Dot1x server in Mikrotik terminology). You need to complete the fields as follows:
Interface: interface nameAuth. Types:mac authInterim Update: amount of time between theAccounting(hh:mm:ss) packetsMAC Auth Mode: mac as usernameRADIUS MAC Format: XX:XX:XX:XX:XX:XXAuth. Timeout: 60.00 (default value)Reatrans. Timeout: 30.00 (default value)
¶ 802.1x + fallback to MAC
Open the Dot1X tab and select the Server tab. Using the + button, add a new configuration of the 802.1x authenticator (Dot1x server in Mikrotik terminology). The fields should be completed as follows:
Interface: interface nameAuth. Types:dot1xandmac authInterim Update: amount of time between theAccounting(hh:mm:ss) packetsMAC Auth Mode: mac as usernameRADIUS MAC Format: XX:XX:XX:XX:XX:XXAuth. Timeout: 20.00 (to speed up the transition from 802.1x to MAC authentication)Reatrans. Timeout: 10.00 (as above)

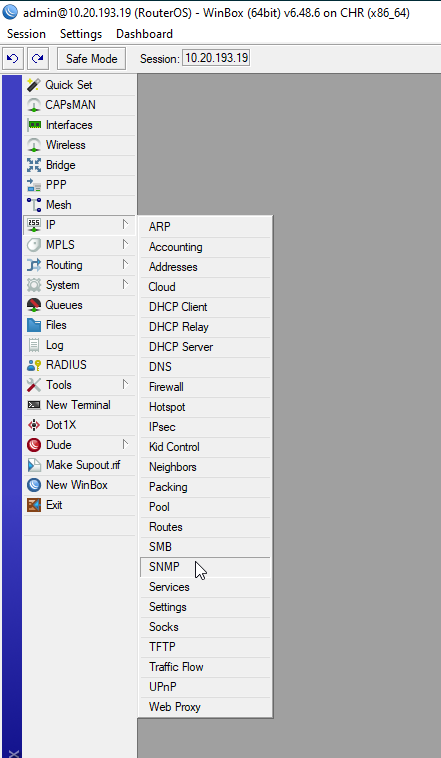
¶ SNMP
¶ SNMP v2c
Open the IP tab and then SNMP from the menu on the left. Then select the Communities option:
You need to give an SNMPv2 name (password) (Name). The Read Access box must be checked. Optionally, the Write Access field can be checked. Then confirm with OK.

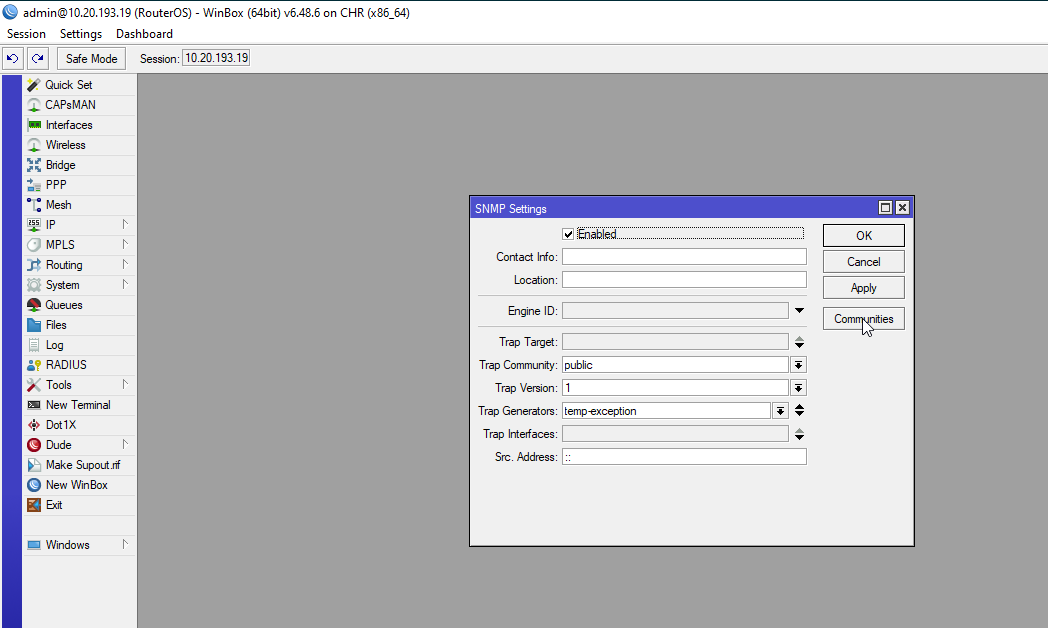
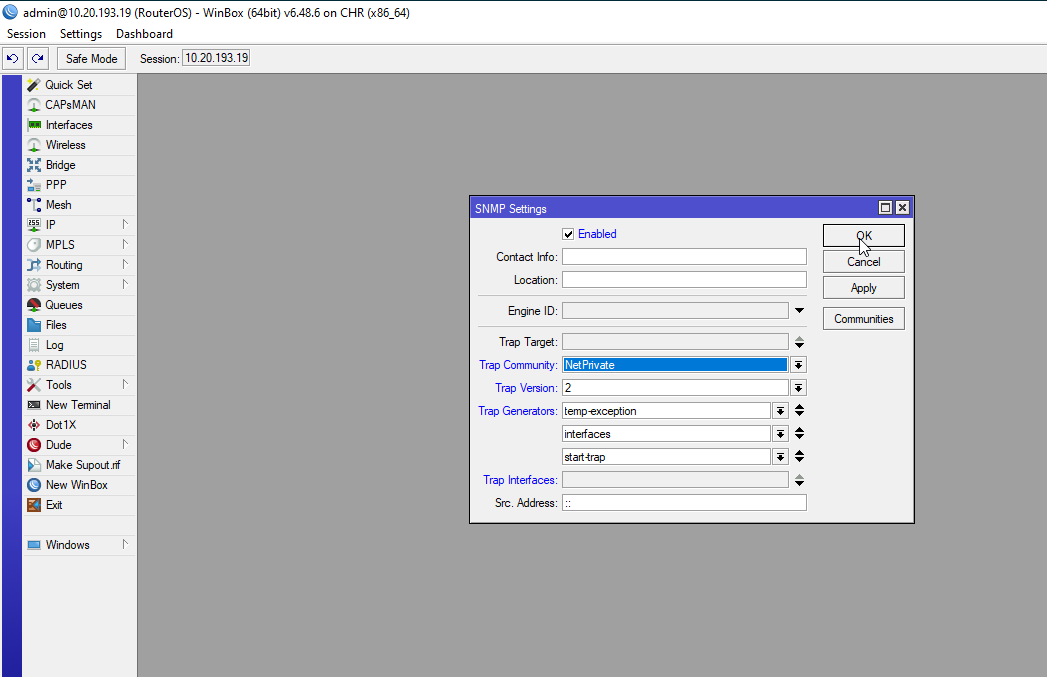
IN the SNMP Settings window set:
Trap Communitynewly created SNMPv2 credentialsTrap Versionon 2
Additionally, you can set Src. Address to the management address of the switch. Confirm with OK.
¶ SNMP v3
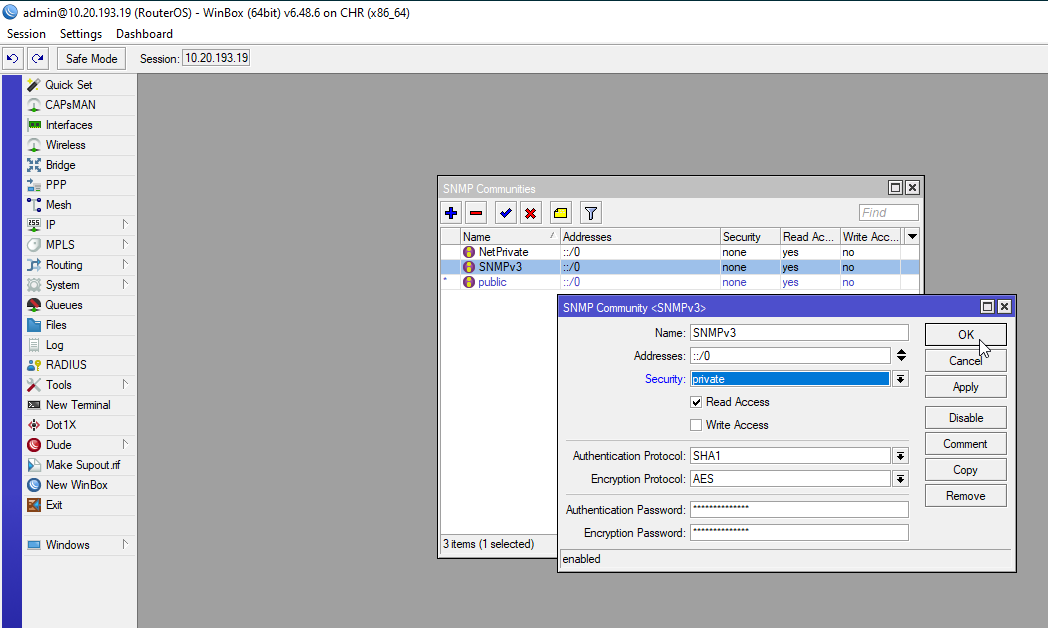
Open the IP tab and then SNMP from the menu on the left. Then select the Communities option.
You need to give:
Name: SNMPv3 usernameSecurity:privateorauthorized- same as in NACVIEW credentialsAuthentication Protocol: same as in NACVIEW credentialsEncryption Protocol: same as in NACVIEW credentialsAuthentication PasswordandEncryption Password: same as the passwords in NACVIEW credentials
The Read Access box must be checked. Optionally, the Write Access field can be checked. Confirm with OK.
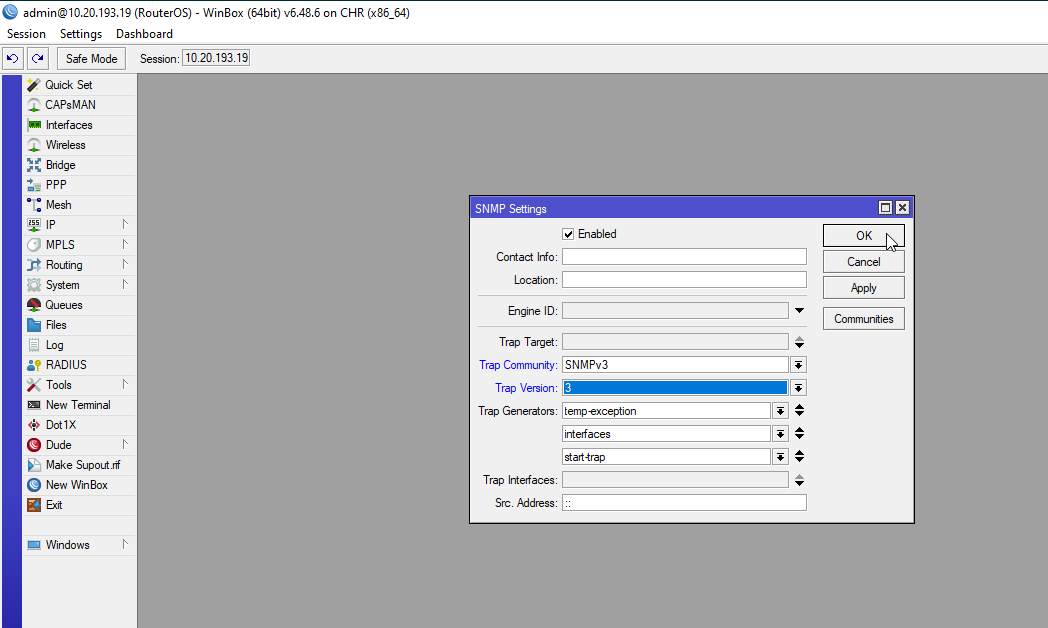
In the SNMP Settings window set:
Trap Communitynewly created SNMPv3 credentialsTrap Versionon 3
Additionally, you can set Src. Address to the management address of the switch. Confirm with OK.
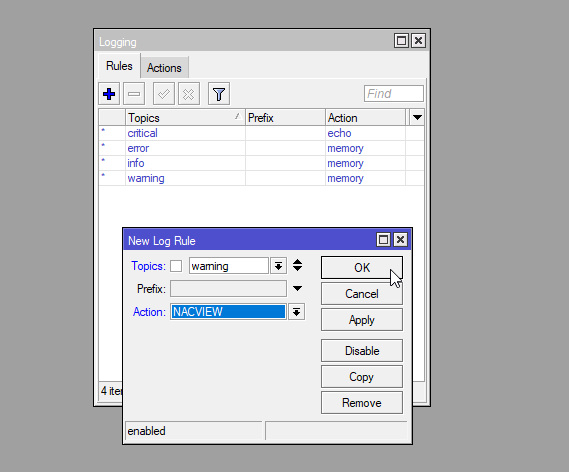
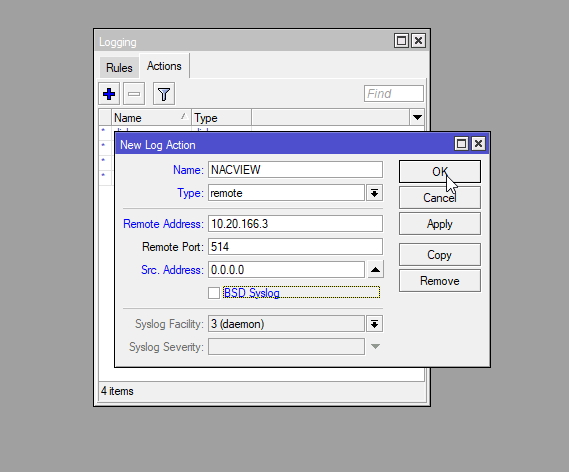
¶ Syslog
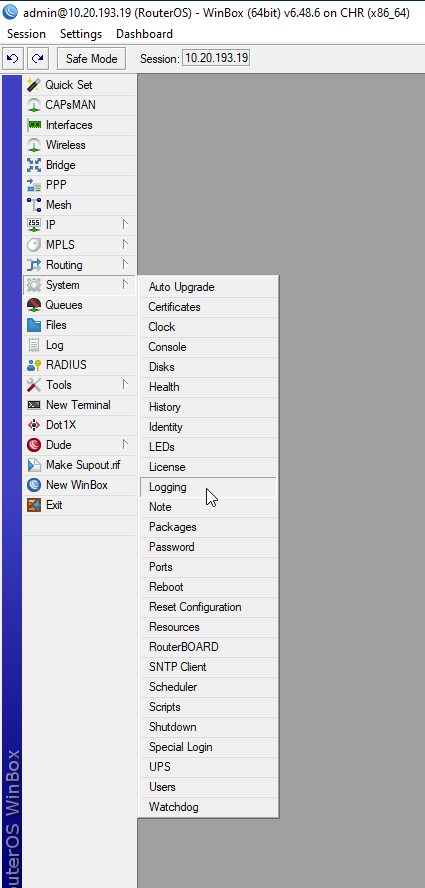
Open the System tab and then Logging from the menu on the left. Then select the Action tab.
With the + button add this new action:
Name: action nameType: `remoteRemote Address: VRRP NACVIEW addressRemote Port: 514 (default value)
Confirm with OK.
Now go to the Rules tab. Use the + button to add a new rule:
Topics: the log level sent to NACVIEW or specific log topics (e.g.radius)Action: the action created above