¶ MICROSENS G6 Micro-Switch
Model: G6
Software: Version: 12.8.0a
¶ Configure the connection to the RADIUS server.
After logging into the Microsens switch's management panel, open the RADIUS tab in the Management section. Then configure a new RADIUS server. You can add a new entry using the blue + in the lower right corner, specifying the name of the server in the add table entry field beforehand.
The fields should be completed as follows:
Authorization:
Name: the name of the NACVIEW server (authorization).Server type: RADIUSHost address: the VRRP address of the NACVIEW server.UDP port: 1812Interim interval: 0.
Accounting:
Name: name of NACVIEW server (accounting).Server type: RADIUSHost address: VRRP address of the NACVIEW server.UDP port: 1813Interim interval: the amount of time betweenAccountingpackets, e.g. 600 (10 minutes).
Next, save the configuration (Apply to running configuration button). Then enter the RADIUS key in the fields under Enter shared secret. Then generate the RADIUS key hash using the Enter shared secret button, then save (Apply to running configuration).

¶ Authentication configuration
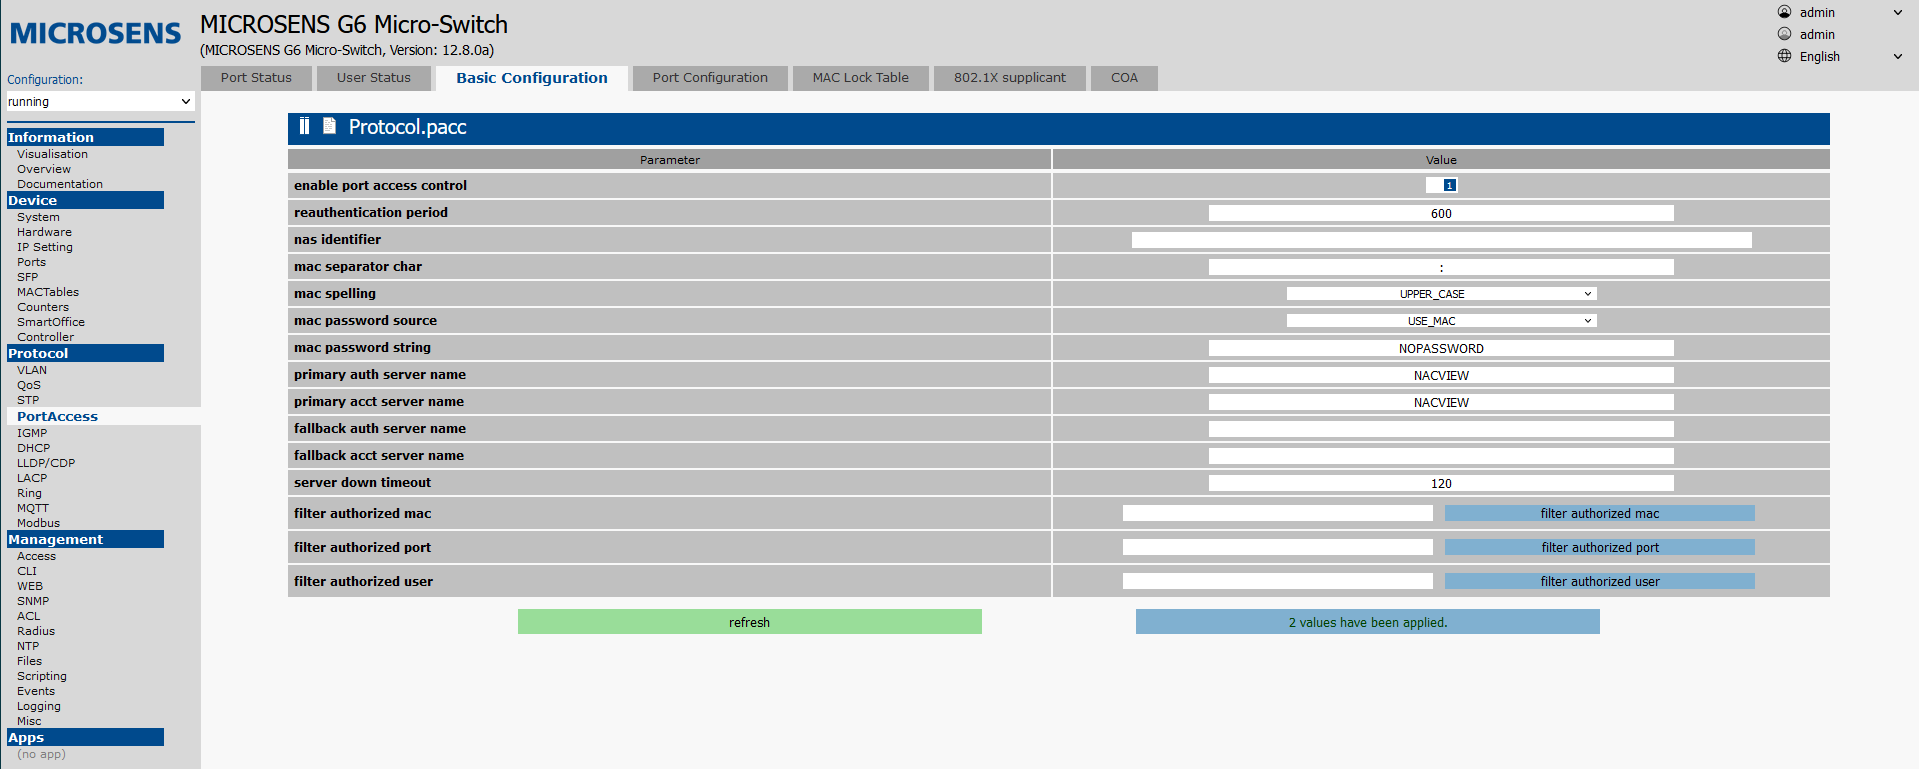
Go to the PortAccess tab, then to the Basic configuration tab. Set the fields as follows:
Enable port access control: true.Reauthemtication period: 600-1800 (10-30 min).NAS identifier: switch name.Mac separator:: (colon).Mac spelling: UPPER_CASEMac password source: USE_MACMac password string: NOPASSWORDPrimary auth server name: NACVIEW server name from "Configuring connection to RADIUS server".Primary acct server name: name of the NACVIEW server from "Configuration of connection to RADIUS server".
Next, save the configuration (Apply to running configuration button).
¶ Port configuration
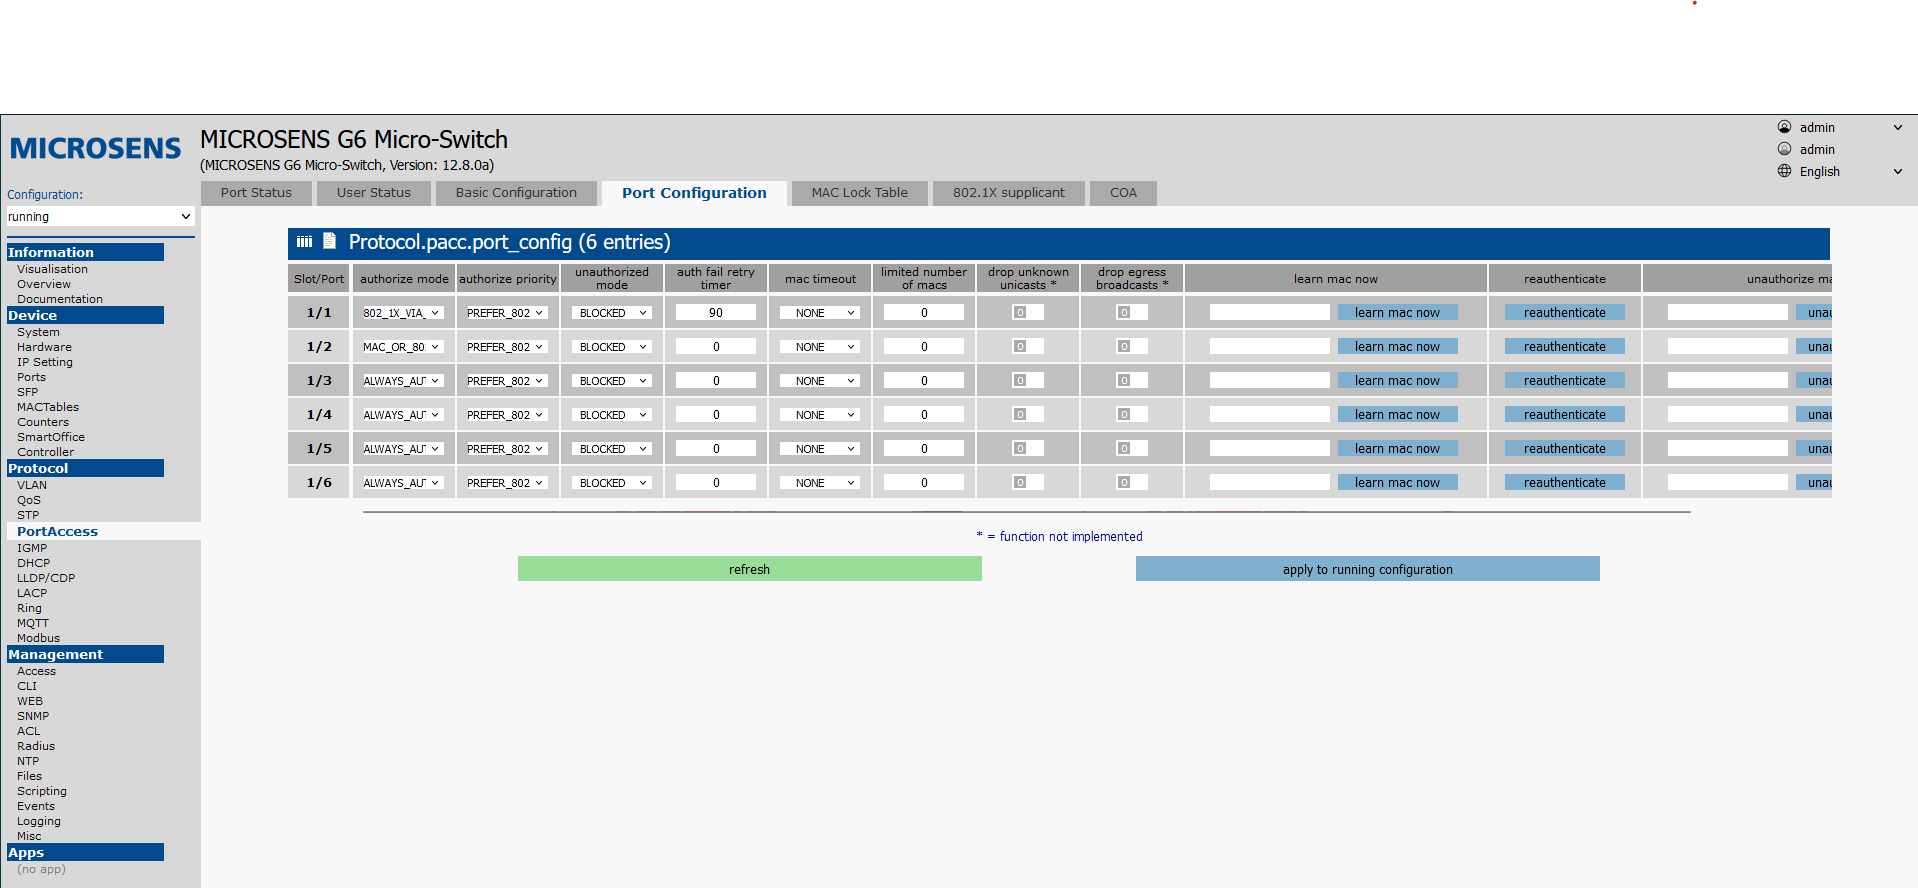
¶ To set the configuration, but without enabling authorization on the port, set the value of the Authorize mode field to ALWAYS_AUTHORIZED.
Open the Port Configuration tab. Set the following fields for all interfaces on which authorization is to be enabled (port 1/1 in the example). Then confirm with Apply to running configuration.
¶ 802.1x
Authorize mode: 802_1X_VIA_RADIUSAuthorize priority: PREFER_802_1XUnathorized mode: BLOCKEDAuth fail timer: 90
¶ MAC
Authorize mode: MAC_VIA_RADIUSAuthorize priority: PREFER_MACUnathorized mode: BLOCKEDAuth fail timer: 90
¶ 802.1x + fallback to MAC
Authorize mode: MAC_OR_802_1X_VIA_RADIUSAuthorize priority: PREFER_802_1XUnathorized mode: BLOCKEDAuth fail timer: 30
¶ Administrative access control
¶ Configuring the connection to the TACACS+ server.
After logging into the Microsens switch's management panel, open the RADIUS tab in the Management section. Then configure a new RADIUS server. You can add a new entry using the blue + in the lower right corner, specifying the name of the server in the add table entry field beforehand.
The fields should be completed as follows:
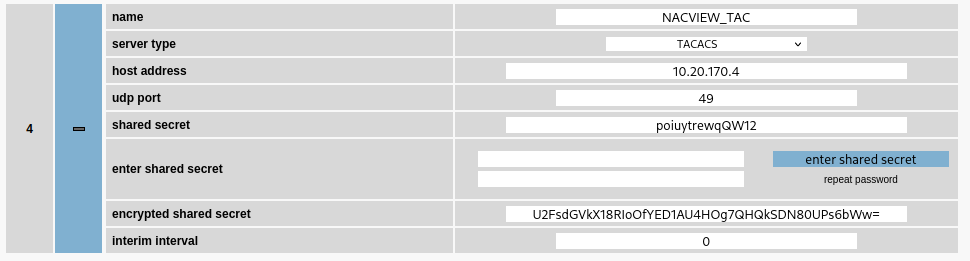
Authorization:
Name: NACVIEW server name (authorization).Server type: TACACS.Host address: the VRRP address of the NACVIEW server.UDP port: 49Interim interval: 0.
Next, save the configuration (Apply to running configuration button). Next, enter the RADIUS key in the fields under Enter shared secret. Then generate the RADIUS key hash using the Enter shared secret button, then save (Apply to running configuration).
If you use the TACACS server as a means of authorization, create a user with the set privileges (Management -> Access -> User) and assign him to the appropriate privilege level (priv. lvl 0/1/15) of TACACS. Then, in the NACVIEW policy, assign the appropriate authorization level using the standard attribute.
¶ Configure the connection to the RADIUS server.
After logging into the Microsens switch's management panel, open the RADIUS tab in the Management section. Then configure a new RADIUS server. You can add a new entry using the blue + in the lower right corner, specifying the name of the server in the add table entry field beforehand.
The fields should be completed as follows:
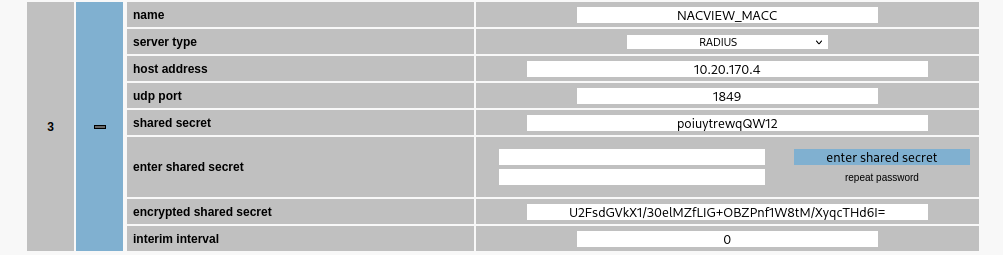
Authorization:
Name: the name of the NACVIEW server (authorization).Server type: RADIUSHost address: the VRRP address of the NACVIEW server.UDP port: 1849Interim interval: 0.
Next, save the configuration (Apply to running configuration button). Next, enter the RADIUS key in the fields under Enter shared secret. Then generate the RADIUS key hash using the Enter shared secret button, then save (Apply to running configuration).
If you use a RADIUS server as a means of authorization, create a user with the given permissions (Management -> Access -> User) and assign it to the appropriate policy using the Filter-ID attribute.
¶ Authorization configuration
After logging into the Microsens switch's management panel, open the Access tab in the Management section. Set the appropriate authentication mode and specify the TACACS server and mapping of local users to authorization levels (Management.access.tacacs) or specify a RADIUS server.
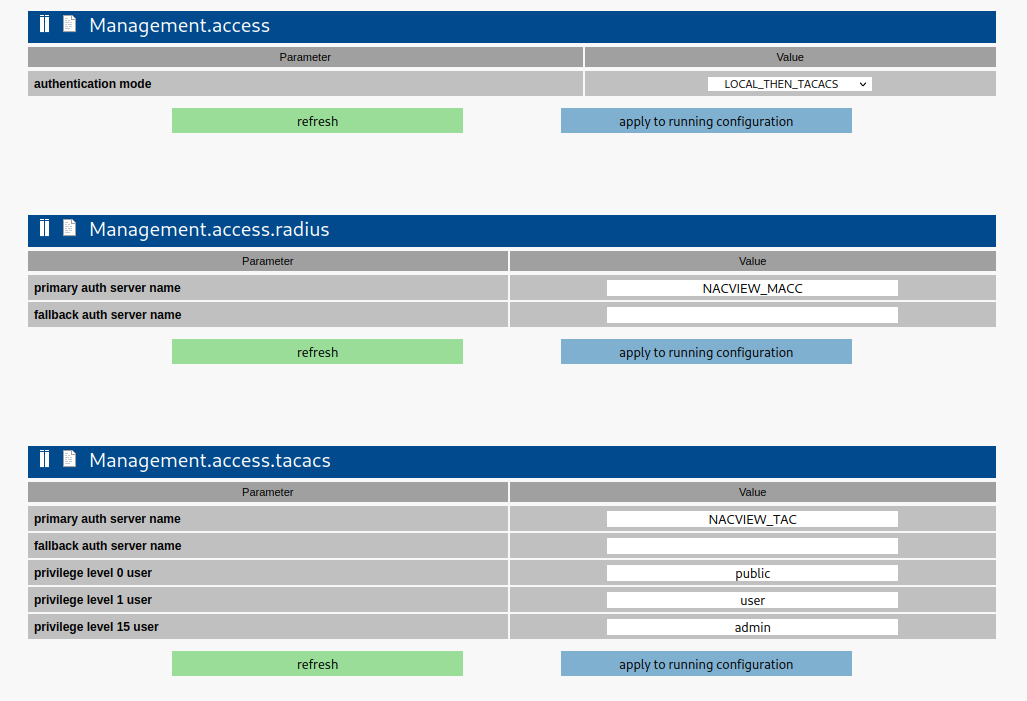
Then save the configuration (button Apply to running configuration).
¶ SNMP
¶ SNMP v3
Open the SNMP tab in the Management section.
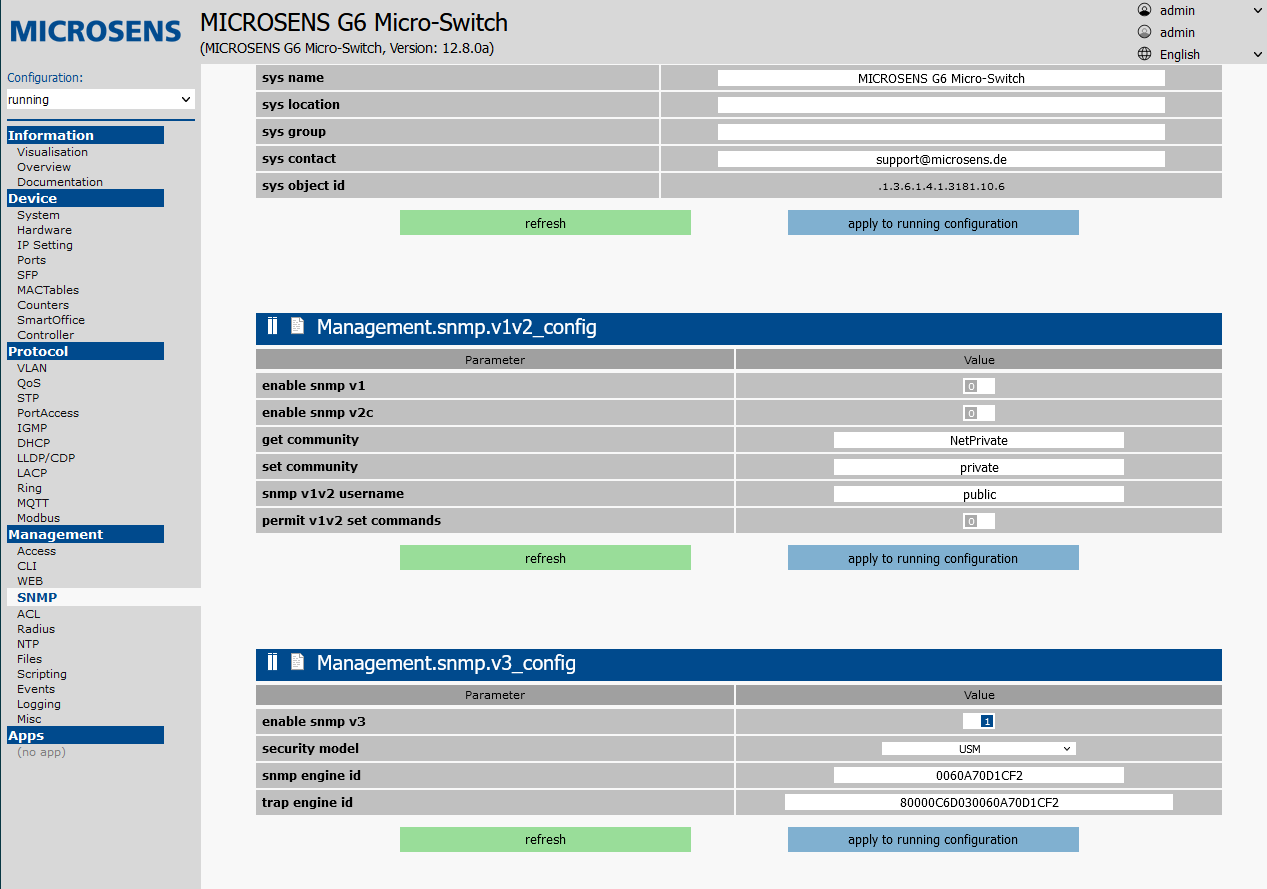
Complete the device_info table as required. enable snmp v1, enable snmp v2c and permit v1v2 set commands should be set to 0 (disabled).
enable snmp v3 should be set to 1 (enabled), security model to VACM.
Then confirm with Apply to running configuration.
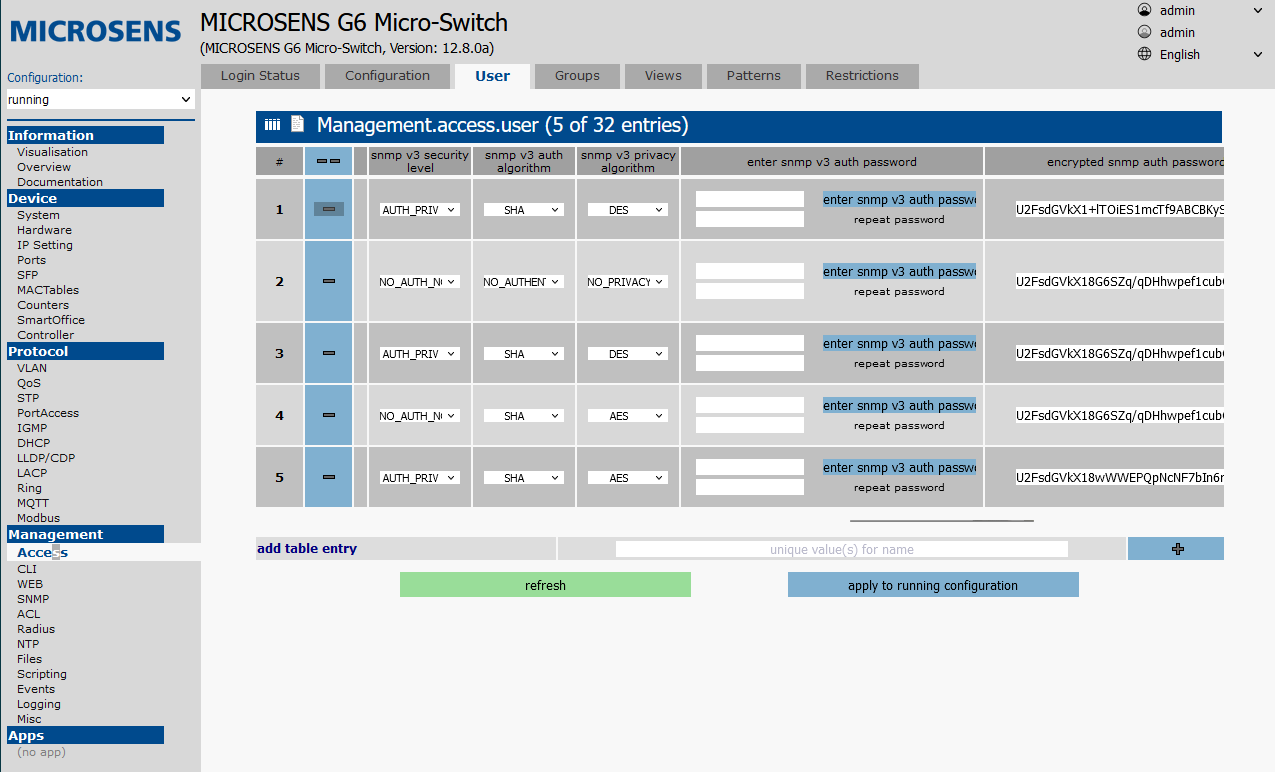
Next, configure the user whose credentials will be used by NACVIEW.
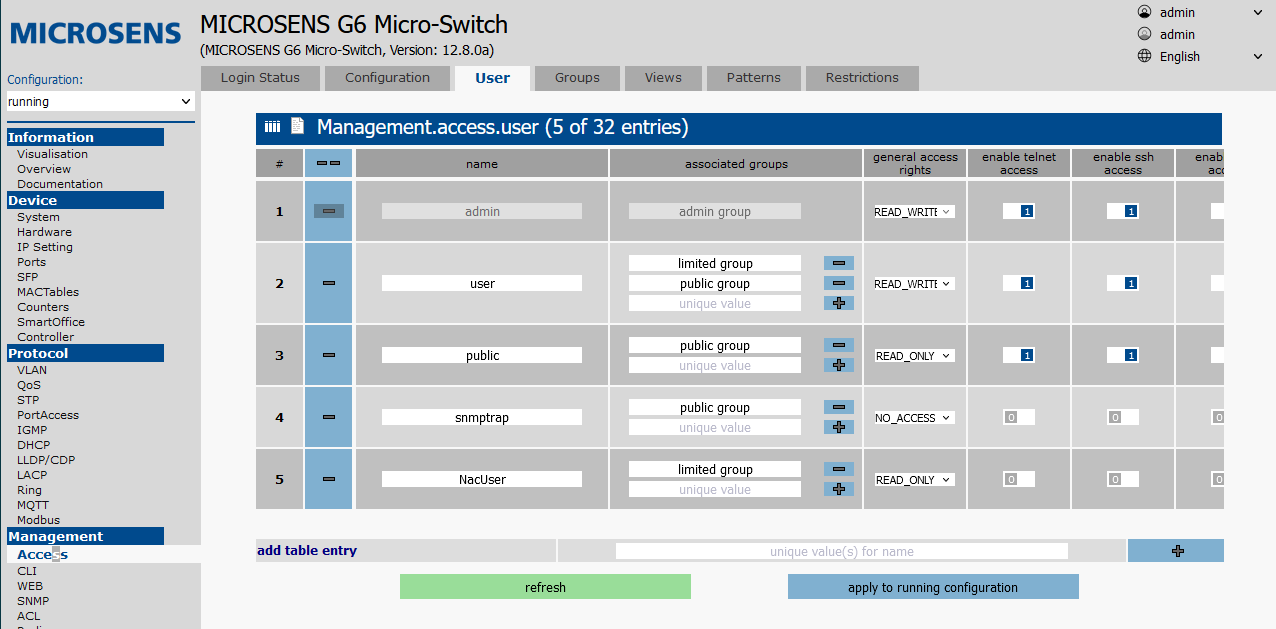
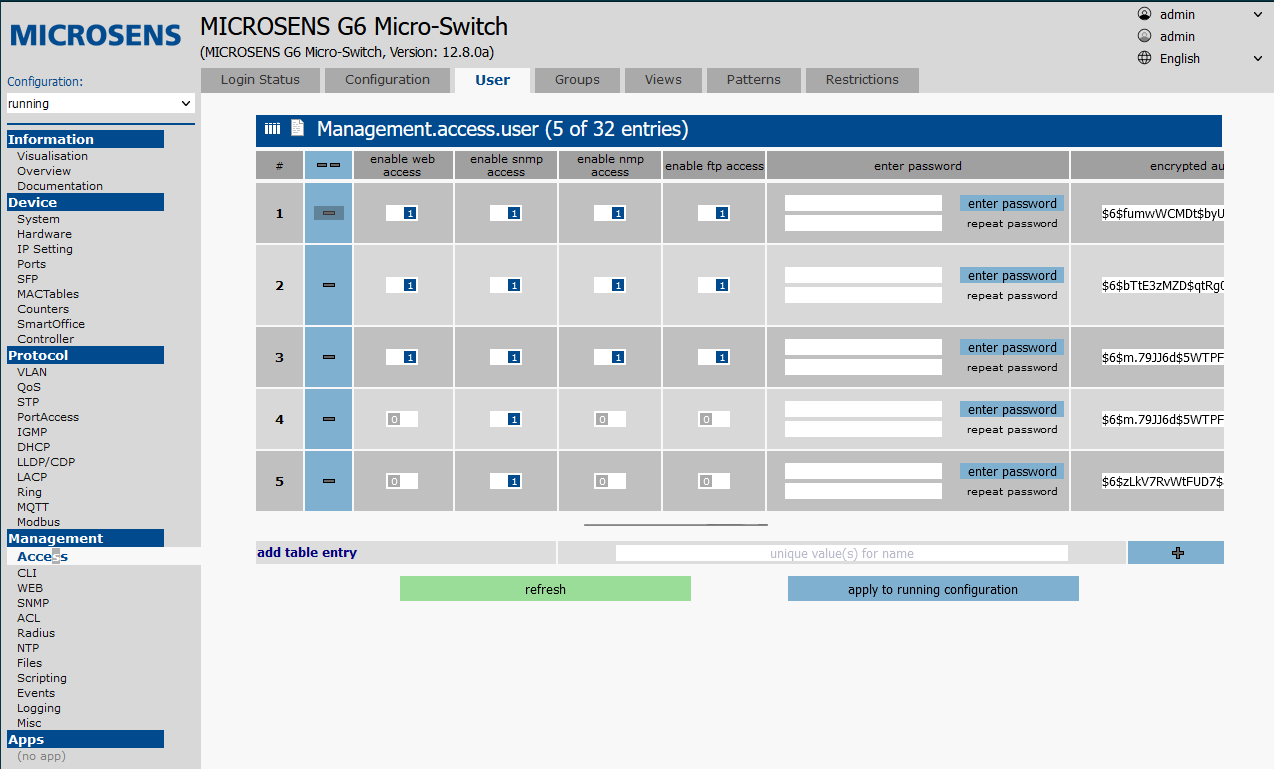
On the Access tab in the Management section, open the Groups tab. Either delete from the predefined limited group or create a group with the appropriate credentials. Then in the Users tab, add a new user:
name: username.associated groups: appropriate permission groups.general access rights: READ_ONLYenable telnet access: 0enable ssh access: 0enable web access: 0enable snmp access: 1enable nmp access: 0enable ftp access: 0enter password: device login password, negligible for SNMP.snmp v3 security level: AUTH_PRIVsnmp v3 auth algorithm: SHAsnmp v3 privacy algorithm: AESenter snmp v3 auth password,enter snmp v3 privacy password: enter SNMPv3 passwords and confirm withenter snmp v3 auth/priv password.
¶ SNMP v2c
Open the SNMP tab in the Management section.
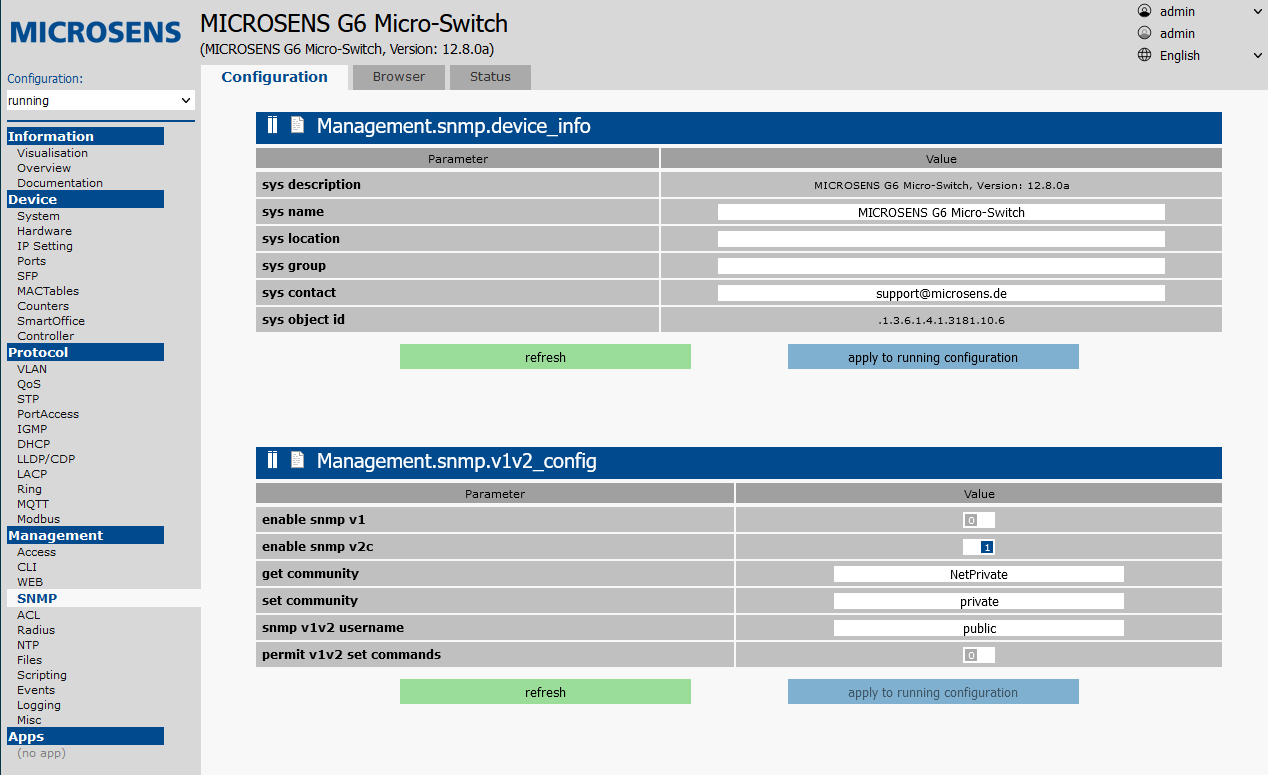
Complete the device_info table as required.
enable snmp v1 and permit v1v2 set commands should be set to 0 (disabled), enable snmp v2c to 1 (enabled).
Set SNMPv2 community(password) (get community) and possibly additionally snmp v1v2 username field to restrict access.
Then confirm with Apply to running configuration.
¶ Syslog
Open the Logging tab in the Management section, then go to the Targets tab.
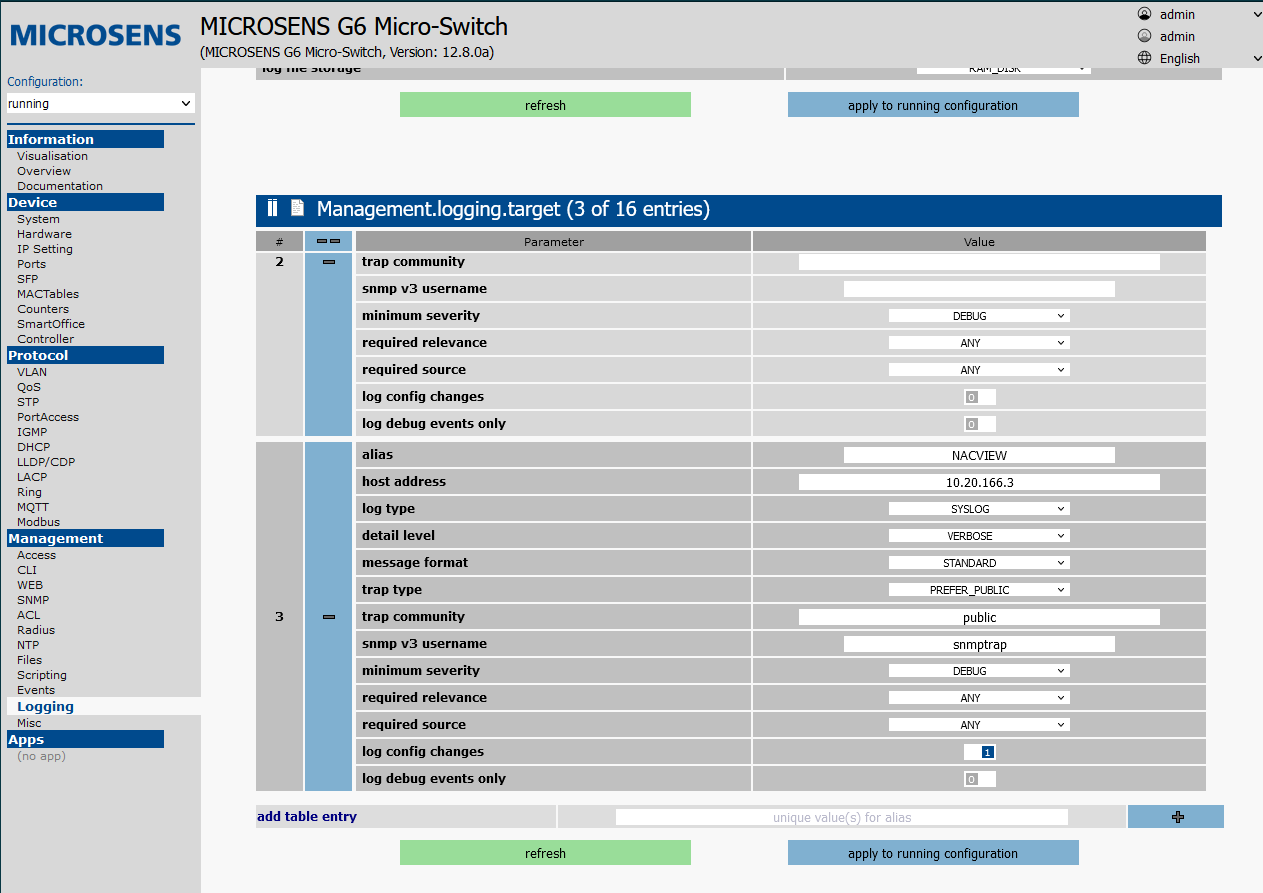
Add a new table entry (add table entry), then set the following values:
host address: VRRP NACVIEW address.log type: syslogdetail level: verboseminimum severity: debuglog config changes: 1
Then confirm with Apply to running configuration.