¶ Windows 11 | Wired network | TLS authorization (certificate)
1. Download the certificate.
2. Run the Certificate Import Wizard by double clicking on the downloaded file.
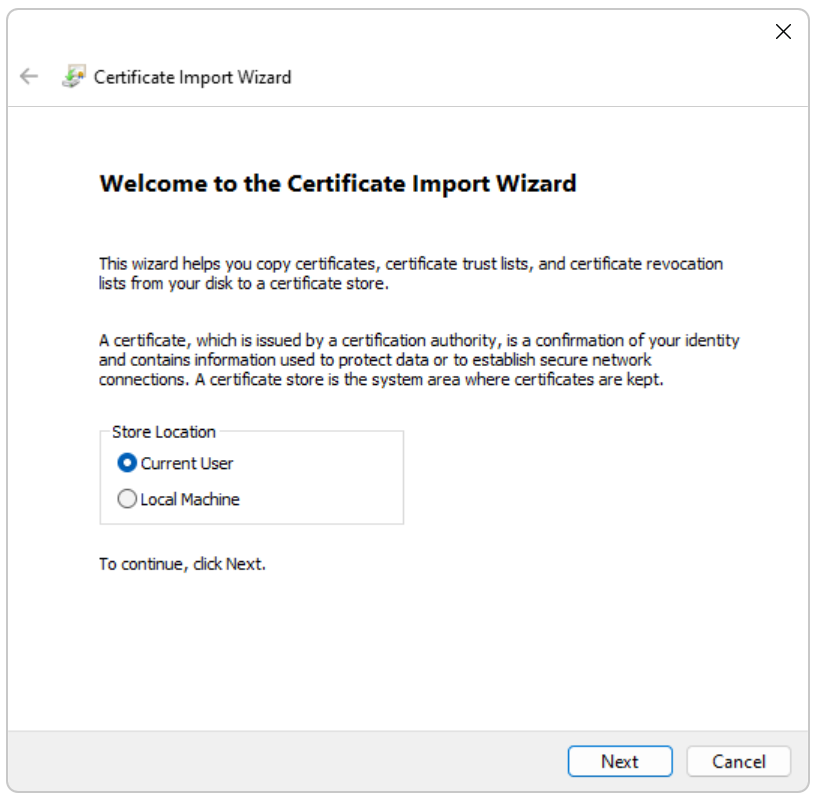
3. Click the Next button in the two following windows.
4. Complete the Password field by entering the key down for the certificate.
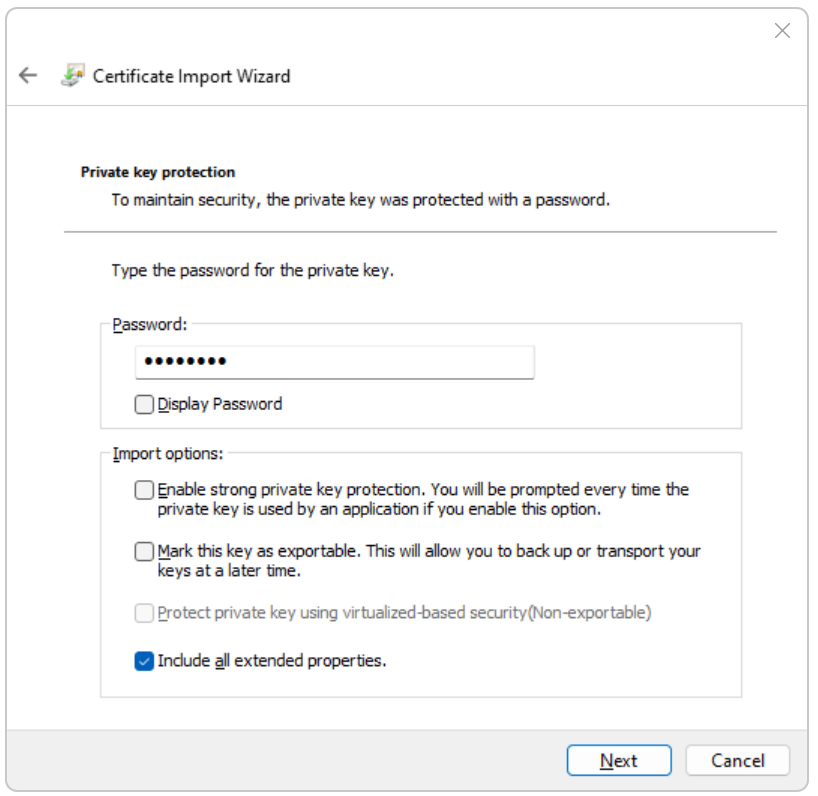
5. Make sure the Enable strong private key protection (...) option is unchecked and go to Next.
6. Select the Automatically select certificate store based on certificate type option.
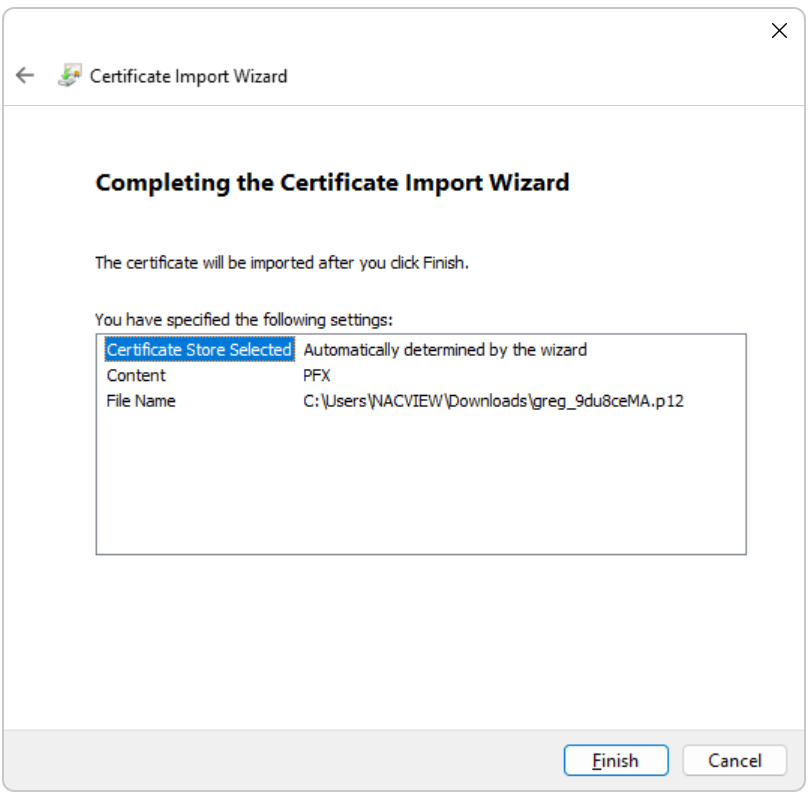
7. Proceed to Next again and click Finish.
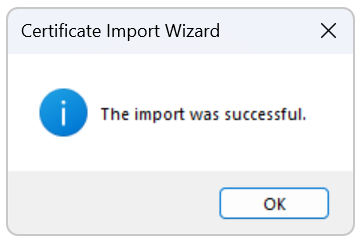
8. After the import completes successfully, click OK.
9. Search the Services application in the system and open it.
10. In the list of services, find Wired AutoConfig and double-click it.
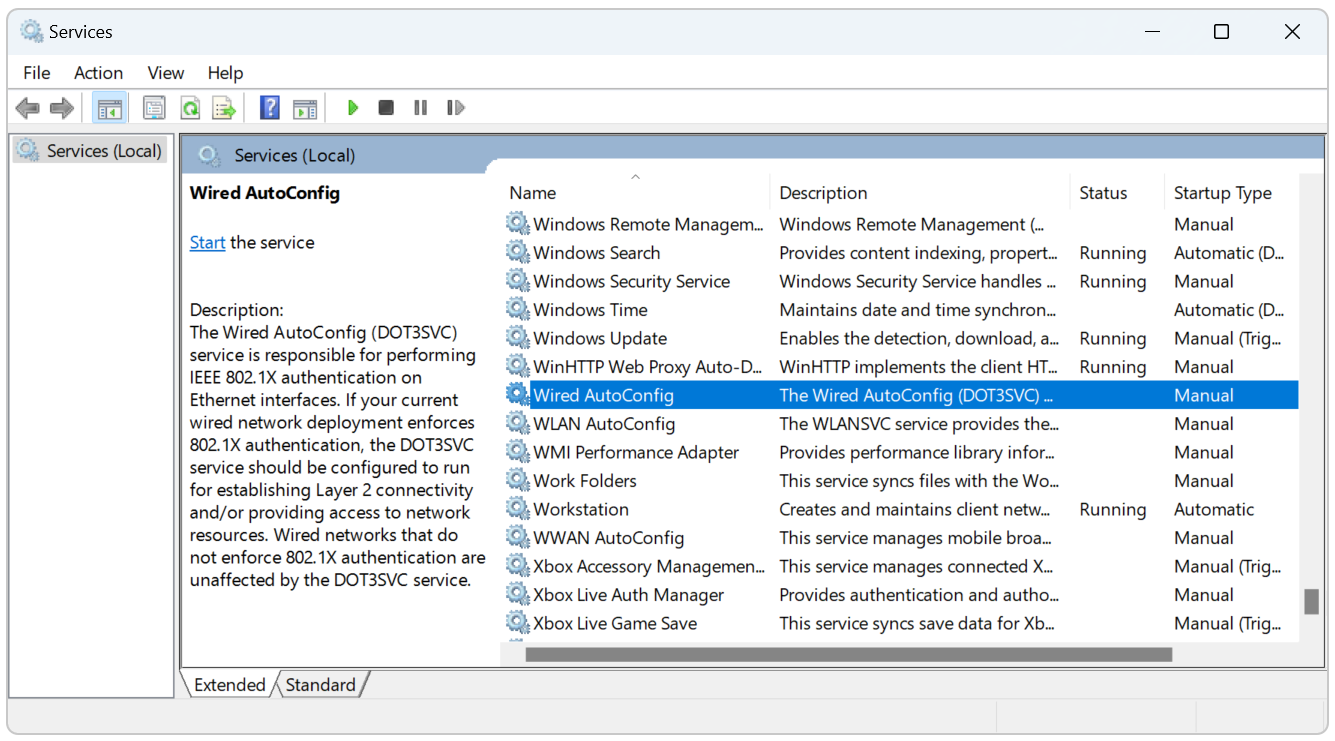
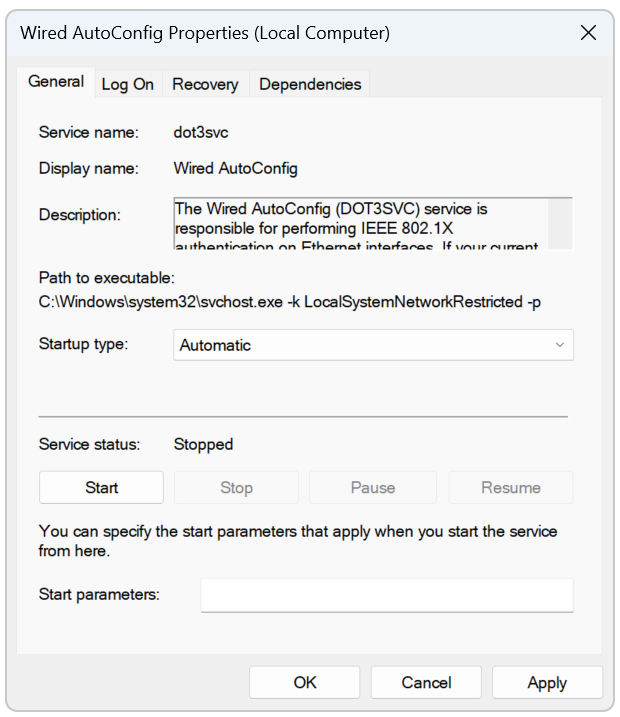
11. In the displayed window, in the Startup type field, select Automatic.
12. Click the Start button and confirm with OK.
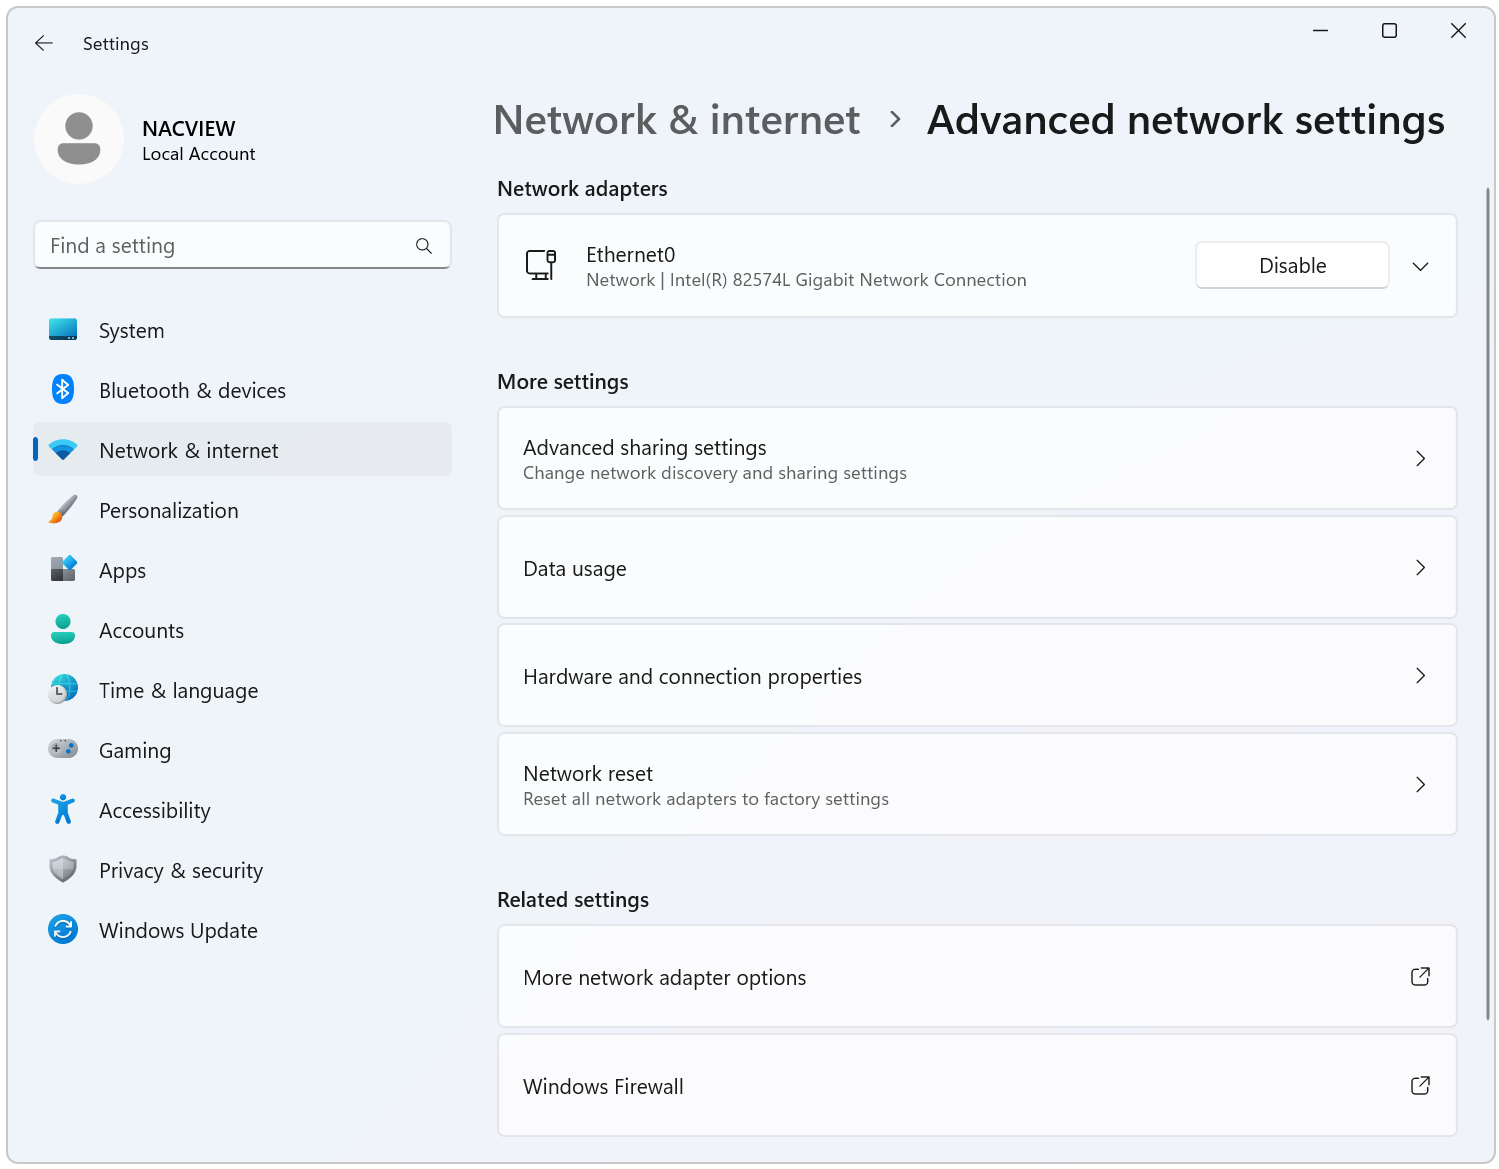
13. From Windows main menu click the Settings > Network & internet > Advanced network settings > More network adapter options.
14. Right-click on the wired network you want to configure and enter: Properties.
15. In the displayed window, go to the Authentication tab.
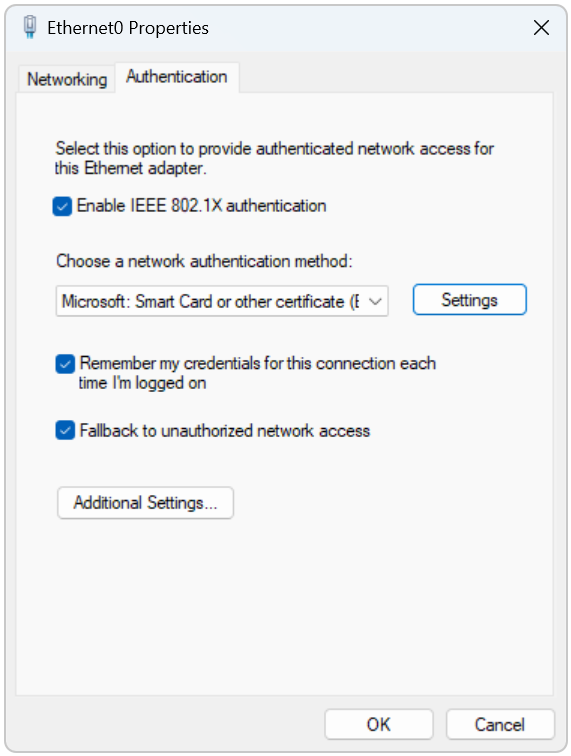
16. As the network authentication method- select: Microsoft: Smart Card or other certificate and click the Settings button.
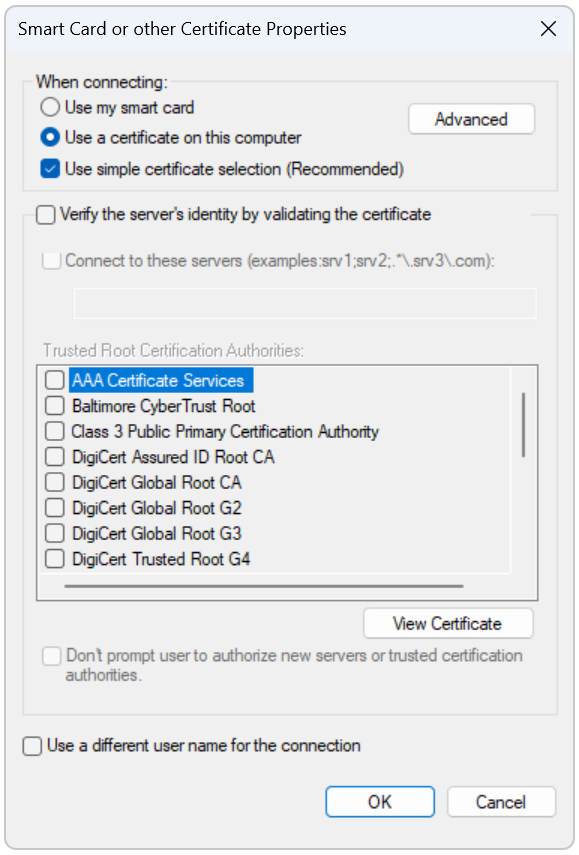
17. Go to the Settings and select: Use certificate on this computer and Use simple certificate selection..., however please bare in mind that:
With the release of the new Windows 11 operating system, the way how to verify server certificates has changed. A more restrictive policy of validating the server name compatibility with the information, contained in the certificate, has been imposed. On Windows 10 systems, the value from the Subject field is used for comparison, whereas on Windows 11, this value is in the Subject Alternative Names field.
When generating the server certificate we recommend that you configure the name settings in the Subject field and the Subject Alternative Names field. This will allow you to create a universal verification mechanism for both Windows 11 and Windows 10 systems working correctly. In some networks it may also be a good idea to add additional IP addresses as alternative server names. On the supplicant’s side, it is also possible to use the appropriate option to select a previously installed certificate and choose the server name verification option by entering the required name in accordance with the format in the system prompt.
18. Confirm with OK all your open windows. You can connect it now to the network.