¶ 1. Radius Configuration on Extreme
1.1. From the menu: Configure > Common Objects > External RADIUS Servers > click this sign + (plus) and give a Name and also IP address object type, set your own Shared Secret (in further steps you will enter it in NACVIEW).

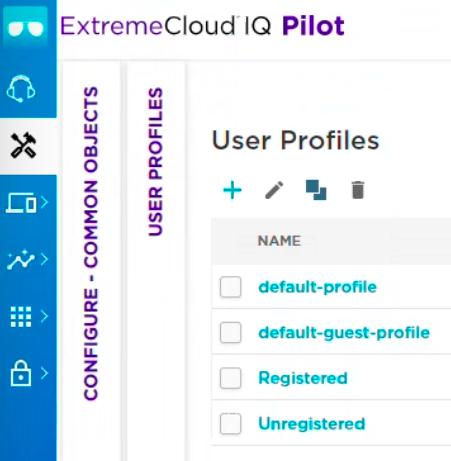
1.2. Go to: Configure User Profiles: Configure > Common Objects > Policy > User Profiles: Click the + (plus) sign, then add 2 types of users: Registered and Unregistered.
1.3. An important element is the VLAN setting. This is guest VLAN.
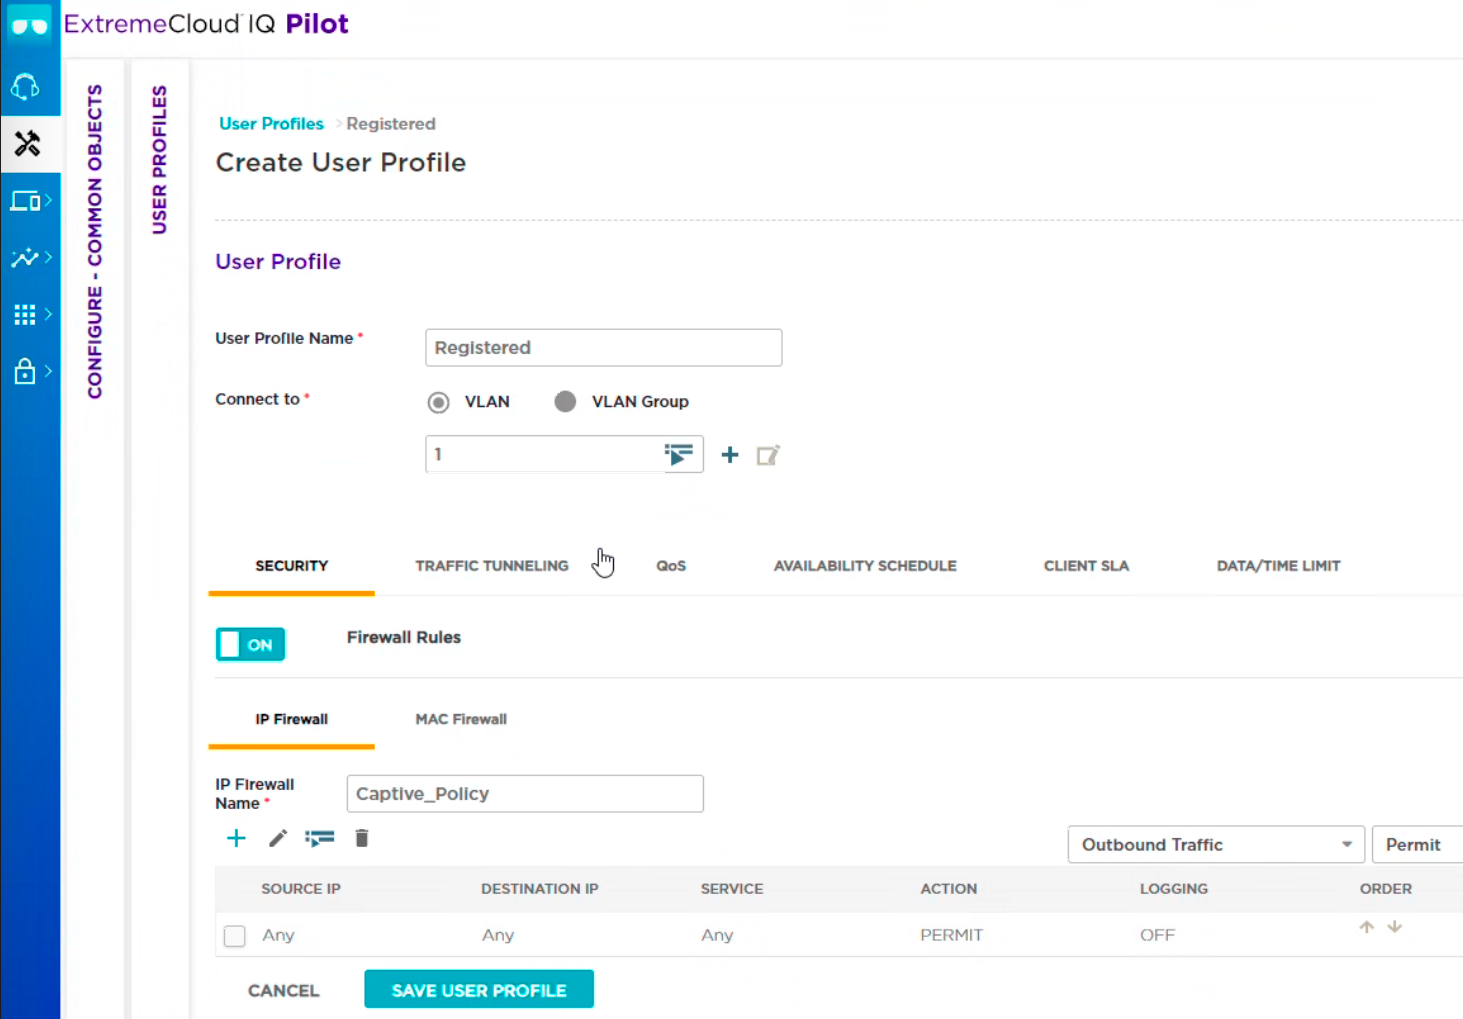
1.4. For the Unregistered user, you can clone the existing policy so that you already have the basic services enabled.
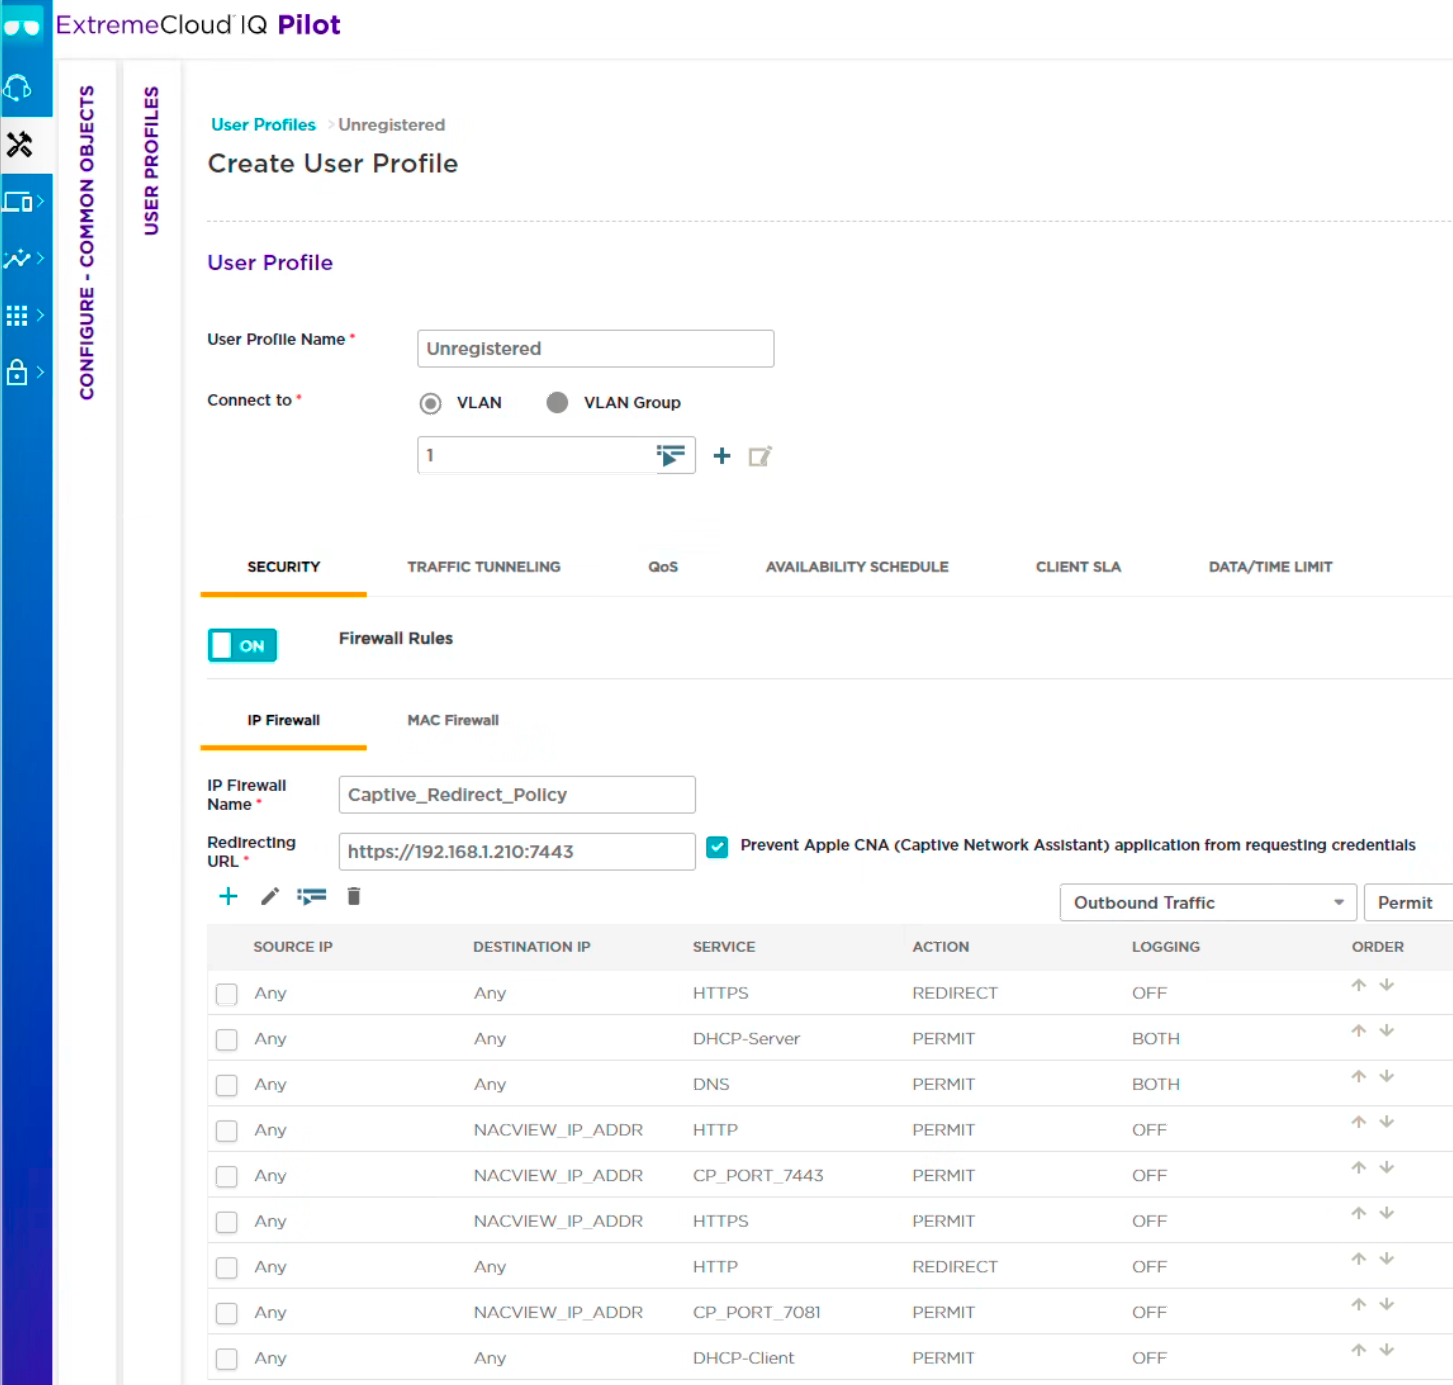
Pay attention to set the correct value in the Redirecting URL field to the name entered there: instead of the IP address put a name corresponding with the certificate, so that web browsers do not report any problem.
1.5. The next step is to to configure VLAN: Configure > Common Objects > Policy > SSID:
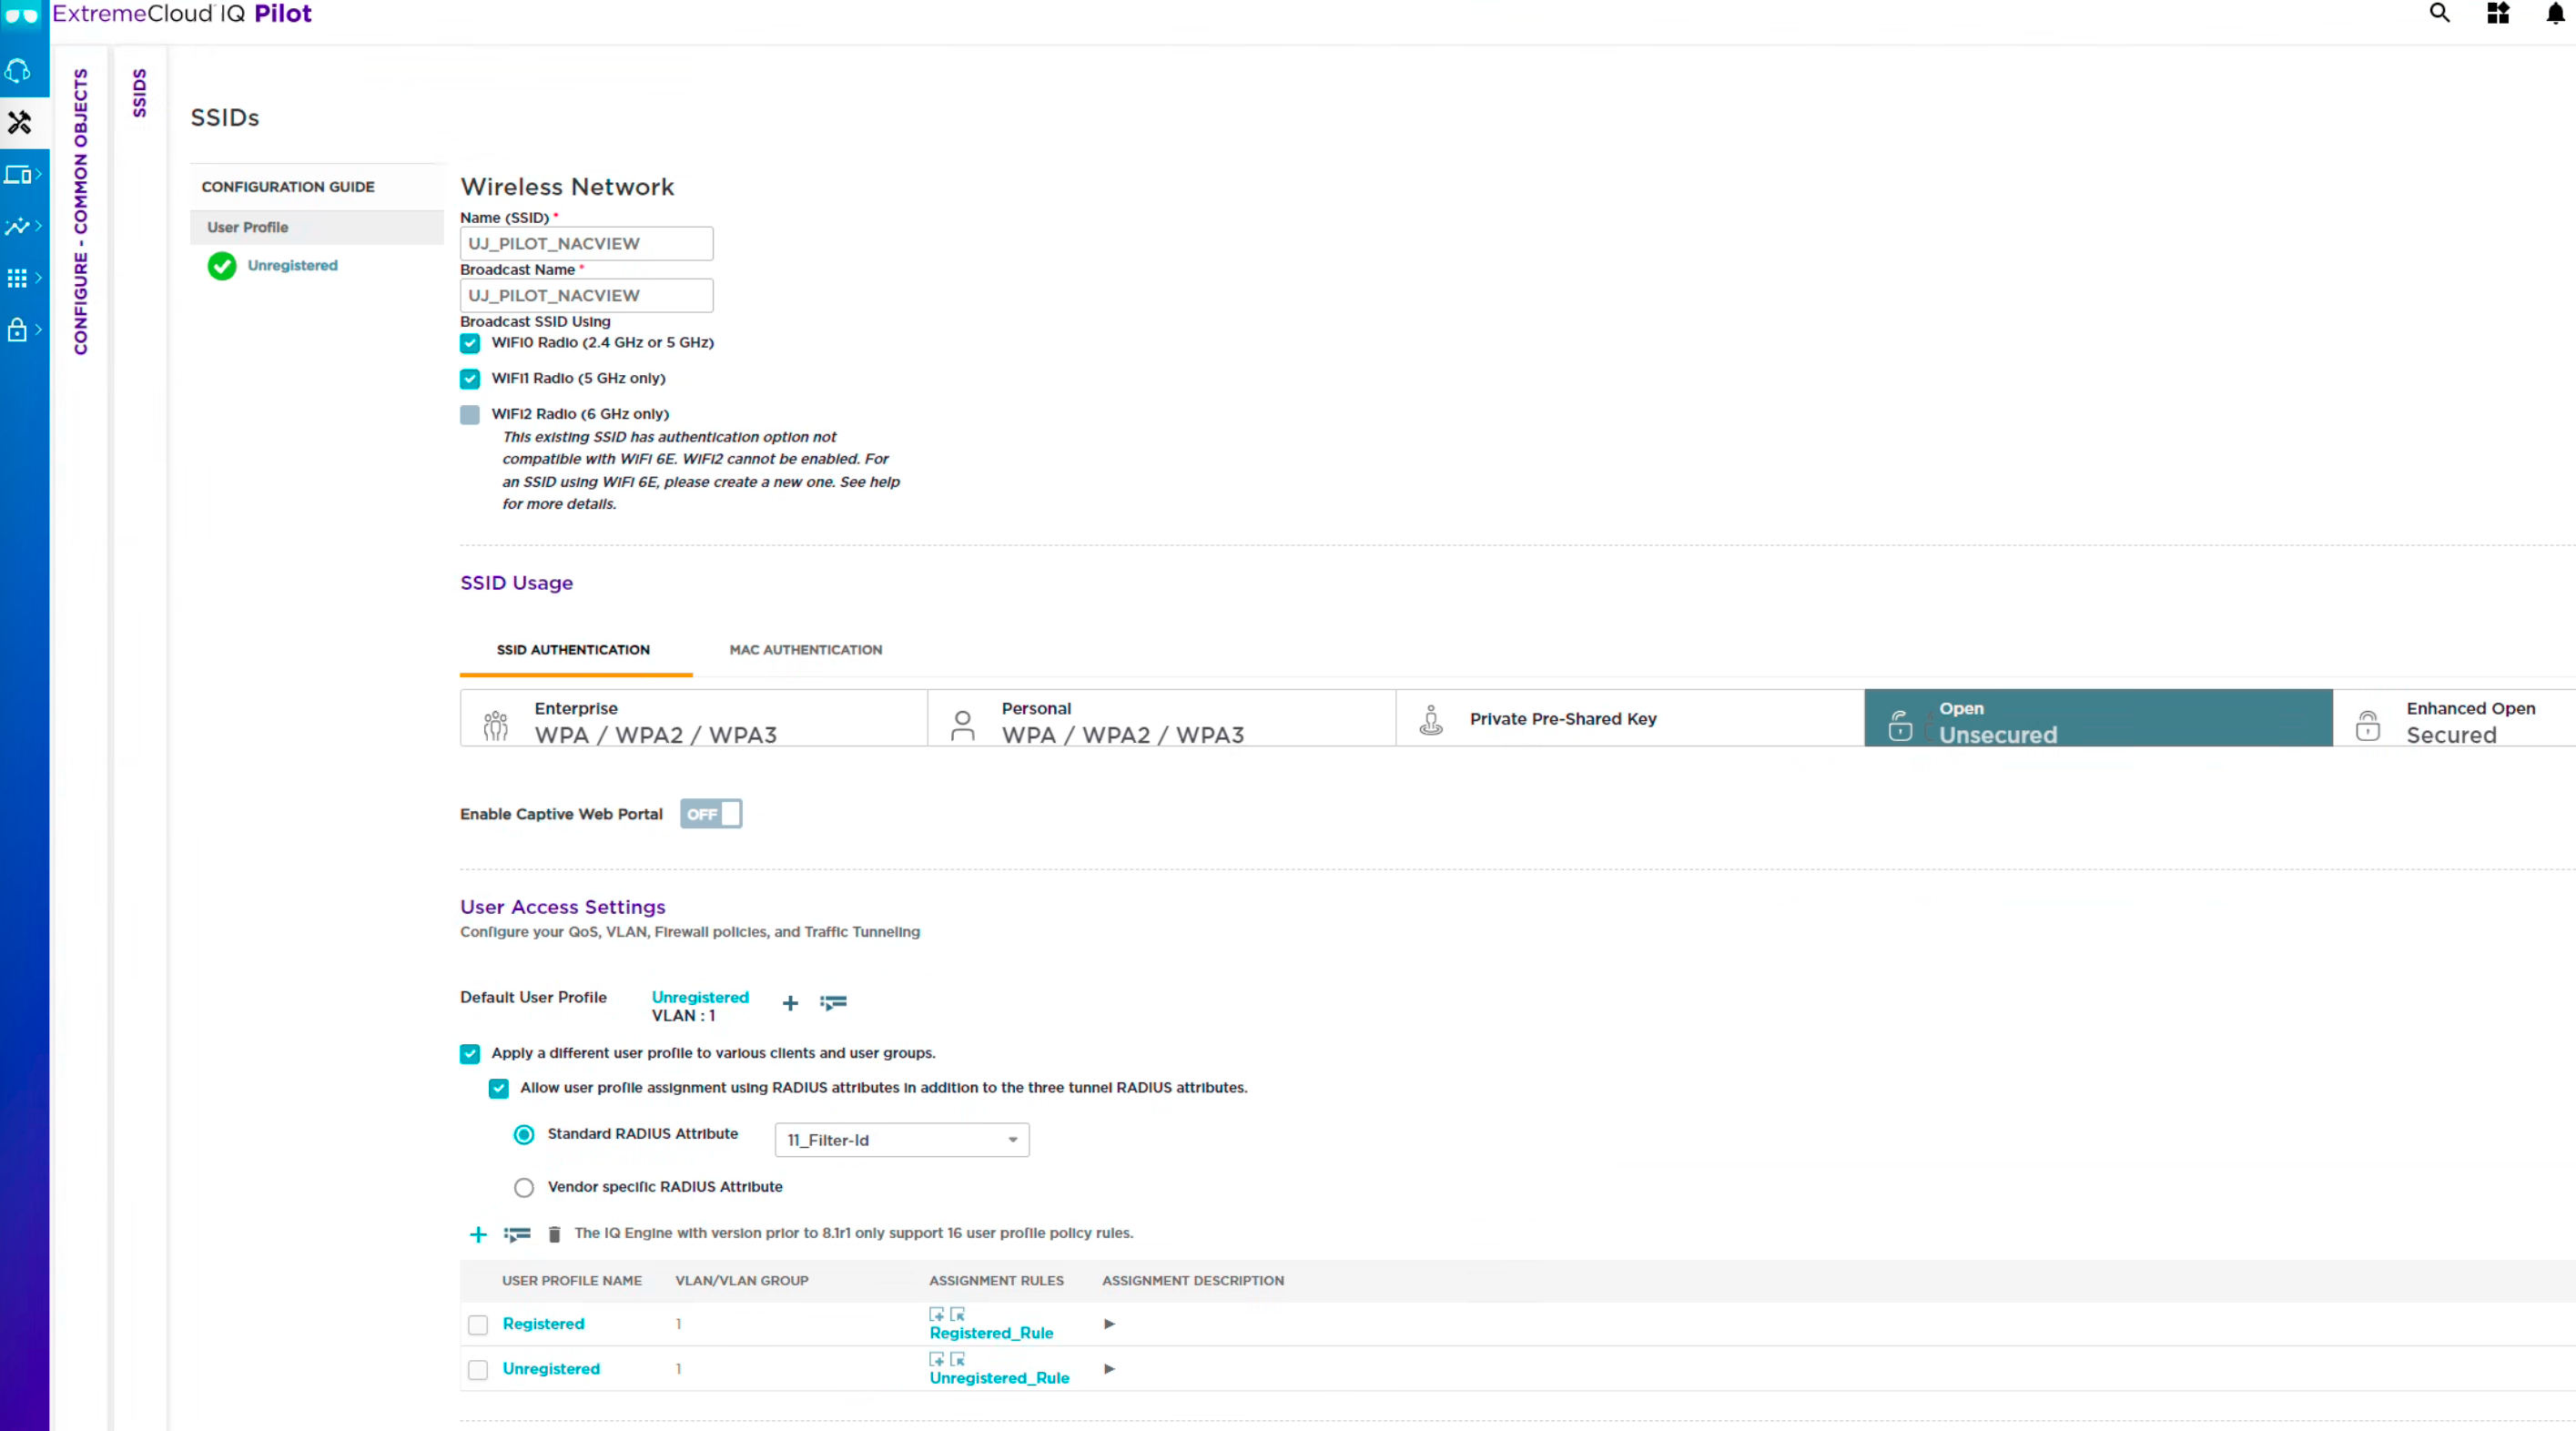
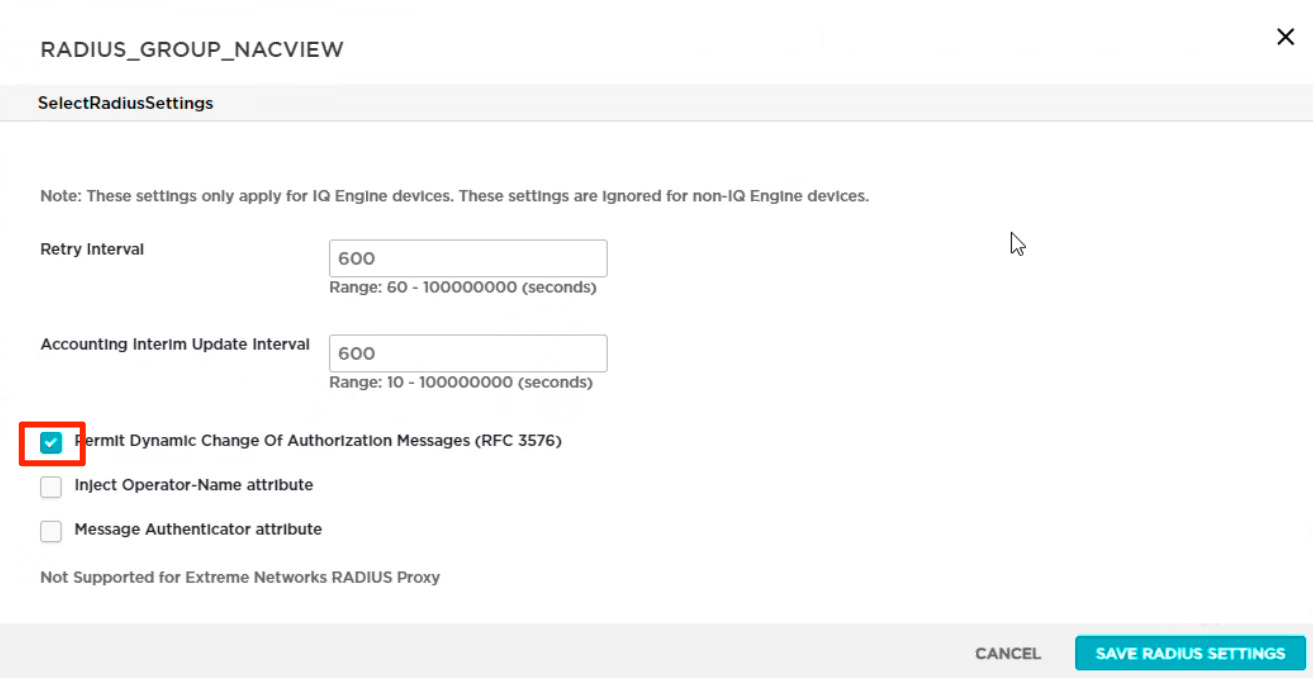
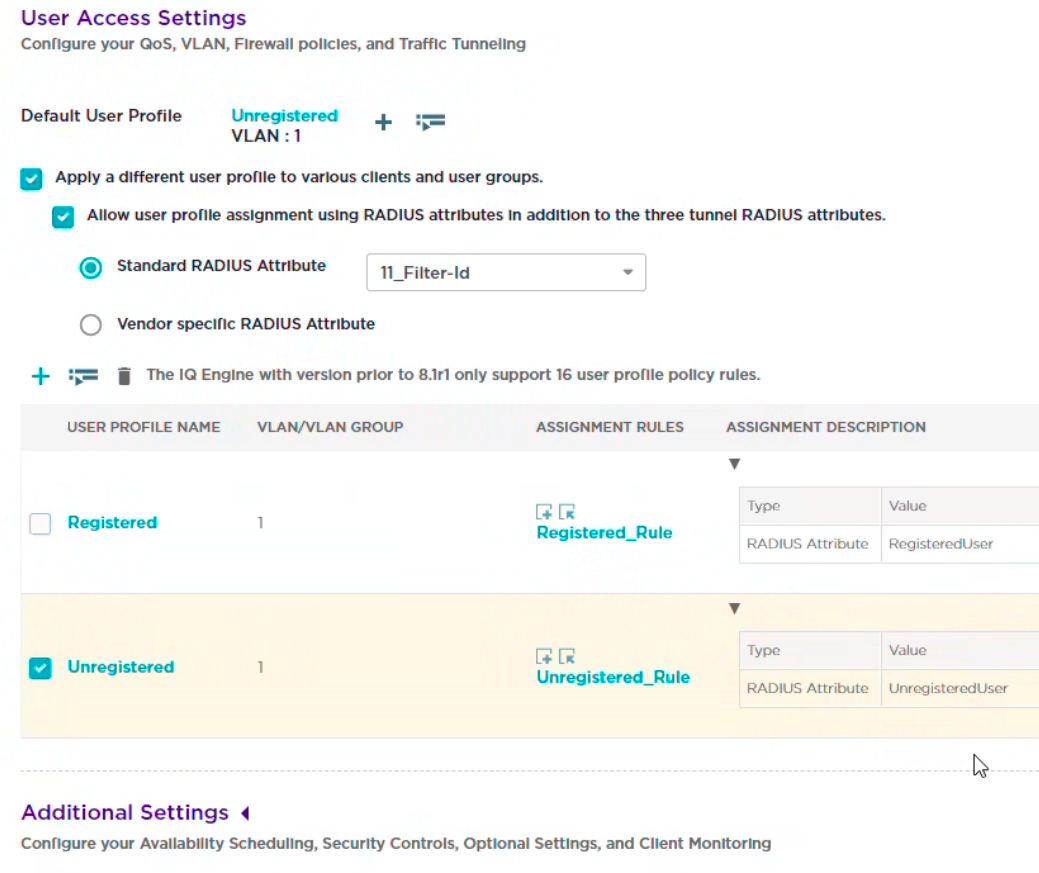
1.6. Below focus on MAC AUTHENTICATION settings. Switch also CoA.
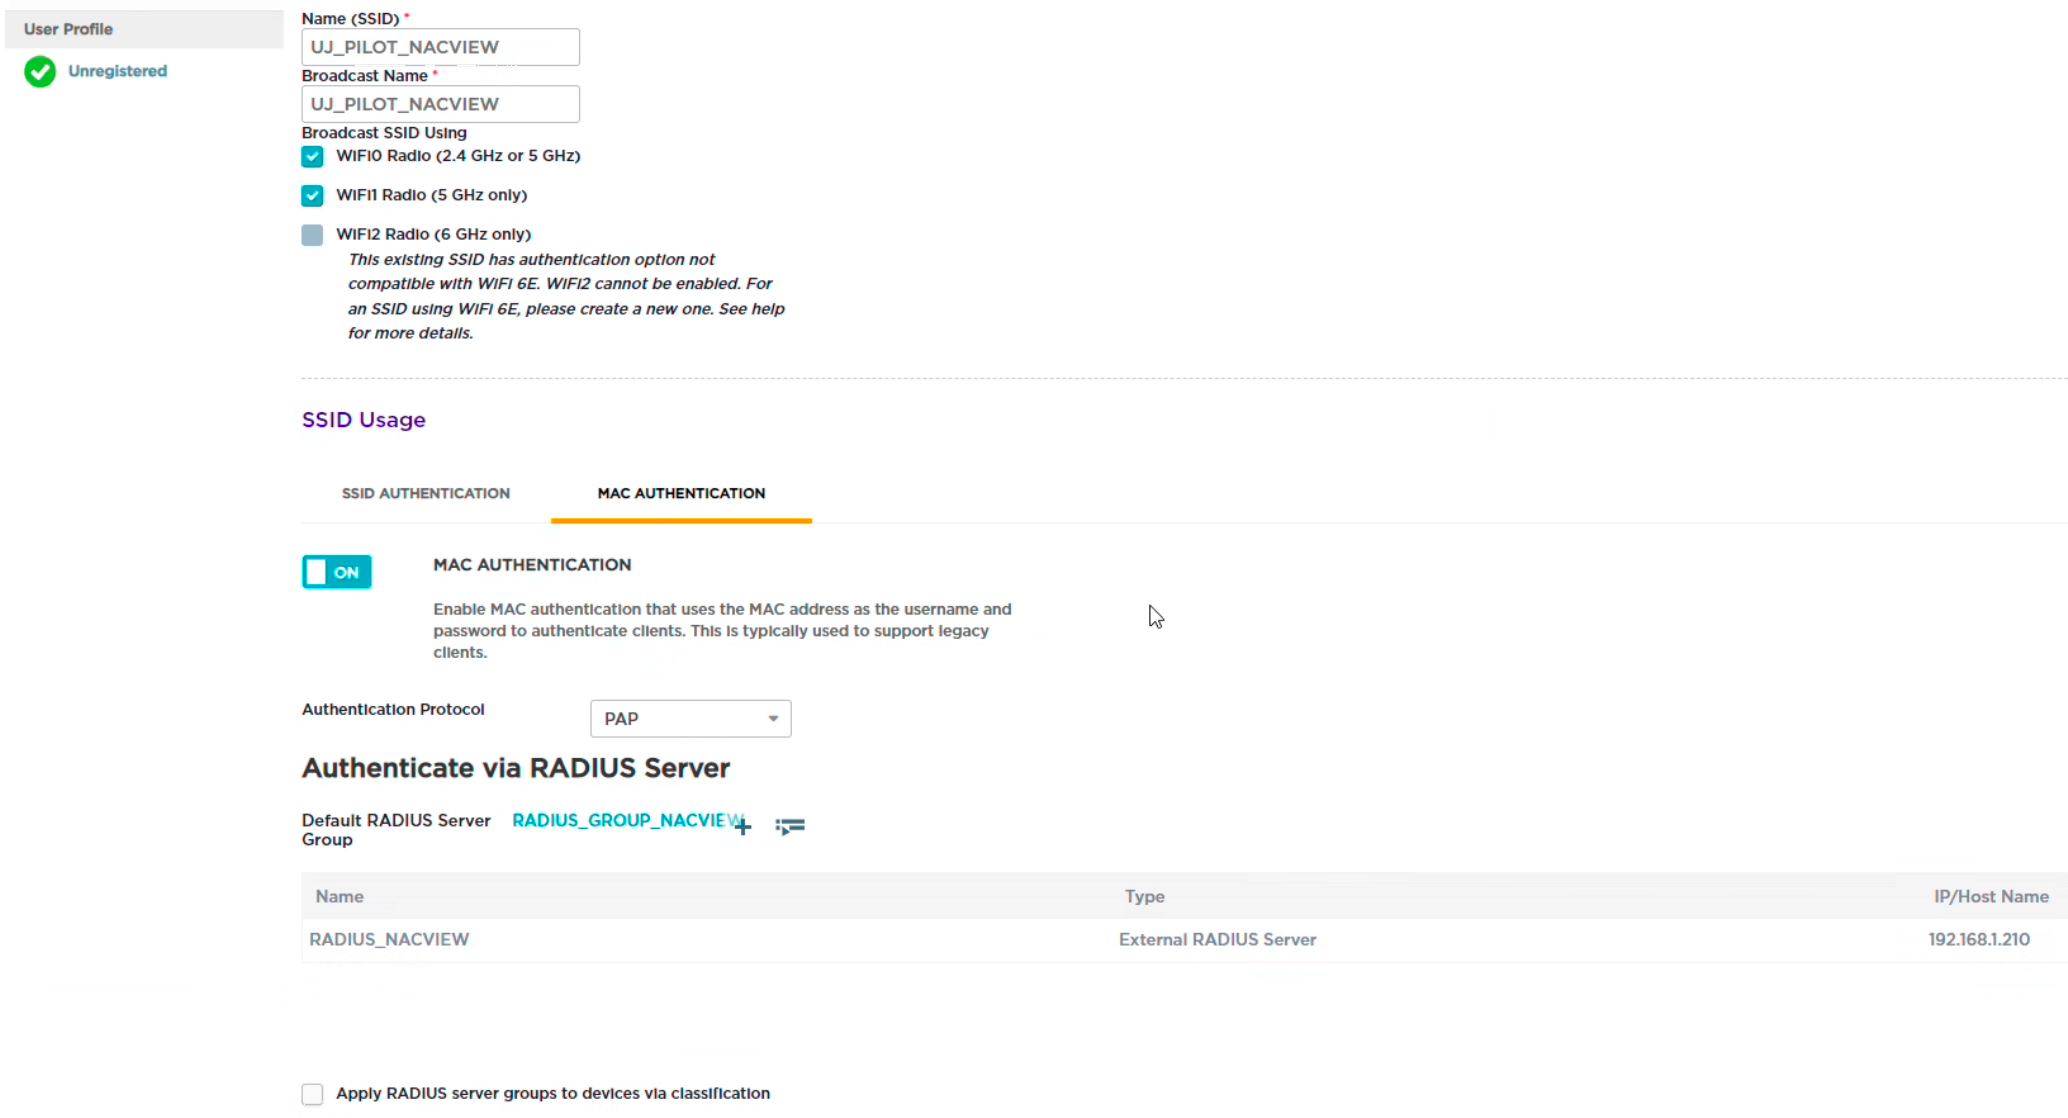
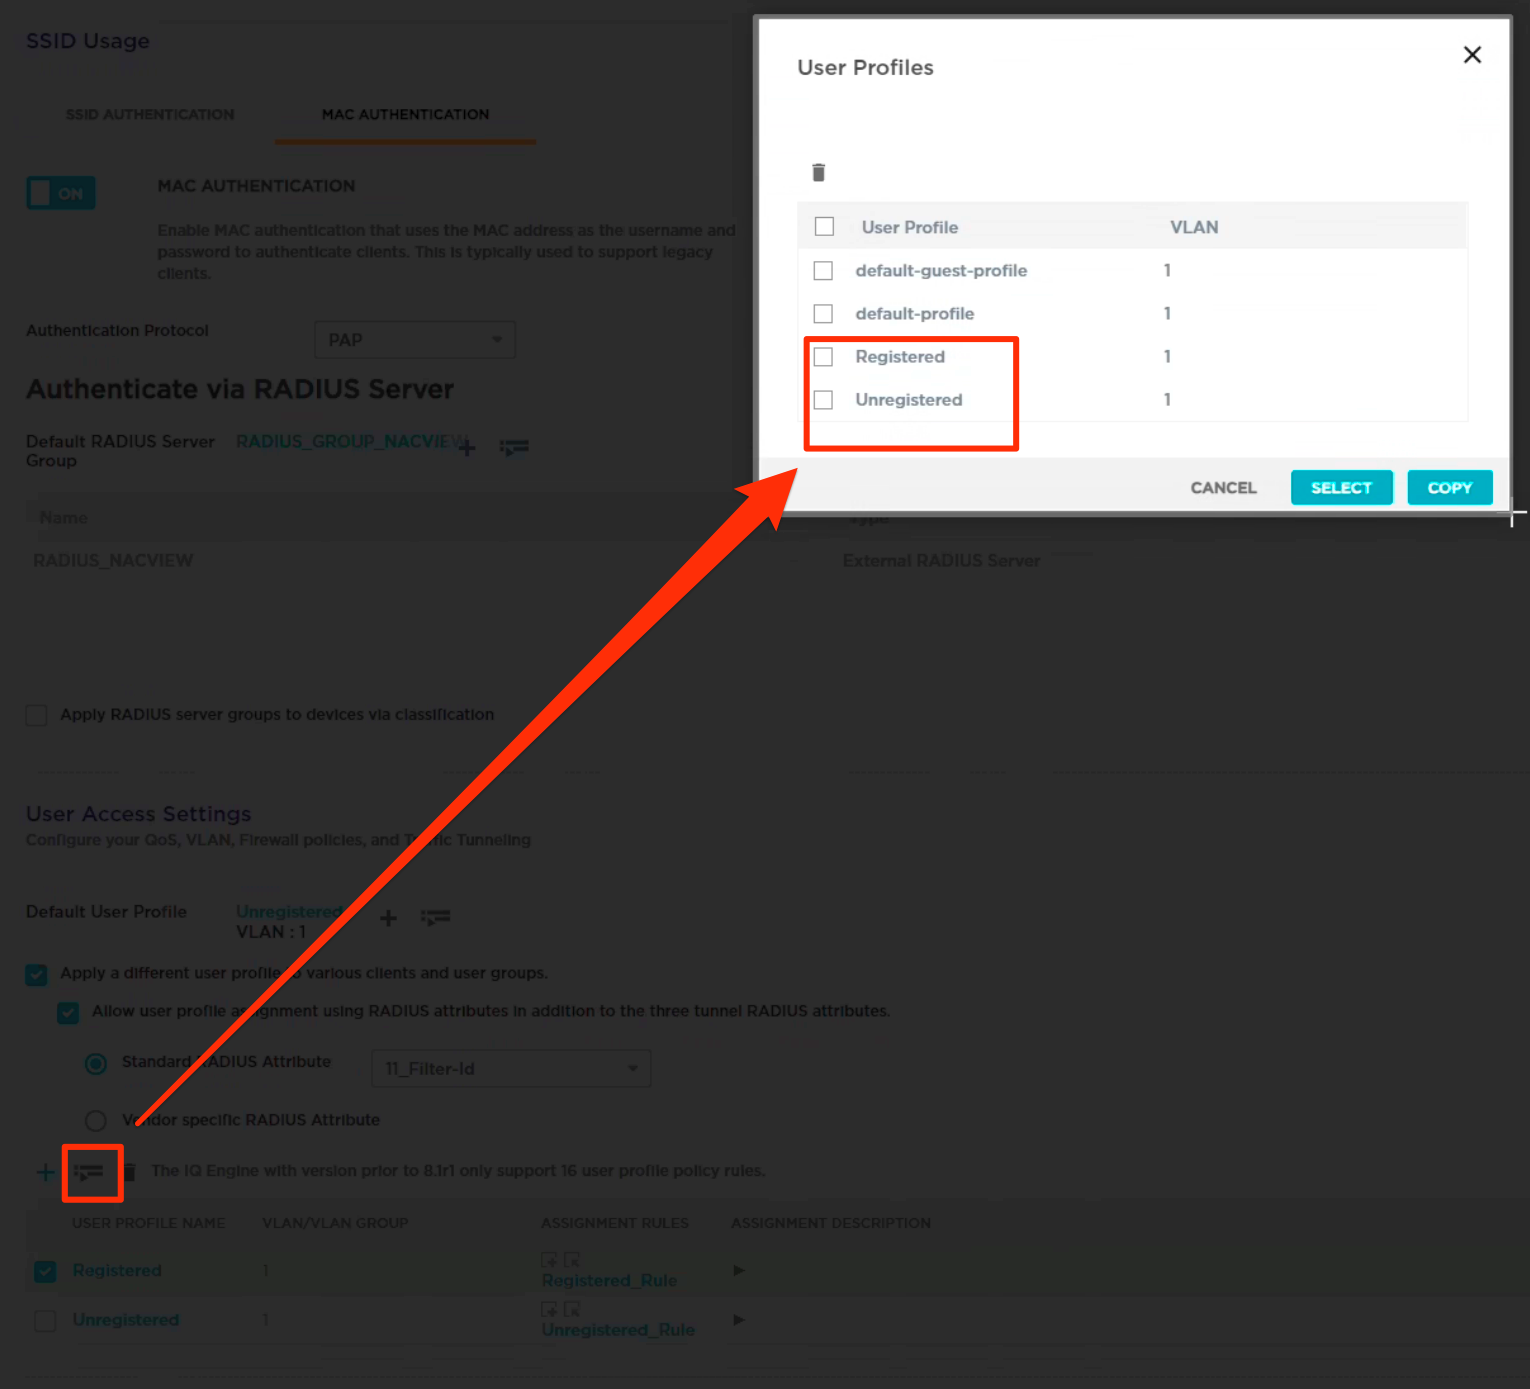
1.7. Allow user profile assignment using RADIUS attributes: Filter-Id. Remember to include earlier created users:
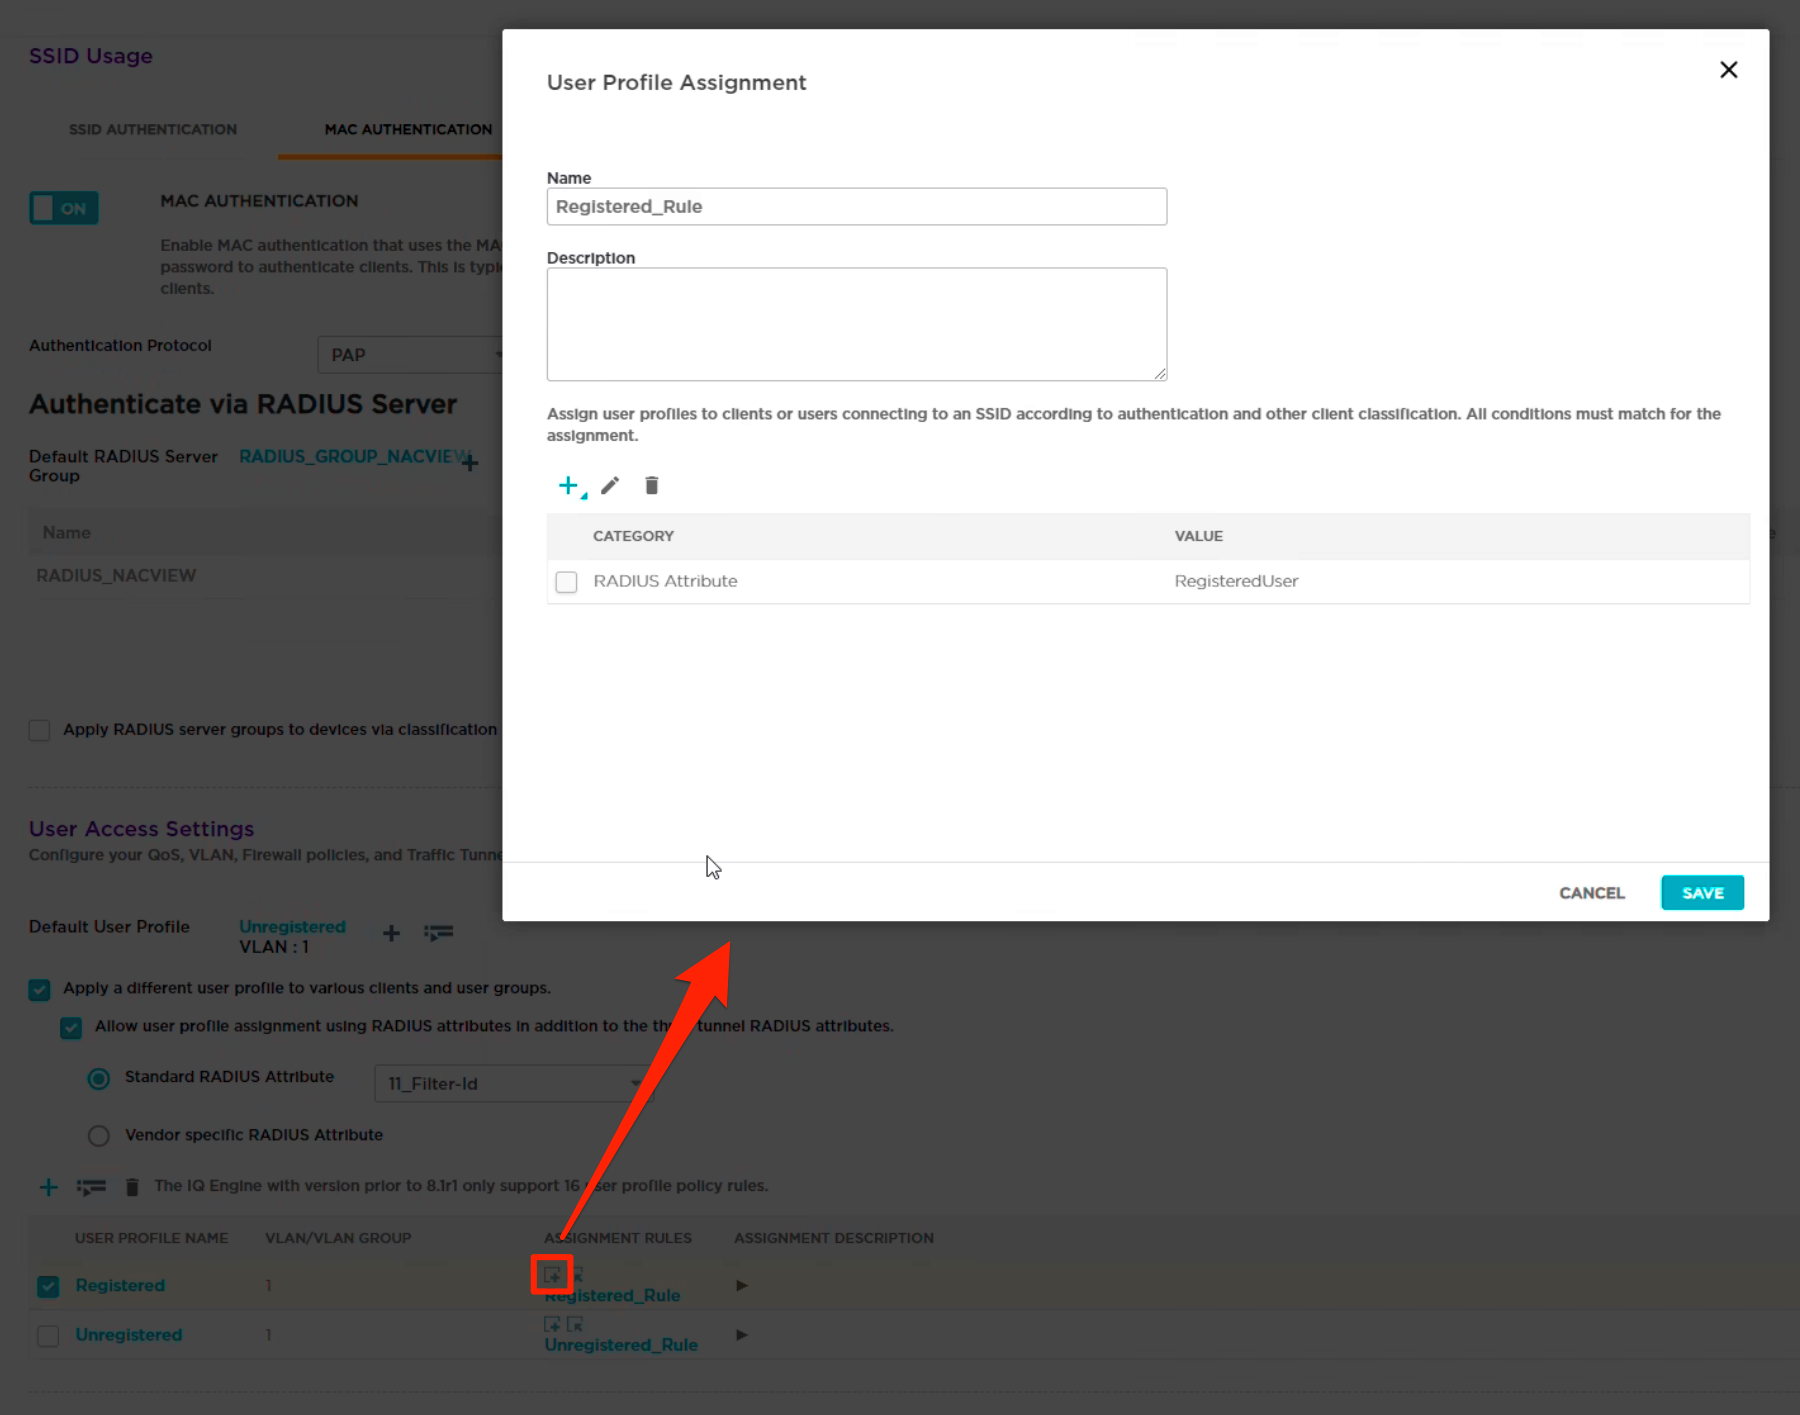
1.8. The RADIUS Attribute value is returned to us by NACVIEW.
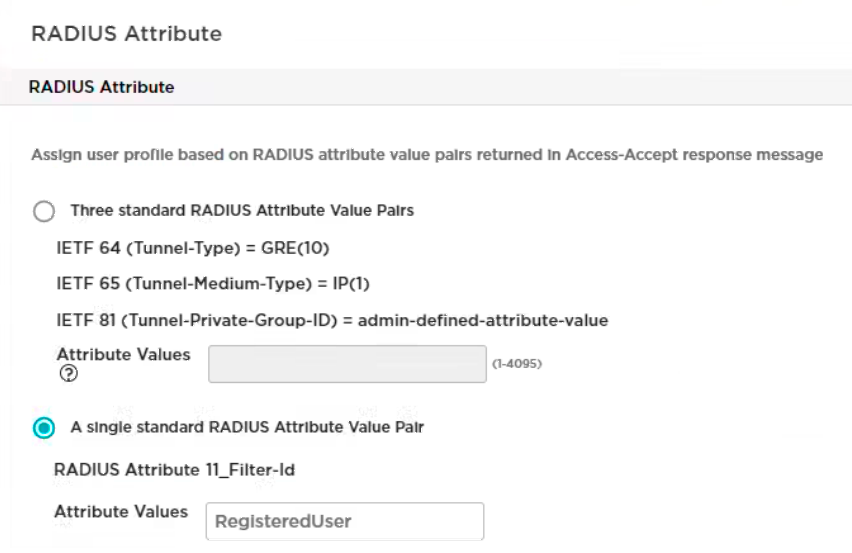
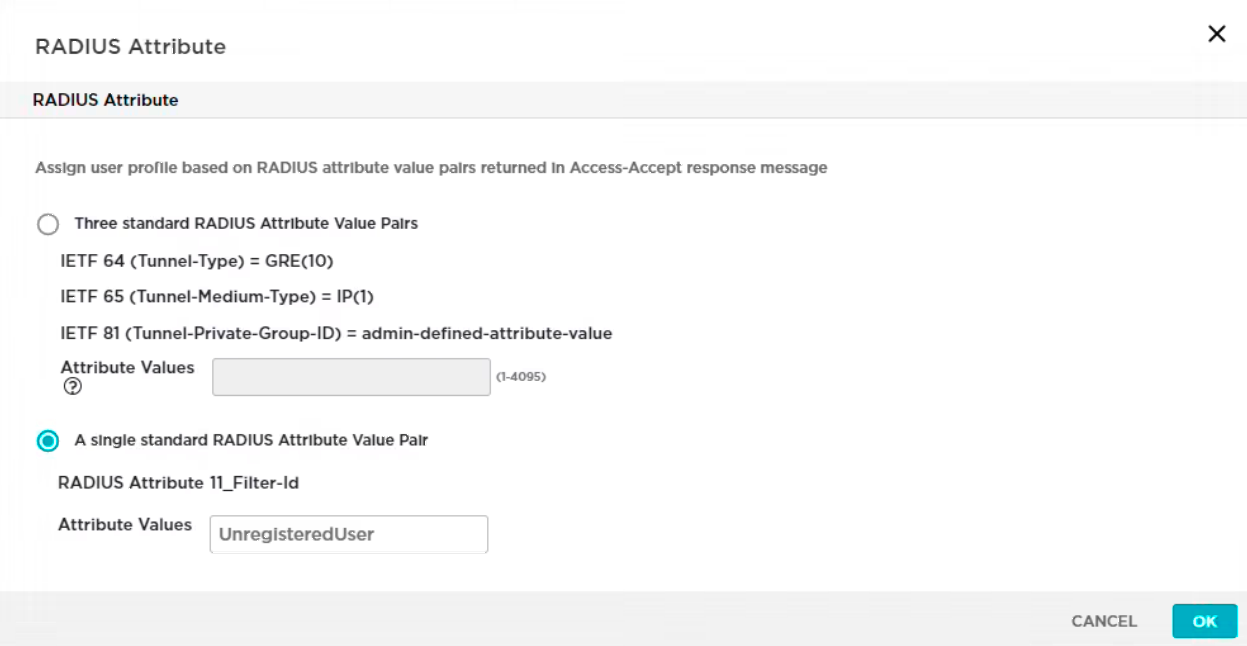
1.9. For Unregistered it is similar, just change attribute values Filter-Id as follows:
1.10. After setting up the whole thing, it should look more or less thus:
¶ 2. Configuration in NACVIEW
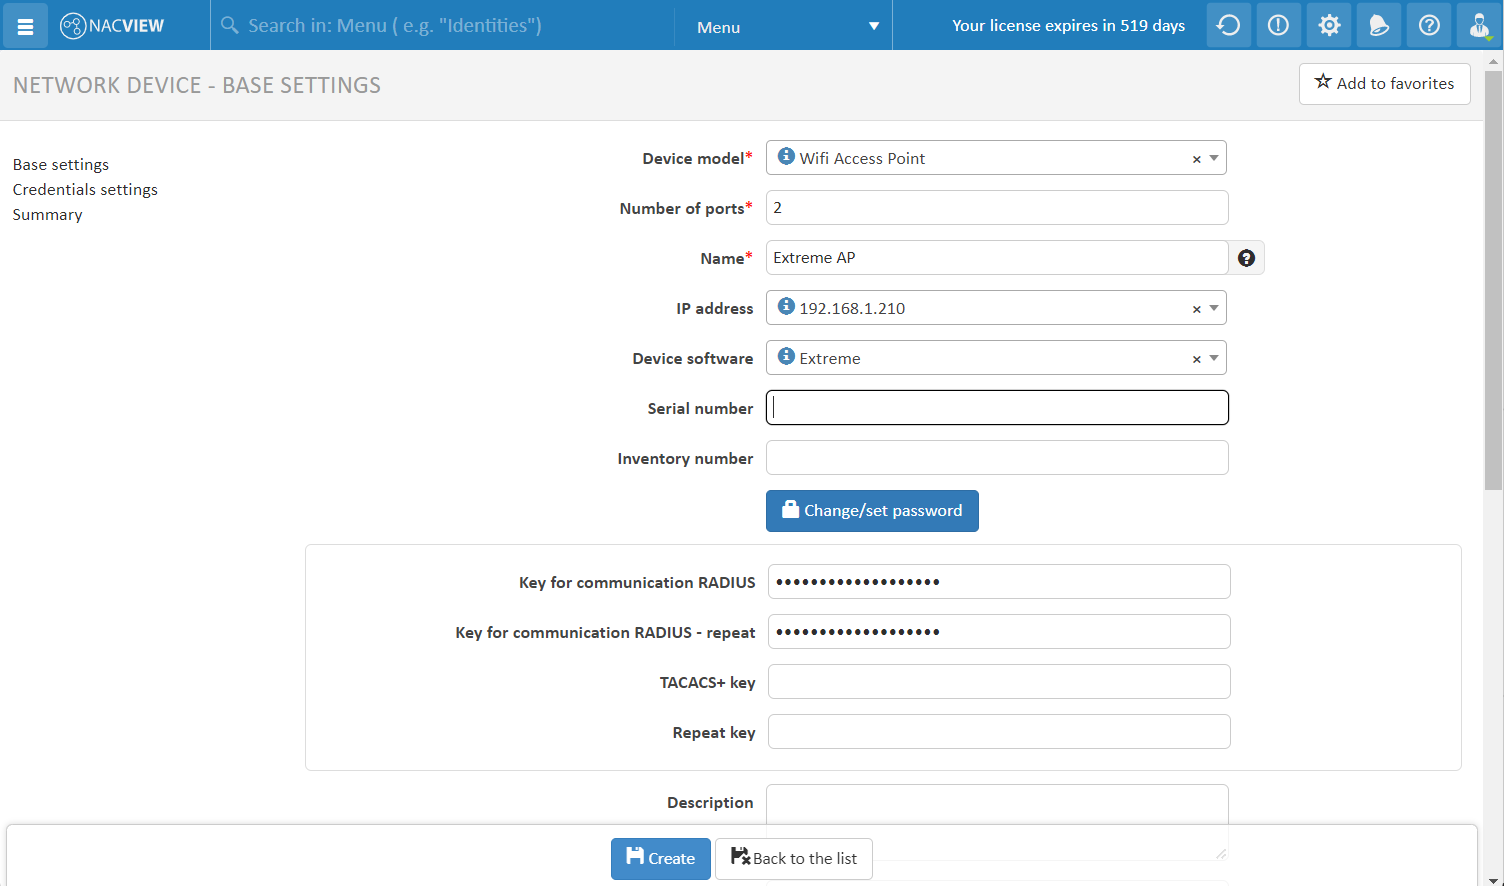
2.1. From the main menu, in the Network section, select: Network devices, then click: +Add new item, fill in the required fields, and set the compatible Radius key (in accordance with the one entered at 1.1.):
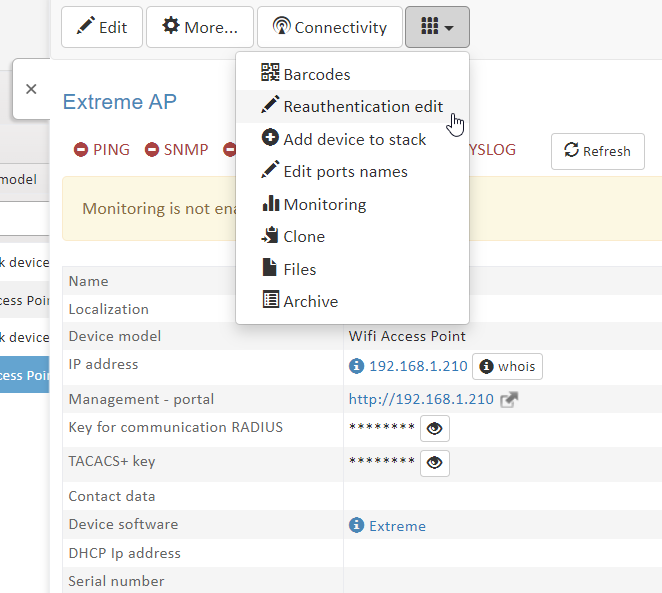
2.2. After you have the device added, double click a new double-click on the new row in the devices list, select more options for this device and then apply: Reauthentication edit from the additional menu:
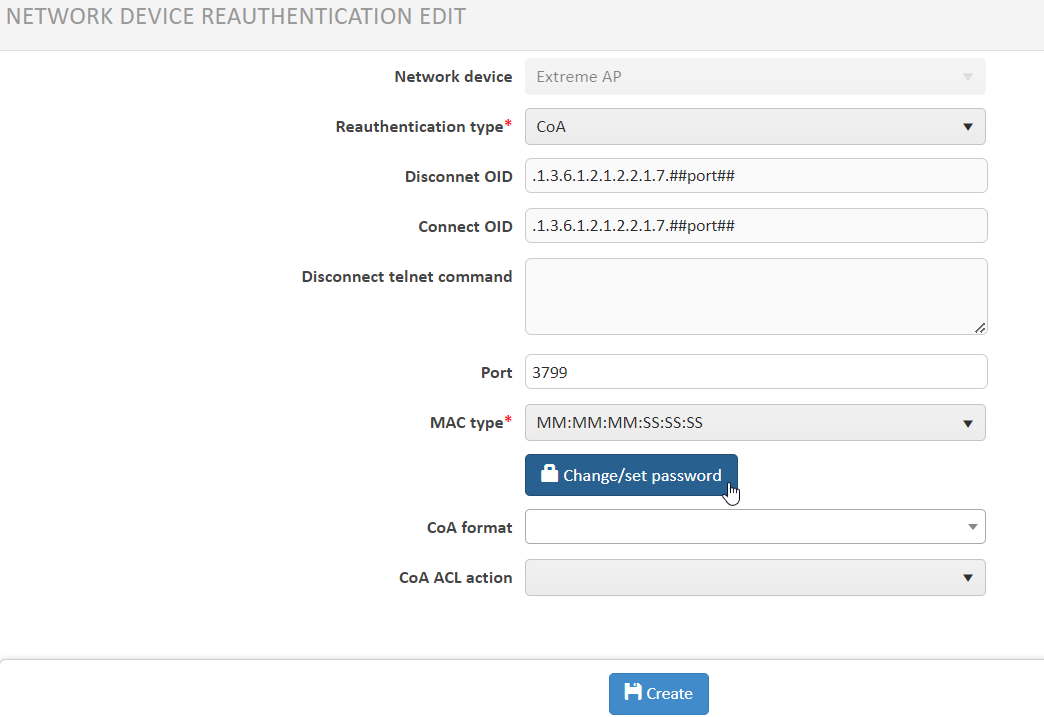
Now apply setting in accordance with the screen below: (Port: 3799, MAC type separated by colons, CoA Format: Generic). Click "Change/Set Password" and enter compatible Radius key:
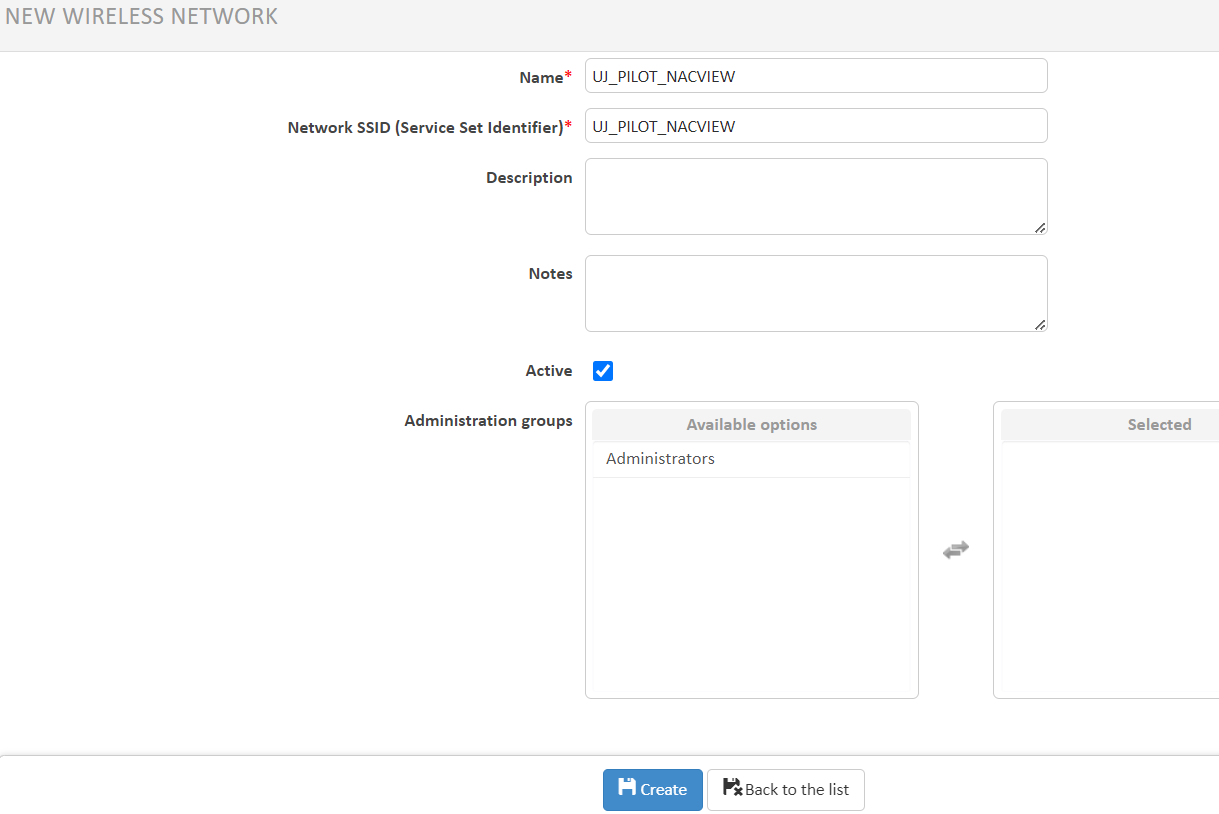
2.4. Then add a new WiFi network to the configuration. To do this, select WiFi networks from the menu (in the Network section). Click the +Create new button and fill in the name and SSID:
2.5. After saving your settings go to the main menu and, in the Configuration section, select Captive Portal. Set the Authorization portal type to suit your network, also pay attention to the selected options:
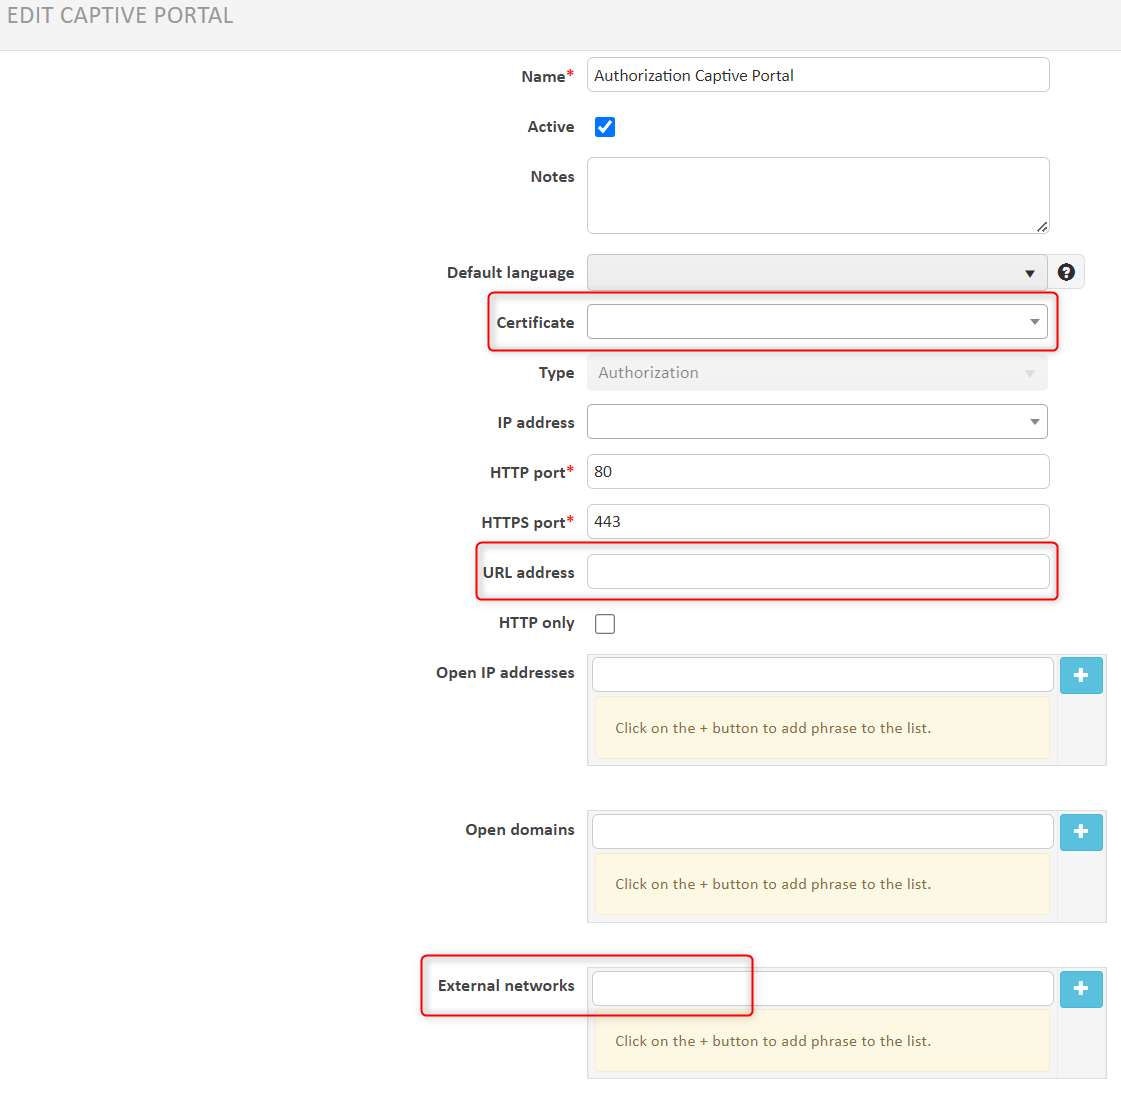
After you saved your settings, remember to click: Install configurations, which you can find in the right upper corner of the Captive Portal list.
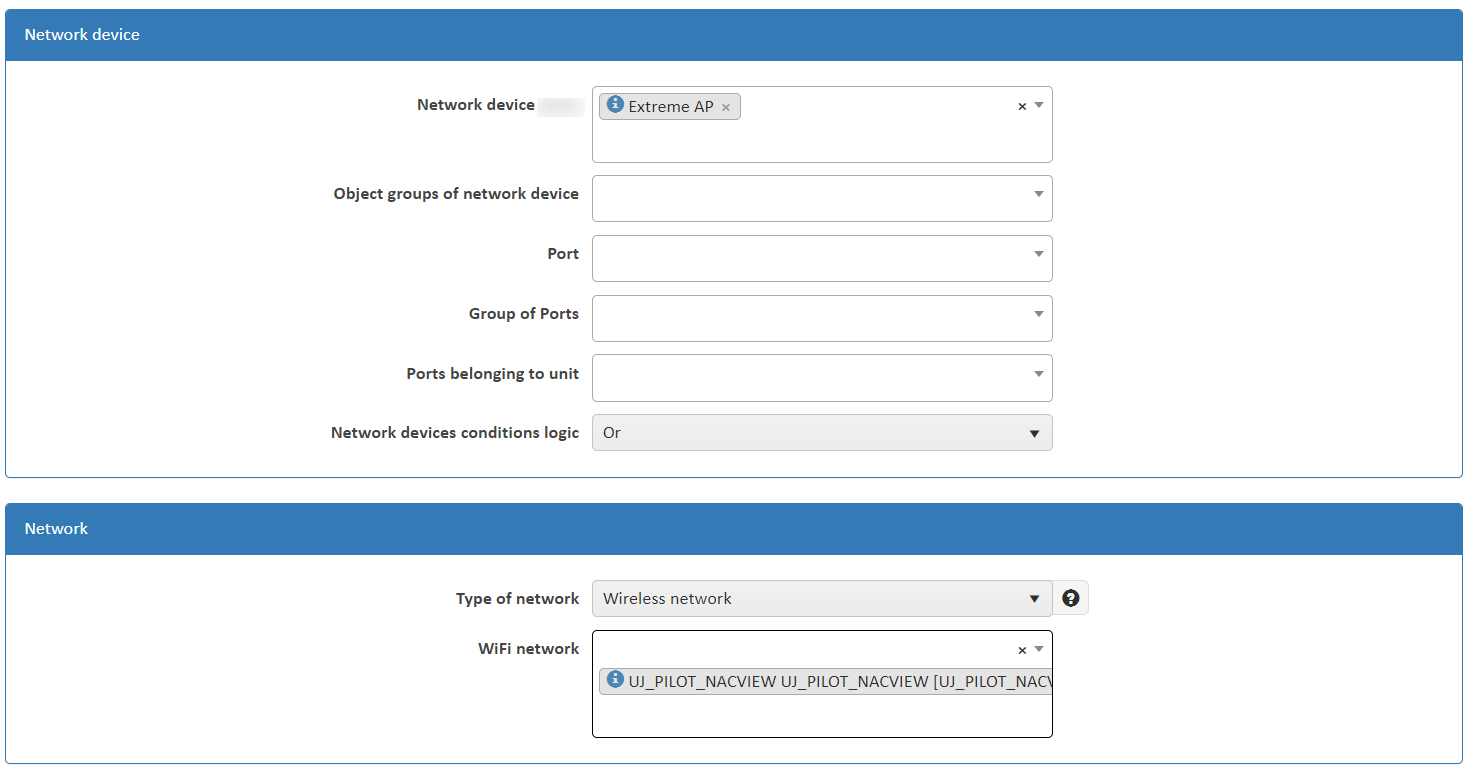
2.6. In the next step go to the main menu and, in the Configuration section, select Access policies and apply: Add Rule according to the screen below, checking Local Captive Portal. Disable Send VLAN tag back (leave unchecked).

2.7. In the lower part of the form, indicate your AP network device (that you added before) and select the SSID of the wireless network.
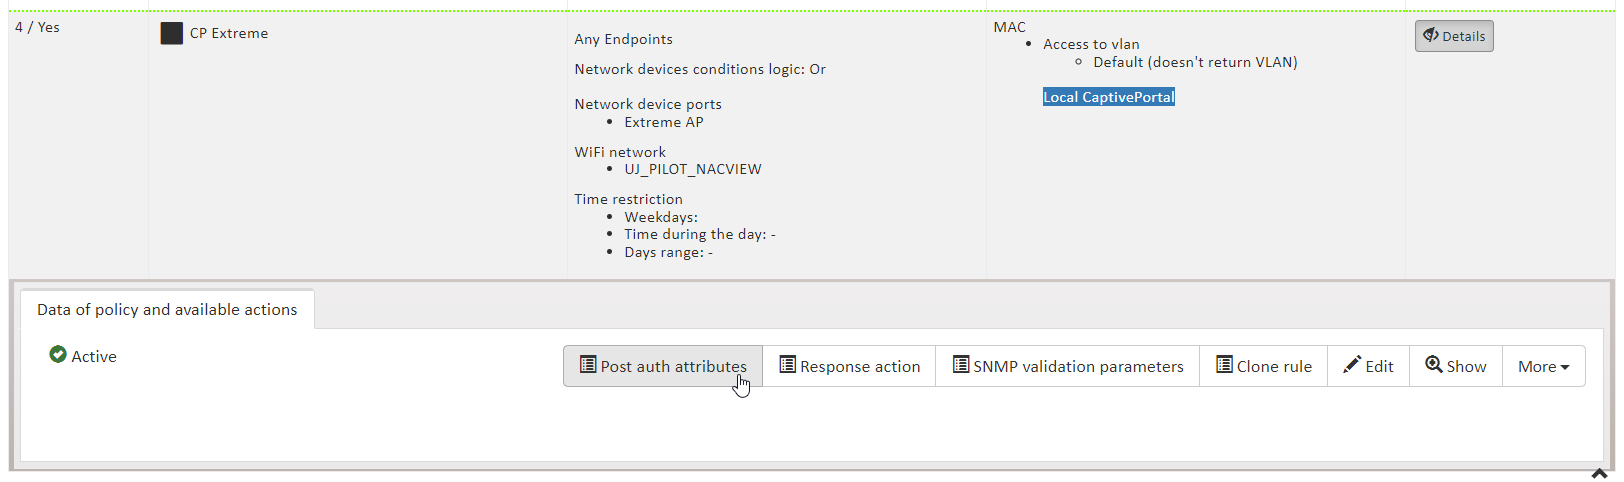
2.8. After saving the new rule, click the Details button to select the Post auth attributes button from the new submenu that appears below:
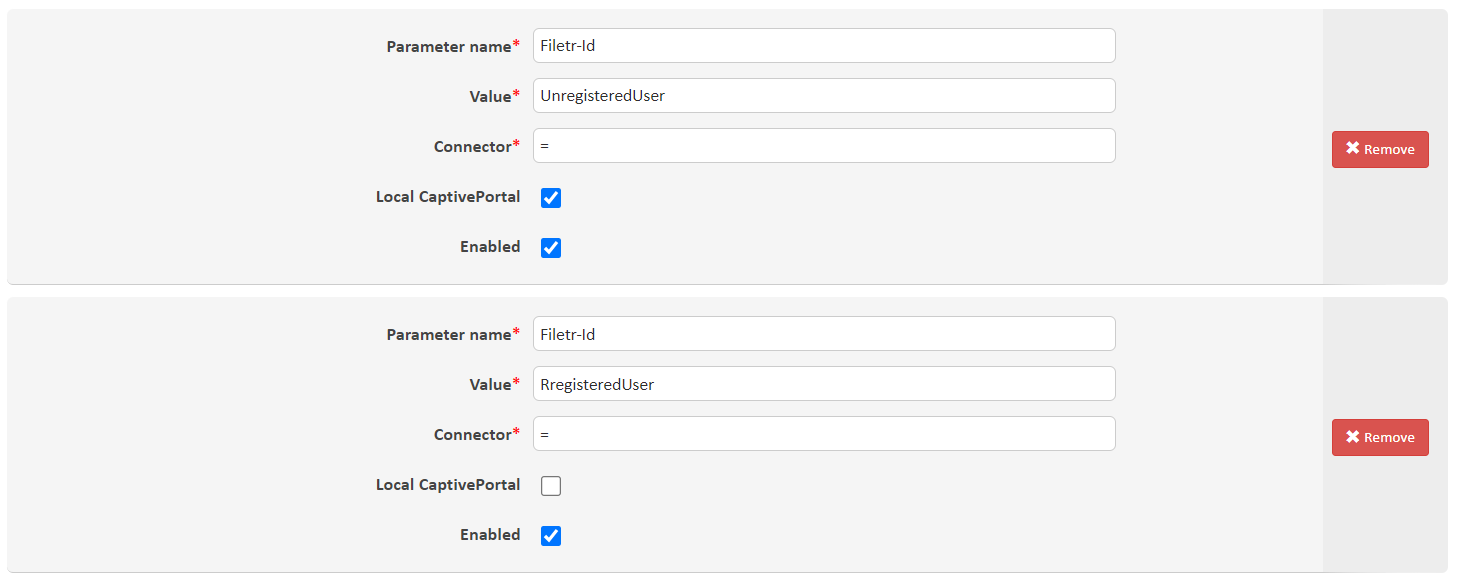
2.9. Then add attributes (click the +New parameter button) by filling out the form as shown in the picture below. Parameter name: Filter-Id, Value: UnregisteredUser, Local CaptivePortal option selected (checked) and the second attribute: Parameter name: Filter-Id, Value: RegisteredUser, and this time - with Local CaptivePortal option disabled (unchecked).
2.10. Save your settings. Finally the new rule should correspond with the screen below:
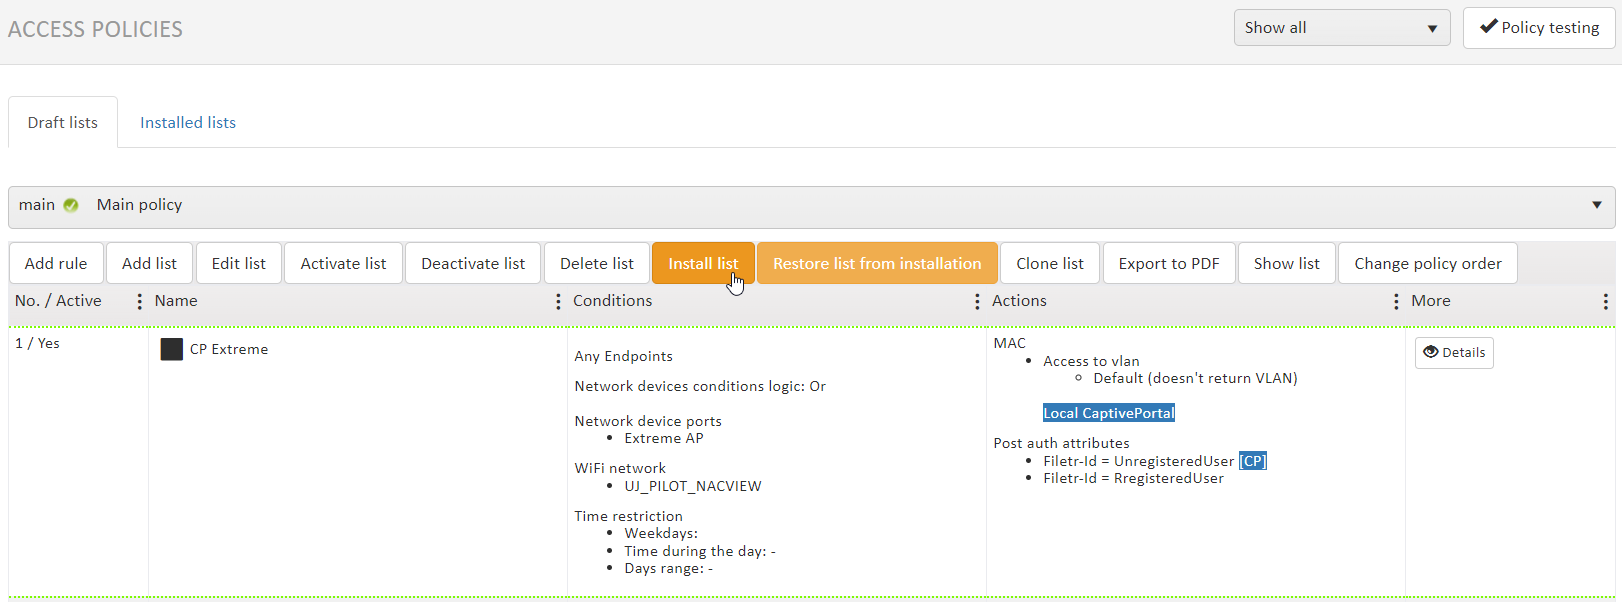
Accept your changes to the access policies from the orange source Install list, visible at the top of the list.