¶ Introduction: Captive Portal for FortiGate
Configuring Captive Portal for FortiGate allows you to secure your guest network access connection. After installing the program's manual, use the redirection to the service page, where you will be asked to enter your username and password for authentication. After successful authentication, they will be granted access to the authorized URL and other Internet resources in accordance with established access policies.
¶ How to configure Captive Portal for FortiGate?
It can be done in 4 easy steps.
¶ 1. Fortigate Configuration
1.1. On the FortiGate system, select User & Device, then RADIUS Servers from the menu on the left. Click: Create New.
1.2. Complete the form by entering in Primary Server section the NACVIEW (VRRP) IP address and the so-called radius secret (random string).
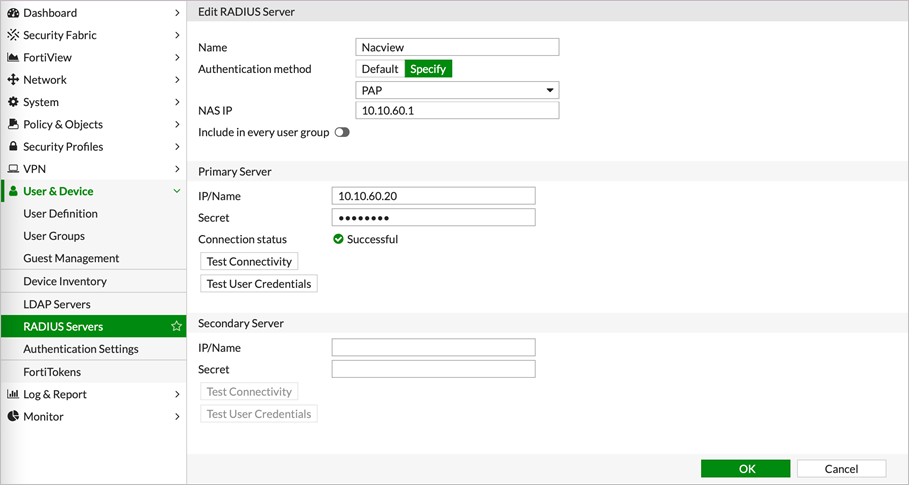
1.3. Confirm the changes with OK.
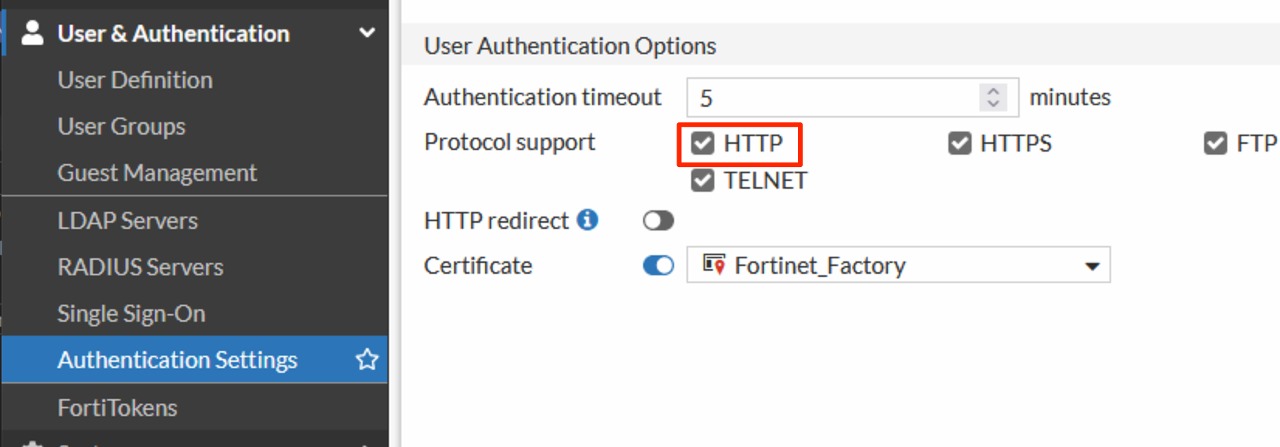
Now in the Authentication Settings, check the box for Protocol support: HTTP
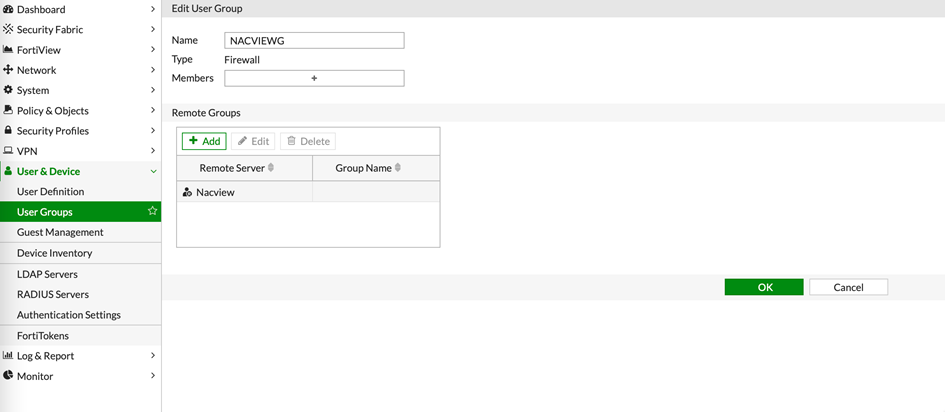
1.4. From the menu on the left, select User Groups this time, and then click Create New.
1.5. In the form that appears, fill in the name of the group, then in the Remote Groups section, click Add and select the item created in step 2. Confirm with OK.
1.6. To set the authorization validity time, go to the command line and execute the following commands, remembering to replace USER_GROUP with the name of the user group created in the previous step:
config user group
edit USER_GROUP
set authtimeout 43200
end
config user setting
    set auth-timeout-type hard-timeout
end
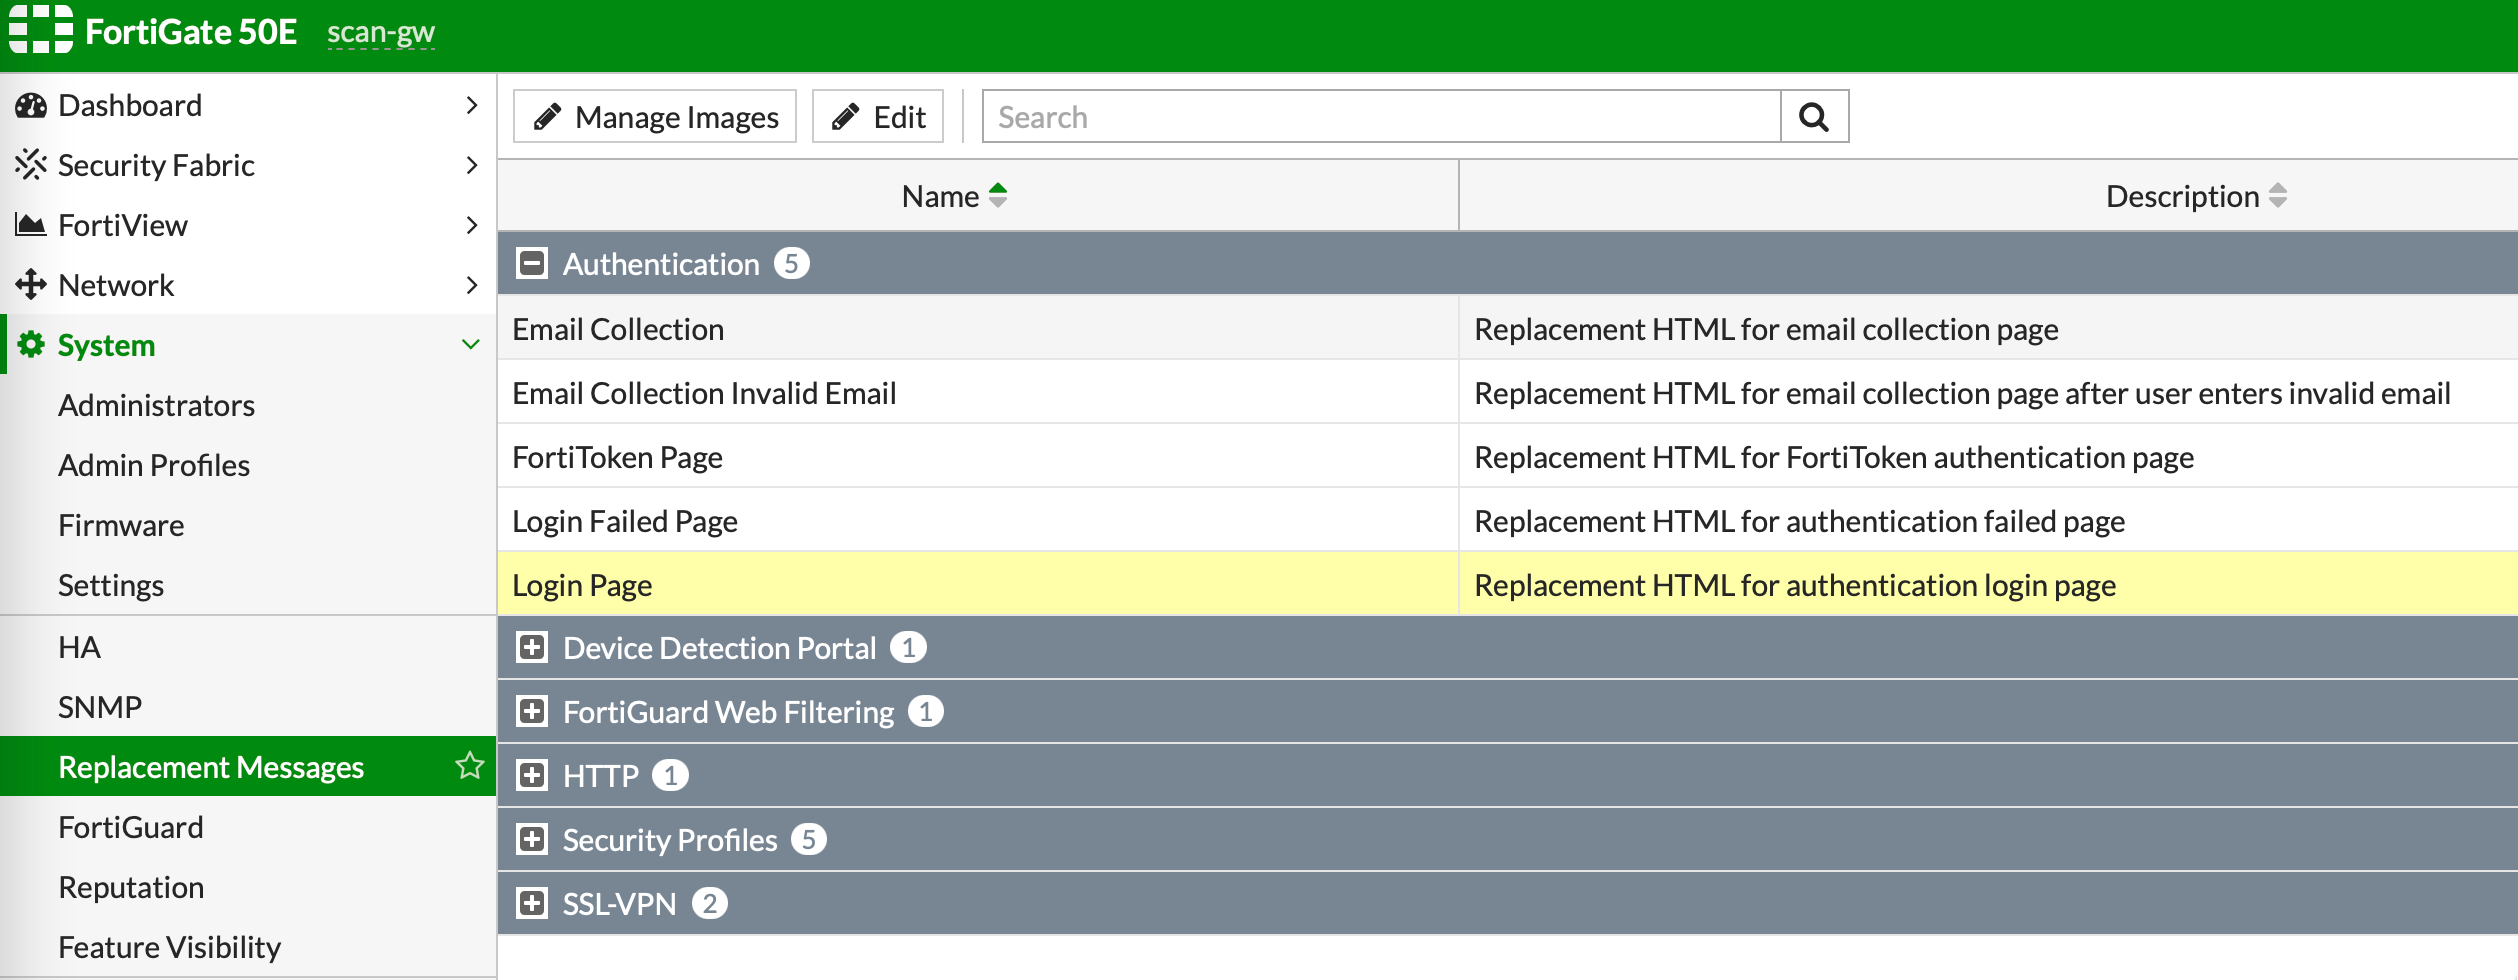
1.7. [It is optional] To modify the appearance and add the content of the regulations, select System from the menu on the left, and then Replacement Messages.
1.8. Go to Network > Interfaces.
1.9. Enable the Captive Portal service on the created VLAN by selecting the previously created group in the User groups field, and selecting the DNS servers shared with the guest network in the Exempt destination/services field.
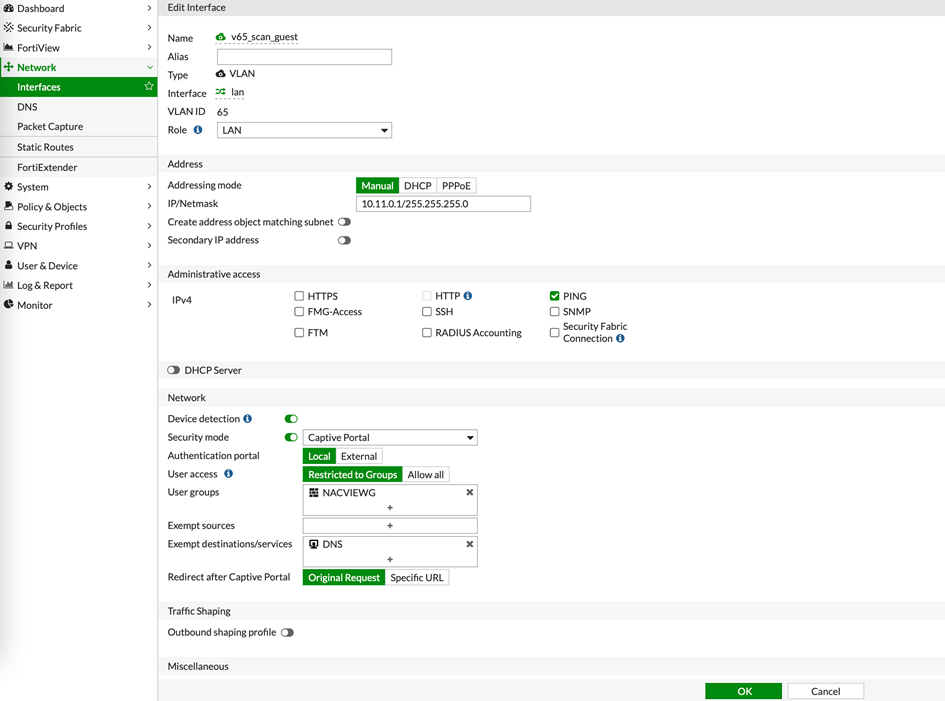
1.10. Go to the Policy & Objects section and then to IPv4 Policy. Click Create New.
1.11. Add a policy for allowing traffic to DNS servers by completing the form with the data from the photo below:
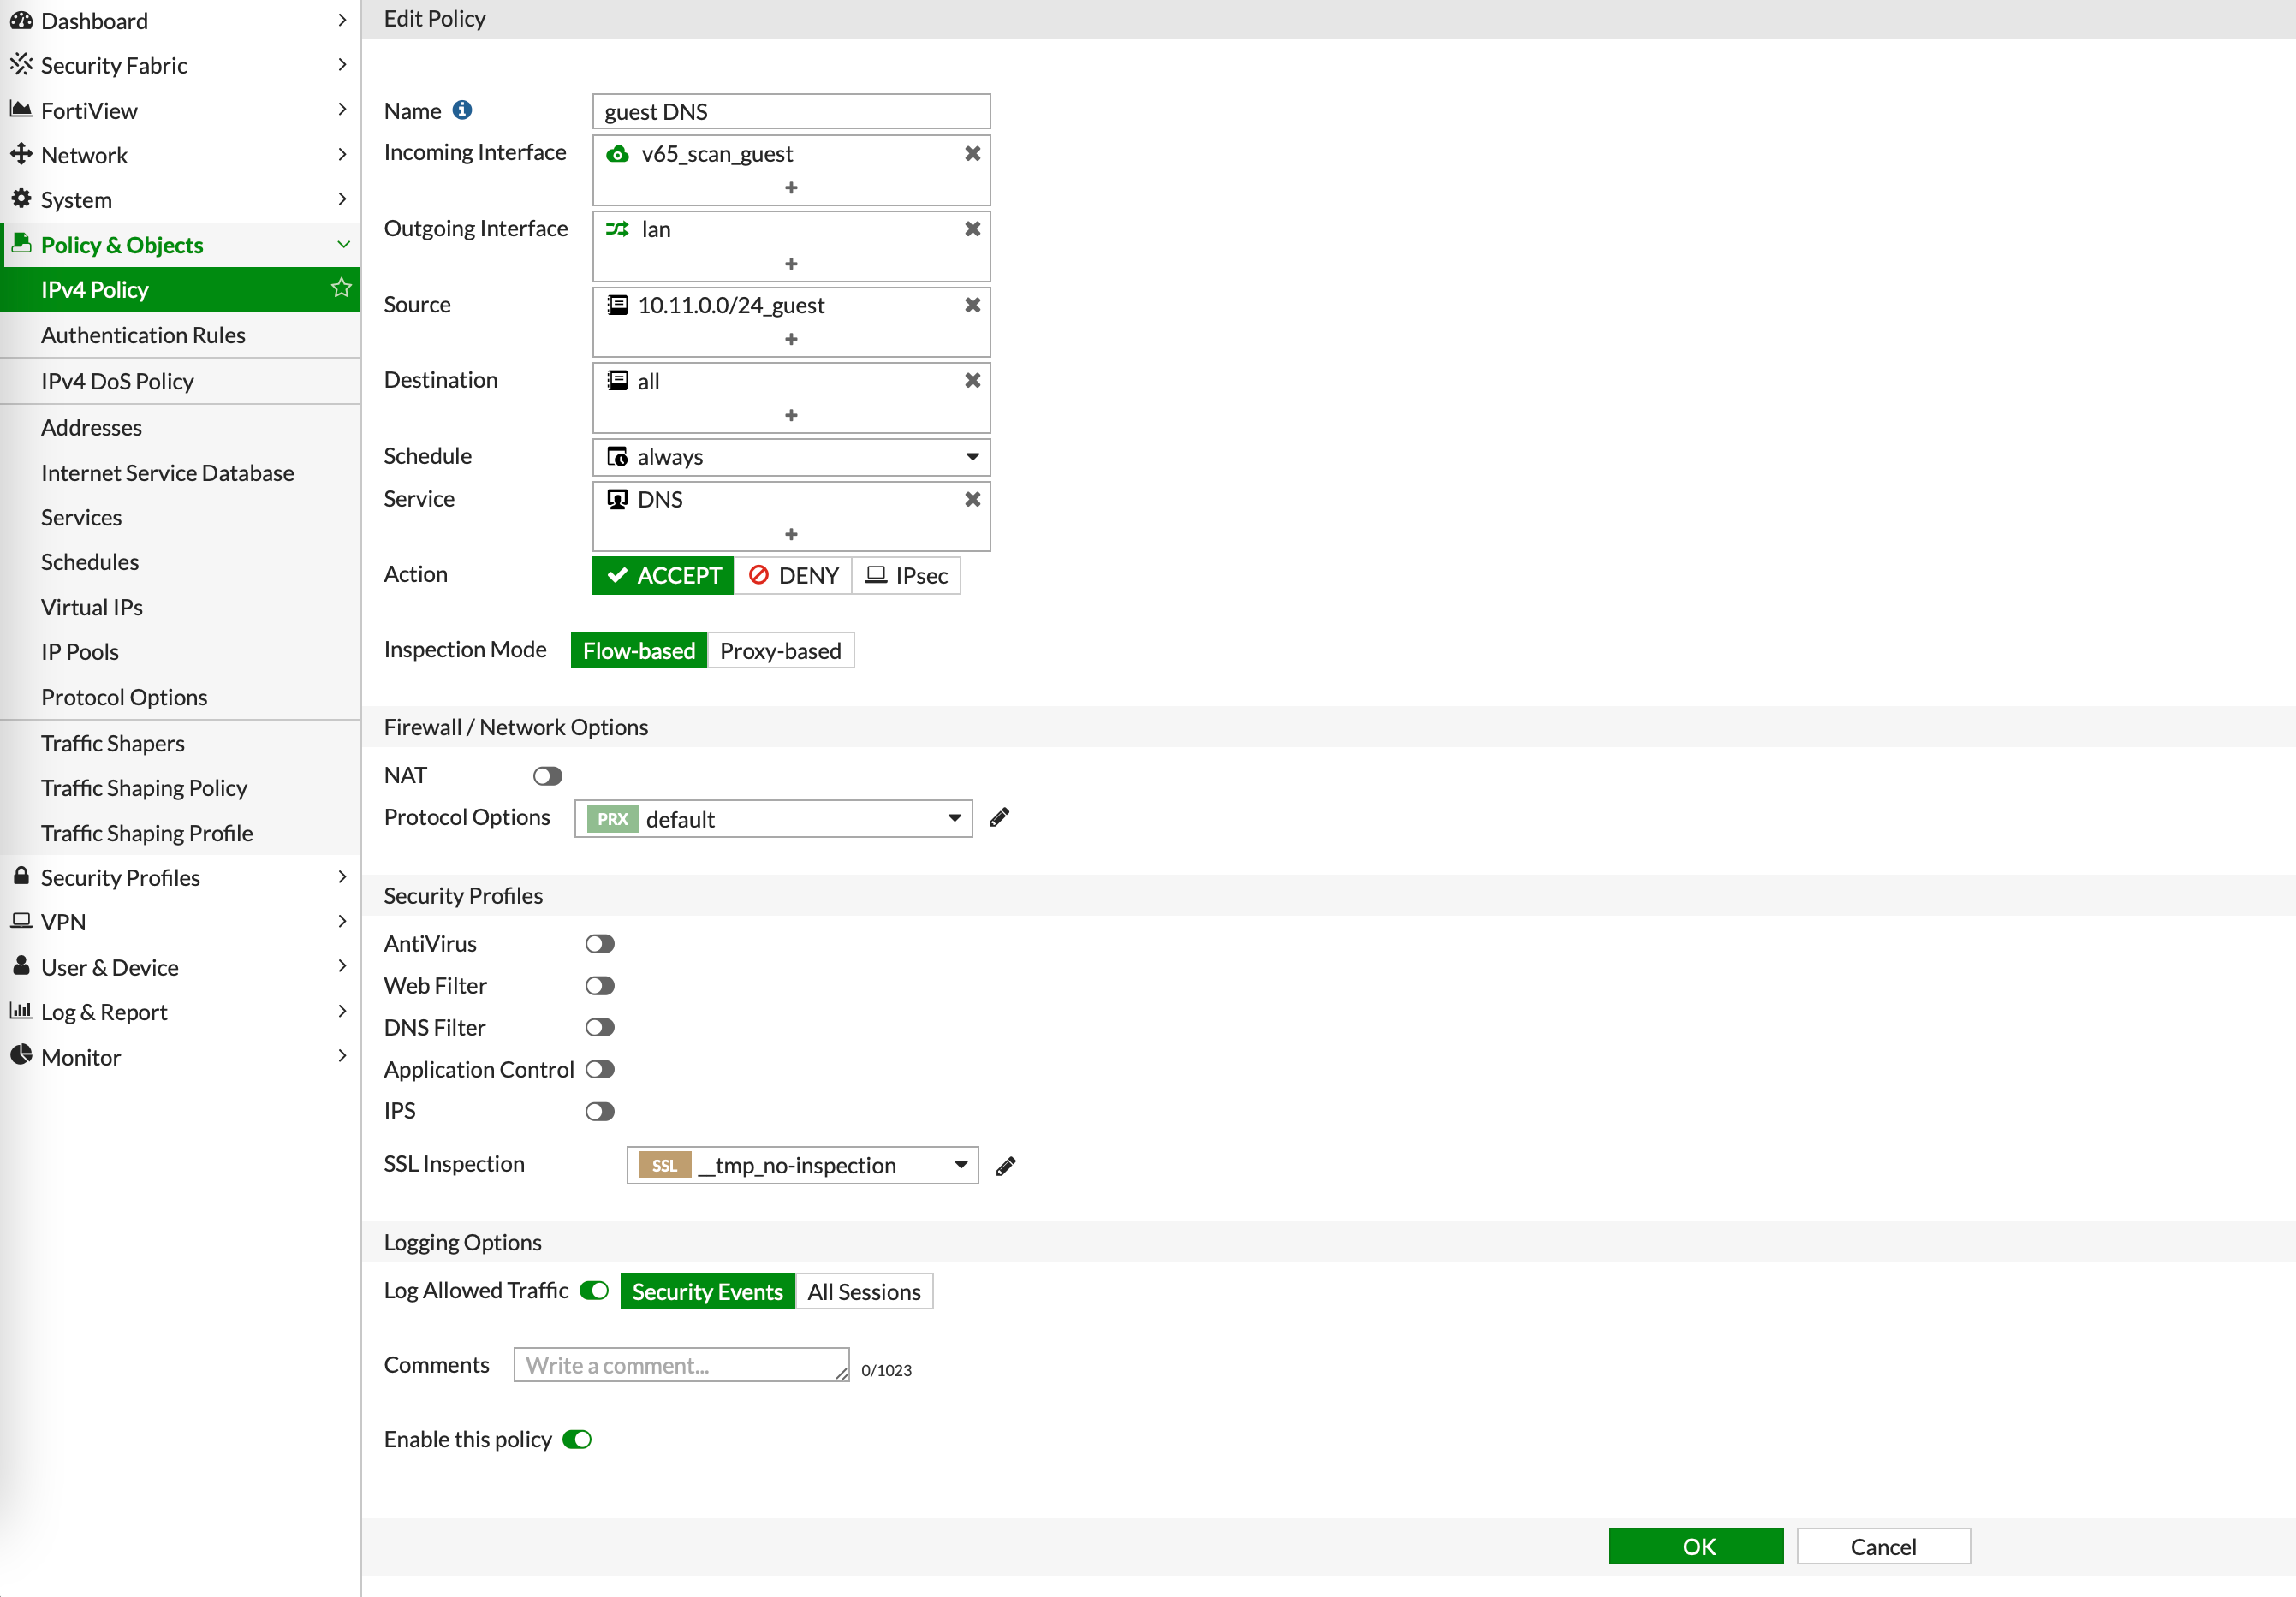
1.12. Confirm all with OK.
1.13. Read the policy number and execute the following commands from the console, and also remember to enter the following value in the place of NR:
scan-gw # config firewall policy
scan-gw (policy) # edit NR
scan-gw (NR) # set captive-portal-exempt enable
scan-gw (NR) # end
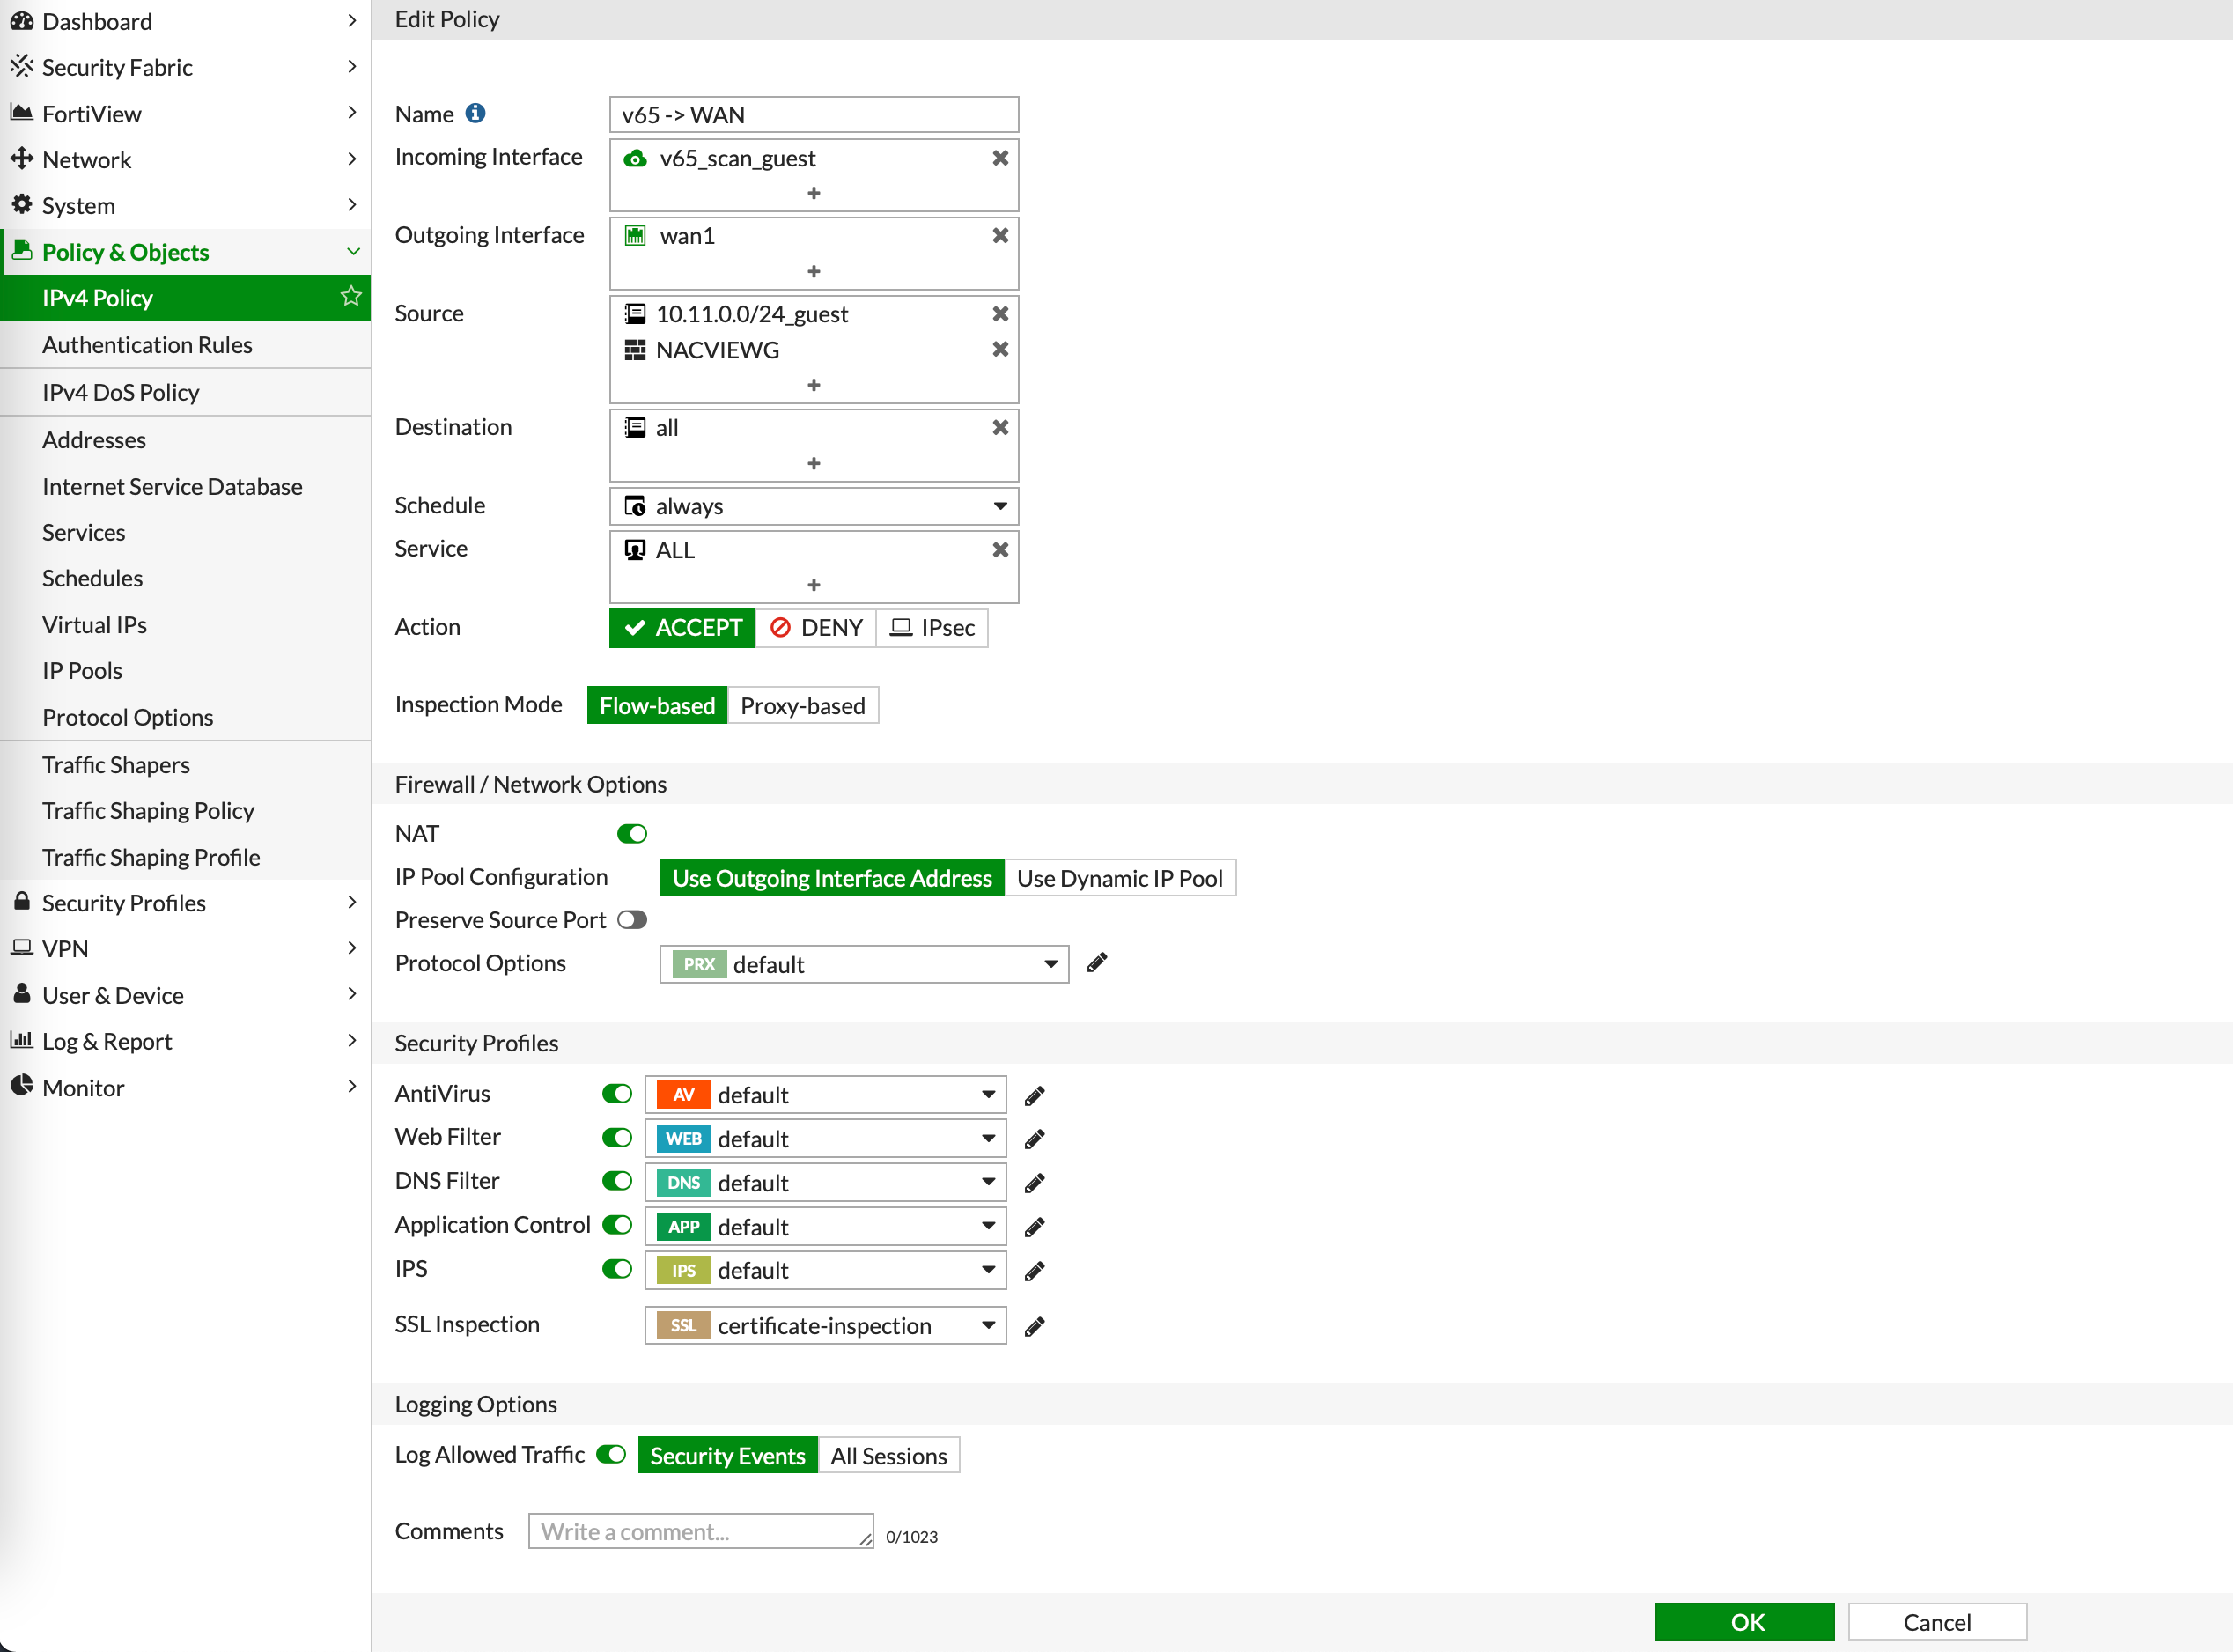
1.14. Add another policy- this time for resources, selecting the subnet and the user group that you have previously created as the source:
¶ 2. NACVIEW Configuration
2.1. Go to the NACVIEW system. Open the menu and select Network Devices (Network section). Click Add New Item.
2.2. Complete the fields: IP address, Radius communication key (after clicking the Change/set password button), entering data for the FortiGate system and entering the radius secret (from 1.2.)
2.3. Save the set values.
2.4. Staying in NACVIEW, select Access Policies from the menu (Configuration section). Now click: Add Rule.
2.5. Complete the form with the values from the Policy A column of the table below (complete the rest of the fields freely, according to the rules in your organization). Record the set values, then add another policy using the data in the Policy B column:
| Form field | Policy A | Policy B |
|---|---|---|
| Authentication method to the network | MAC | Captive Portal (PAP) |
| Action | VLAN access | VLAN access |
| Whether to send back VLAN number | Yes | No |
| VLAN | Select the previously configured VLAN from the list | Select the previously configured VLAN from the list |
2.6. For the changes made to the access policies to take effect, press the Install list button.
¶ 3. Configuring session disconnection (optional)
3.1. To disconnect the user's session from the NACVIEW level, follow the instructions below, remembering to replace the RADIUS_NAME, RADIUS_IP, RADIUS_SECRET, NAS_IP values with the data for the RADIUS server configured in step 3.2.
config user radius
    edit RADIUS_NAME
       set server RADIUS_IP
       set secret RADIUS_SECRET
       set nas-ip NAS_IP
       set acct-interim-interval 600
       set radius-coa enable
       set radius-port 1812
       set auth-type pap
       set acct-all-servers enable
       config accounting-server
           edit 1
               set status enable
               set server RADIUS_IP
               set secret RADIUS_SECRET
               set port 1813
               set source-ip NAS_IP
           next
       end
   next
end
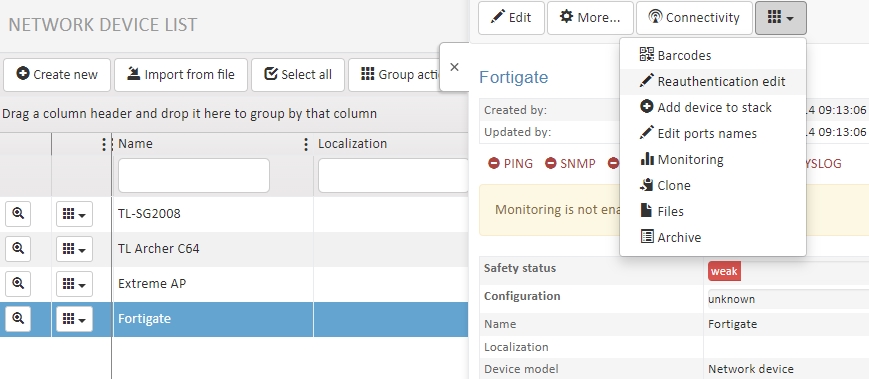
3.2. Go to NACVIEW. From the main menu, select Network devices, find the device added in the previous step and open its preview window by clicking the button: located in the same row of the table.
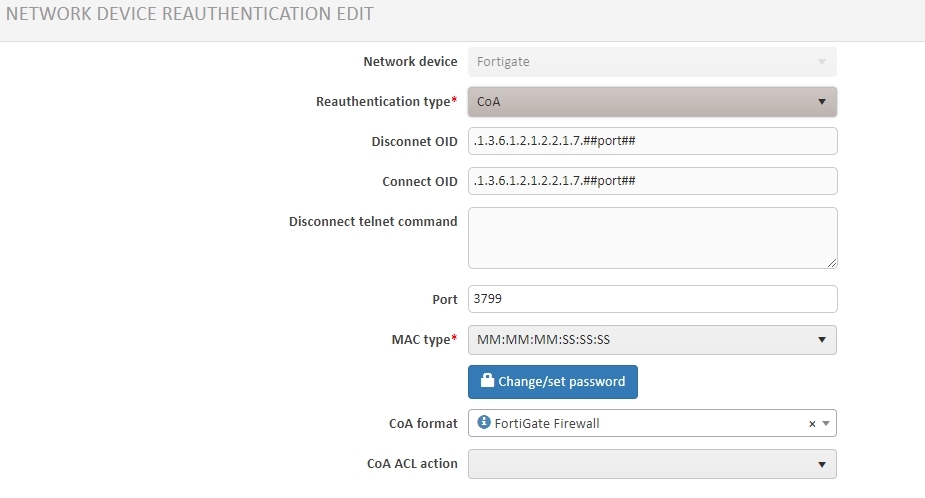
3.3. Go to the Reauthentication edit by clicking the button in the drop-down menu on the top bar of the preview window.
3.4. Complete the form with the appropriate information using the example below:
3.5. Save the set values.
¶ 4. Network login
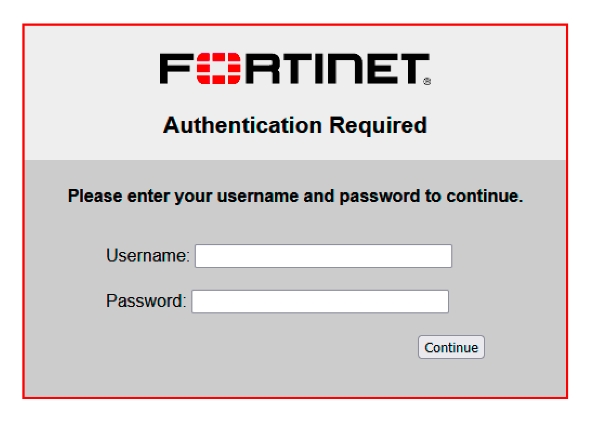
The web browser should display an option to login to the network.
The Login to network button will take you to the login window.
¶ 5. An extension that gives you the ability to enable registration
With reference to paragraph 1.7
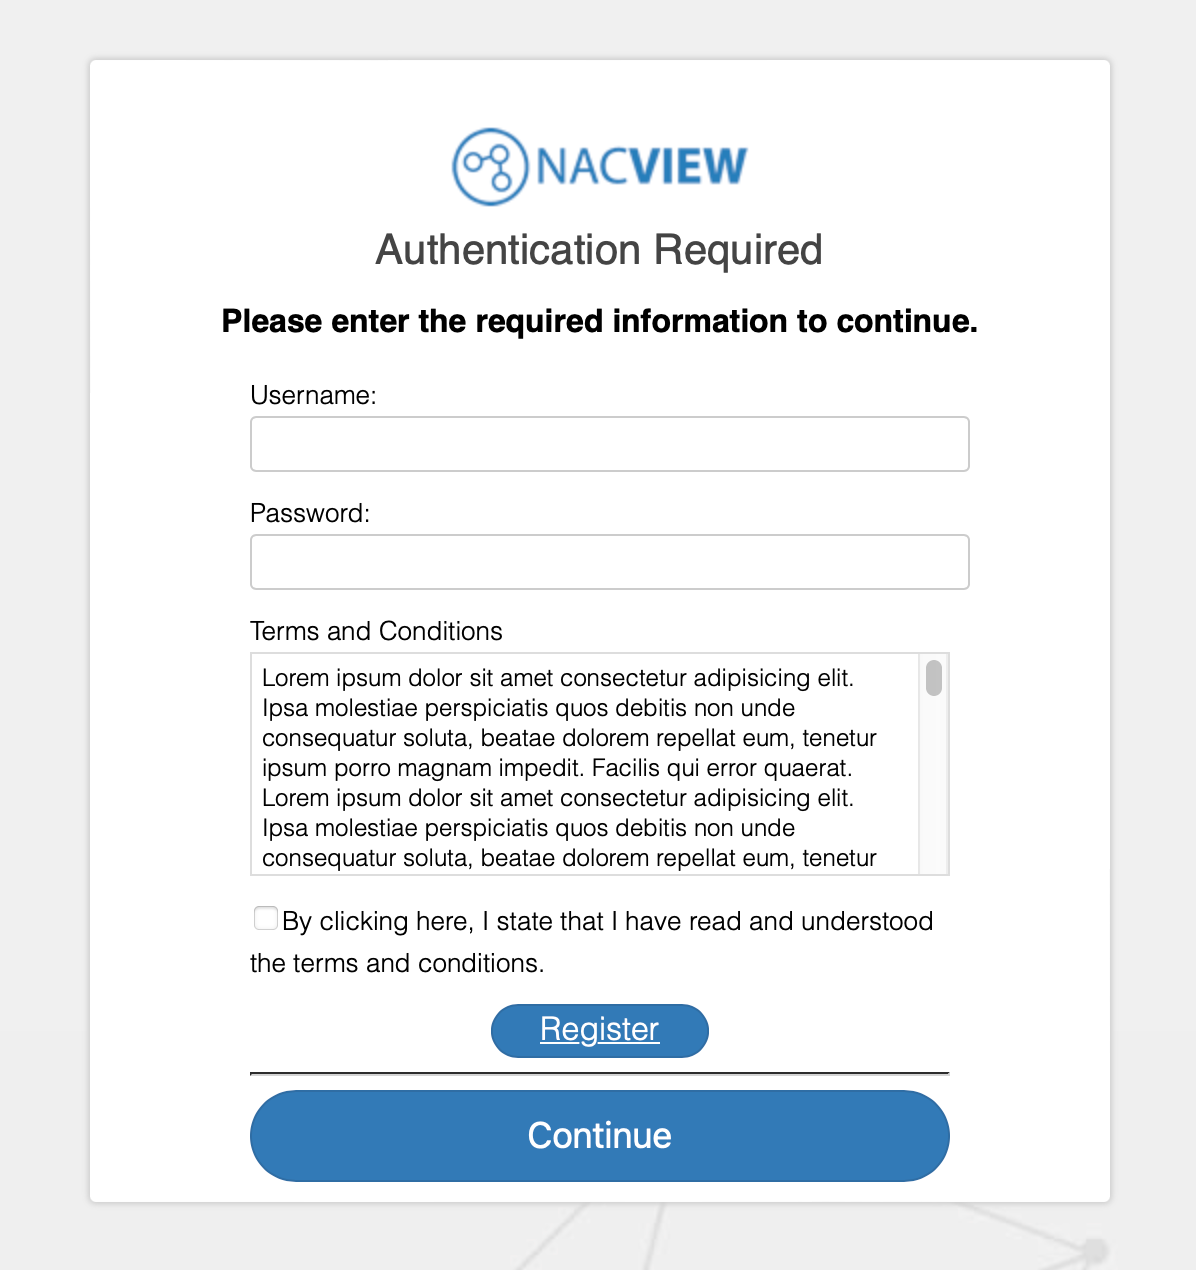
Download source code web form on Fortigate: source-code-fort-form.zip
This line should be corrected:
<a id="myLink" href="_blank" class="btn">Register</a>

<script>
    var uri = document.URL;
    myLink.href = "http://192.168.1.1:7081?loginLink=" + document.URL;
</script>
As the first url we give the IP of the Master NACVIEW server, as the second url we give the IP address of Fortigate on which the Captive Portal is running.
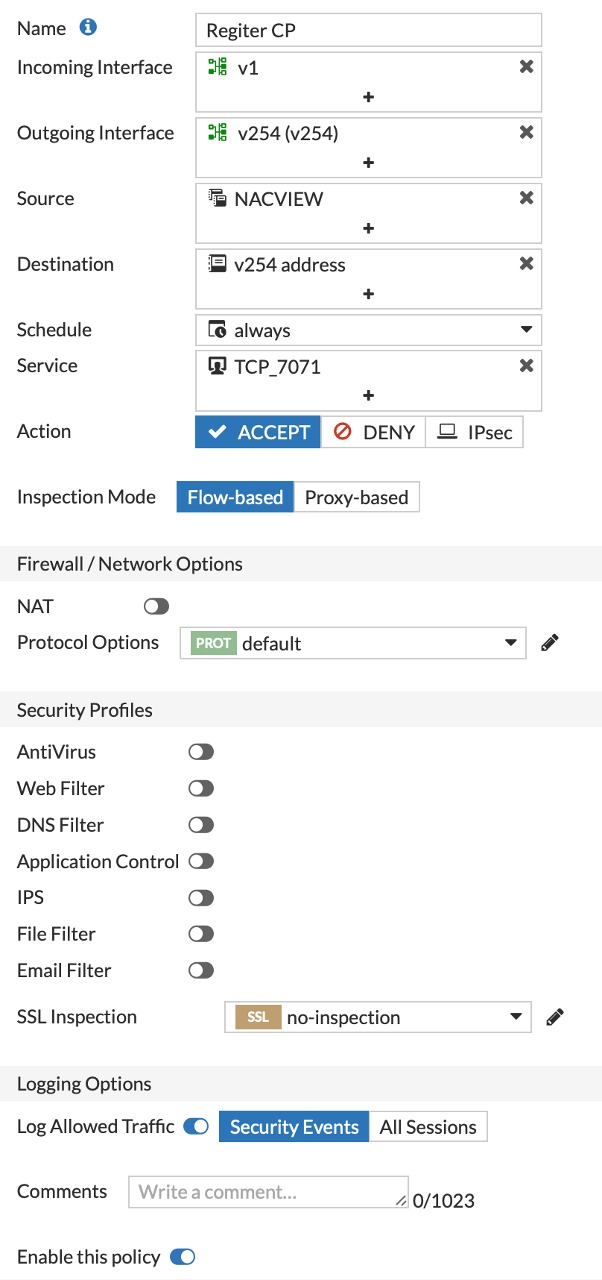
Finally, we add one more policy in NACVIEW, which gives open access to the master on port 7071.
Once we add this policy, we repeat step 1.13 for this policy once again.
¶ 6. Sample CP page
With reference to paragraph 1.7 of the instructions, you can download sample files for customizing your own login page: fortigate_cp_sample.zip